2.5 Steps to Perfect Bug Reports
So you found a bug, that’s great! I want to hear from you. But first we need to have a talk. Yes, I know there are more than 140 characters below but please be patient and read all the words.
Why should you read all the words? It will make your developers so very happy. We are kind of like your car mechanic. You want to be friends with us, it’s in your interest. And we want to be friends too, it makes the whole experience better for everyone (bad bug reports make us suicidal homicidal).
The Steps
Step 0.5: Get the latest version from staging. Are you in a browser? Reload and/or clear cache. Does the software download something in order to function? Make sure it has the freshest copy.
Why step 0.5? Because doing this is half way to finishing step 1.
Step 1: Reproduce the bug. If you can’t reproduce, then I don’t really want to know about it right now. If you think you have valuable details to document (e.g. screen shots, error logs, data files) then post them in an unassigned bug report and indicate that you were unable to reproduce. If the bug is intermittent say so in the bug report.
Step 2: Document and report the bug. I need details: links you followed, data you entered, buttons you clicked/tapped. If you are able to determine that a specific input or action is crucial to causing the bug, even better.
Are you in a browser? Browser version (saying “latest version” here is OK) and platform version (e.g. Windows 8.1, Mac 10.10.2, Android 5.0.2, etc).
If you followed step 0.5 then good news! I don’t need to know the specific version of the software you were using. If for some reason you had a good reason not to follow step 0.5, then provide any relevant version numbers.
Linux Nerd Coping in Windows
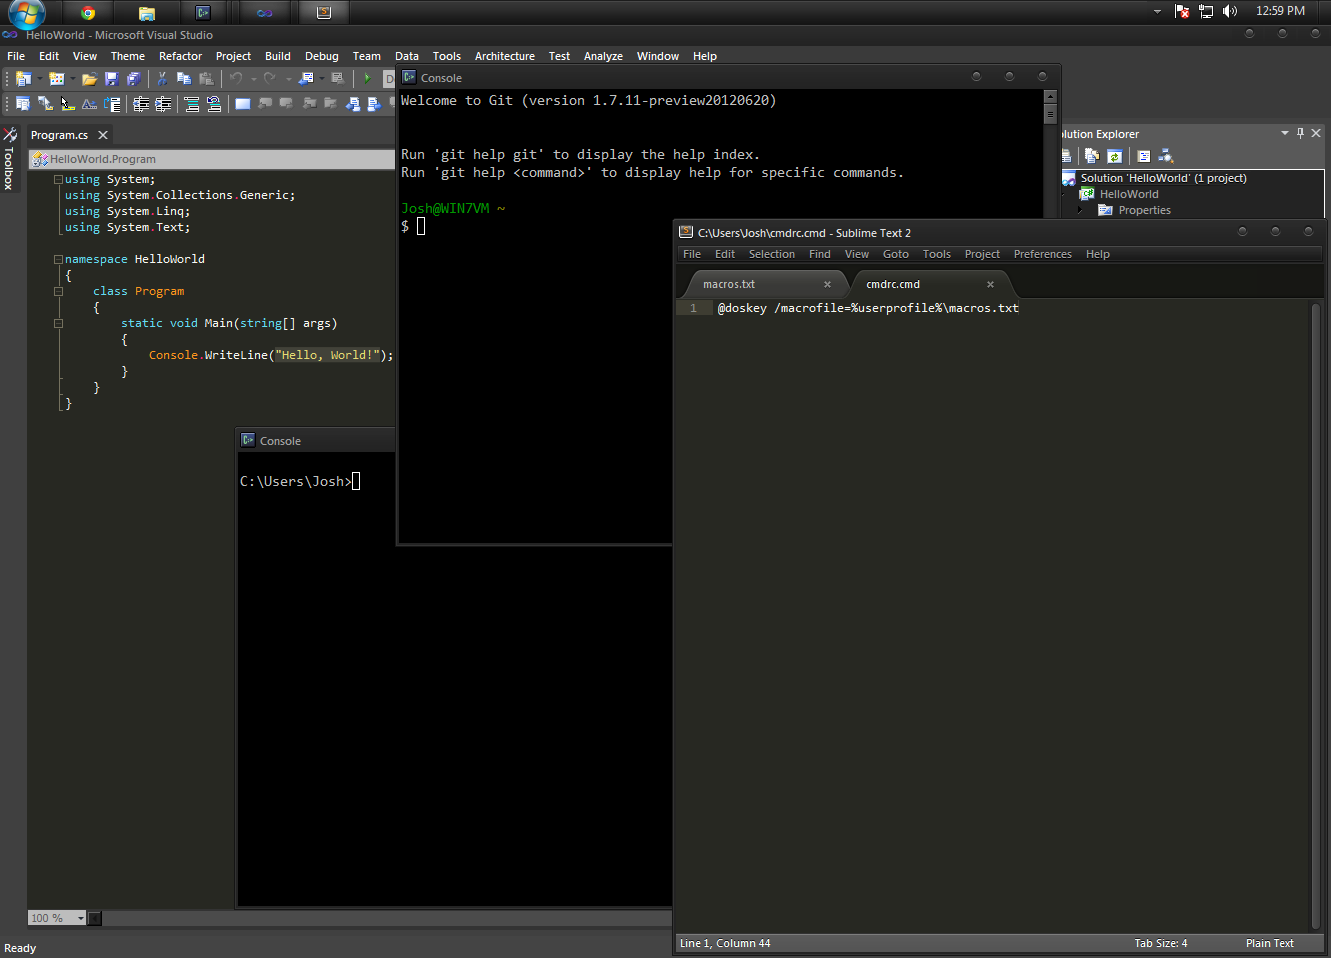
I run a triple boot setup with Windows 7, Mac OS X 10.7, and Arch Linux. Linux is my go-to OS but I get most of my paid work from Windows .NET and iOS development. As a result I’ve had to spend lots of time in every ones favorite non-unix OS. I’ve compiled a few tricks that make using Windows 7 a bit more bearable (maybe even enjoyable) for the Linux nerd.
SNES USB Gamepad
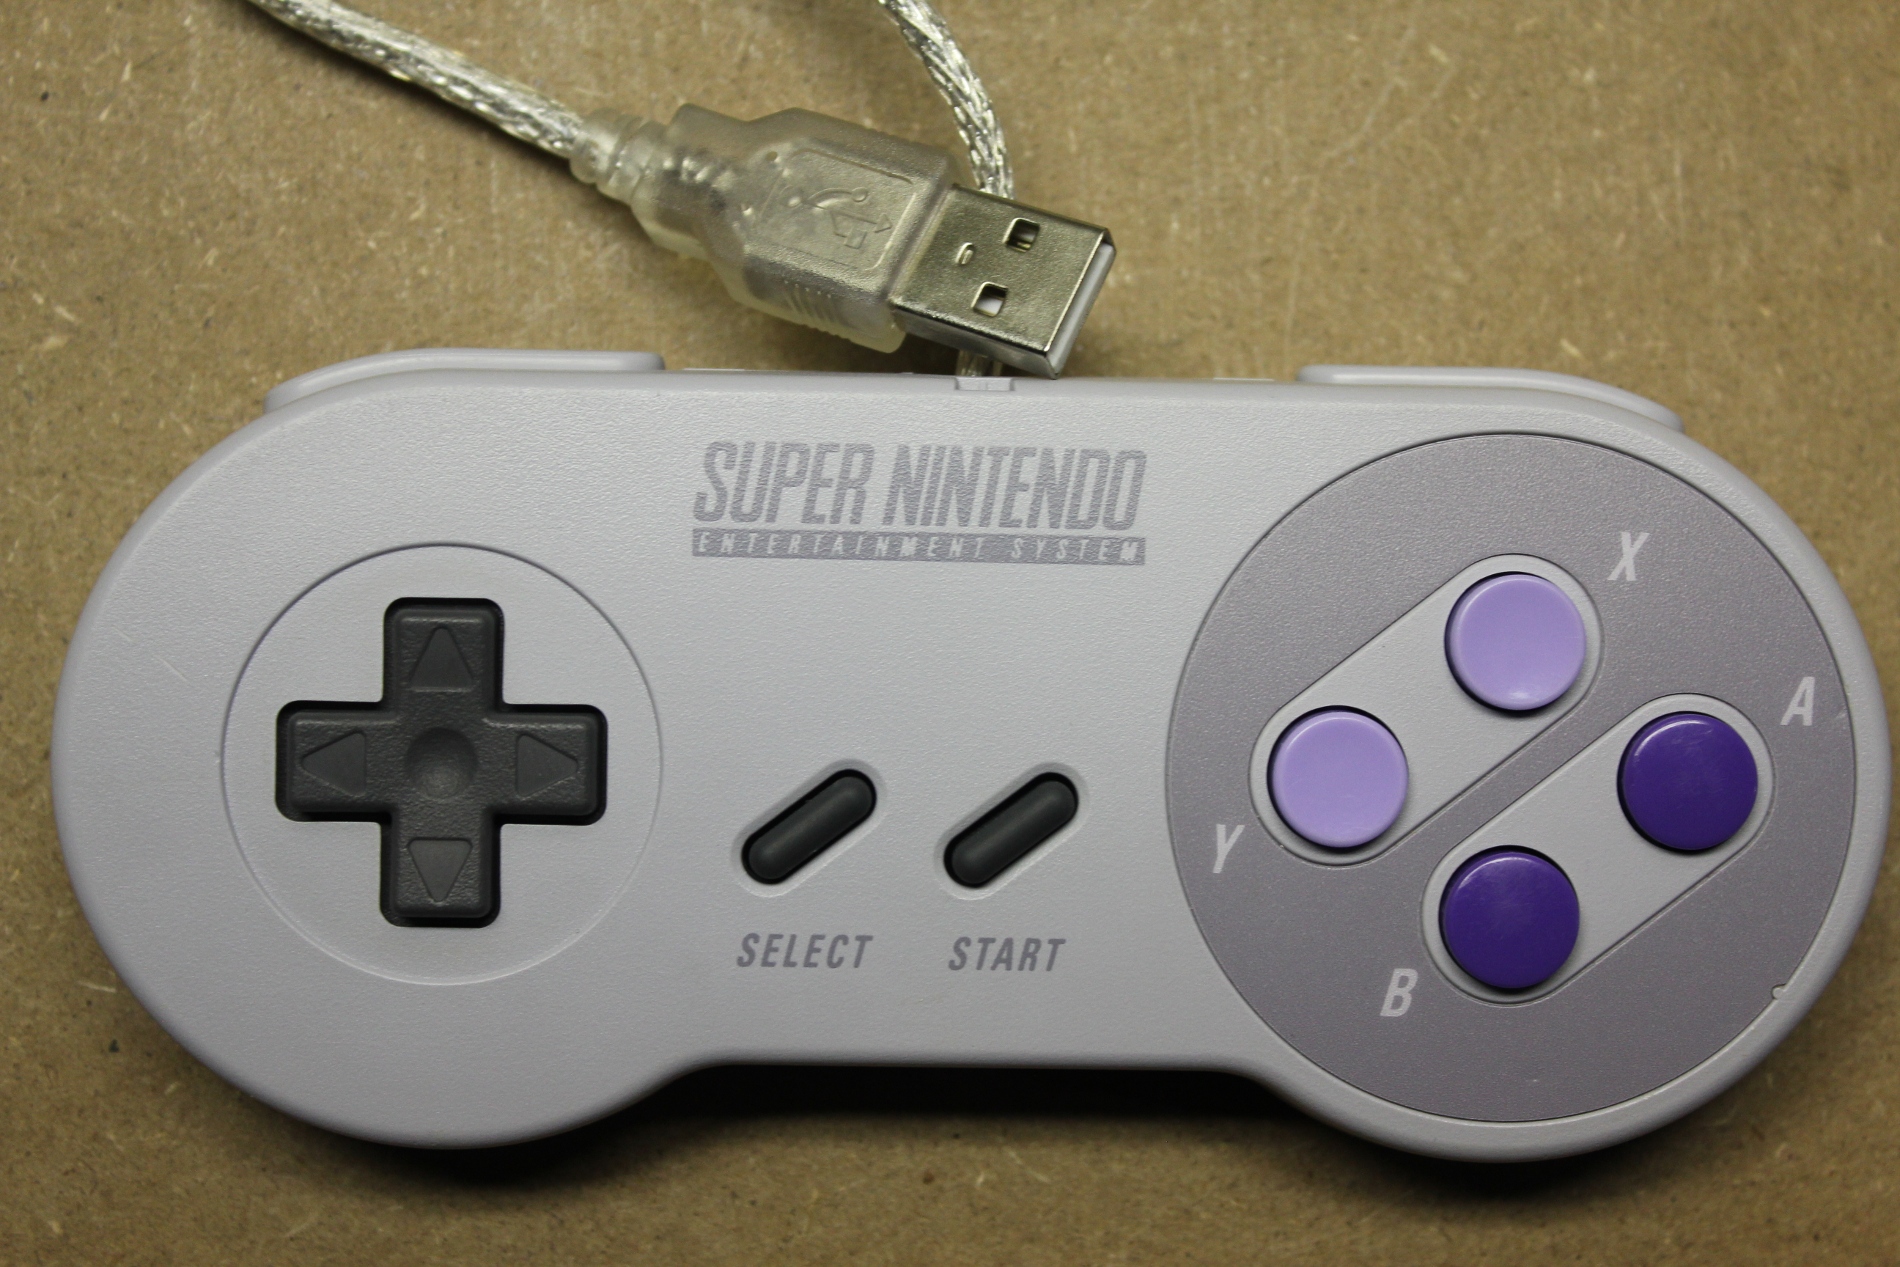
I was inspired for this build by an instructables user who used my teensy ps3 gamepad code to build a SNES USB controller for the PS3.
I can’t say enough good things about the Teensy development board. It’s affordable and just so damn versatile.
John’s code is great and all but I just needed something to work with my Linux media center PC so I set out to create a simpler version. Click through for some build tips, links to the code, and a few more photos.
ATX PSU into Bench PSU
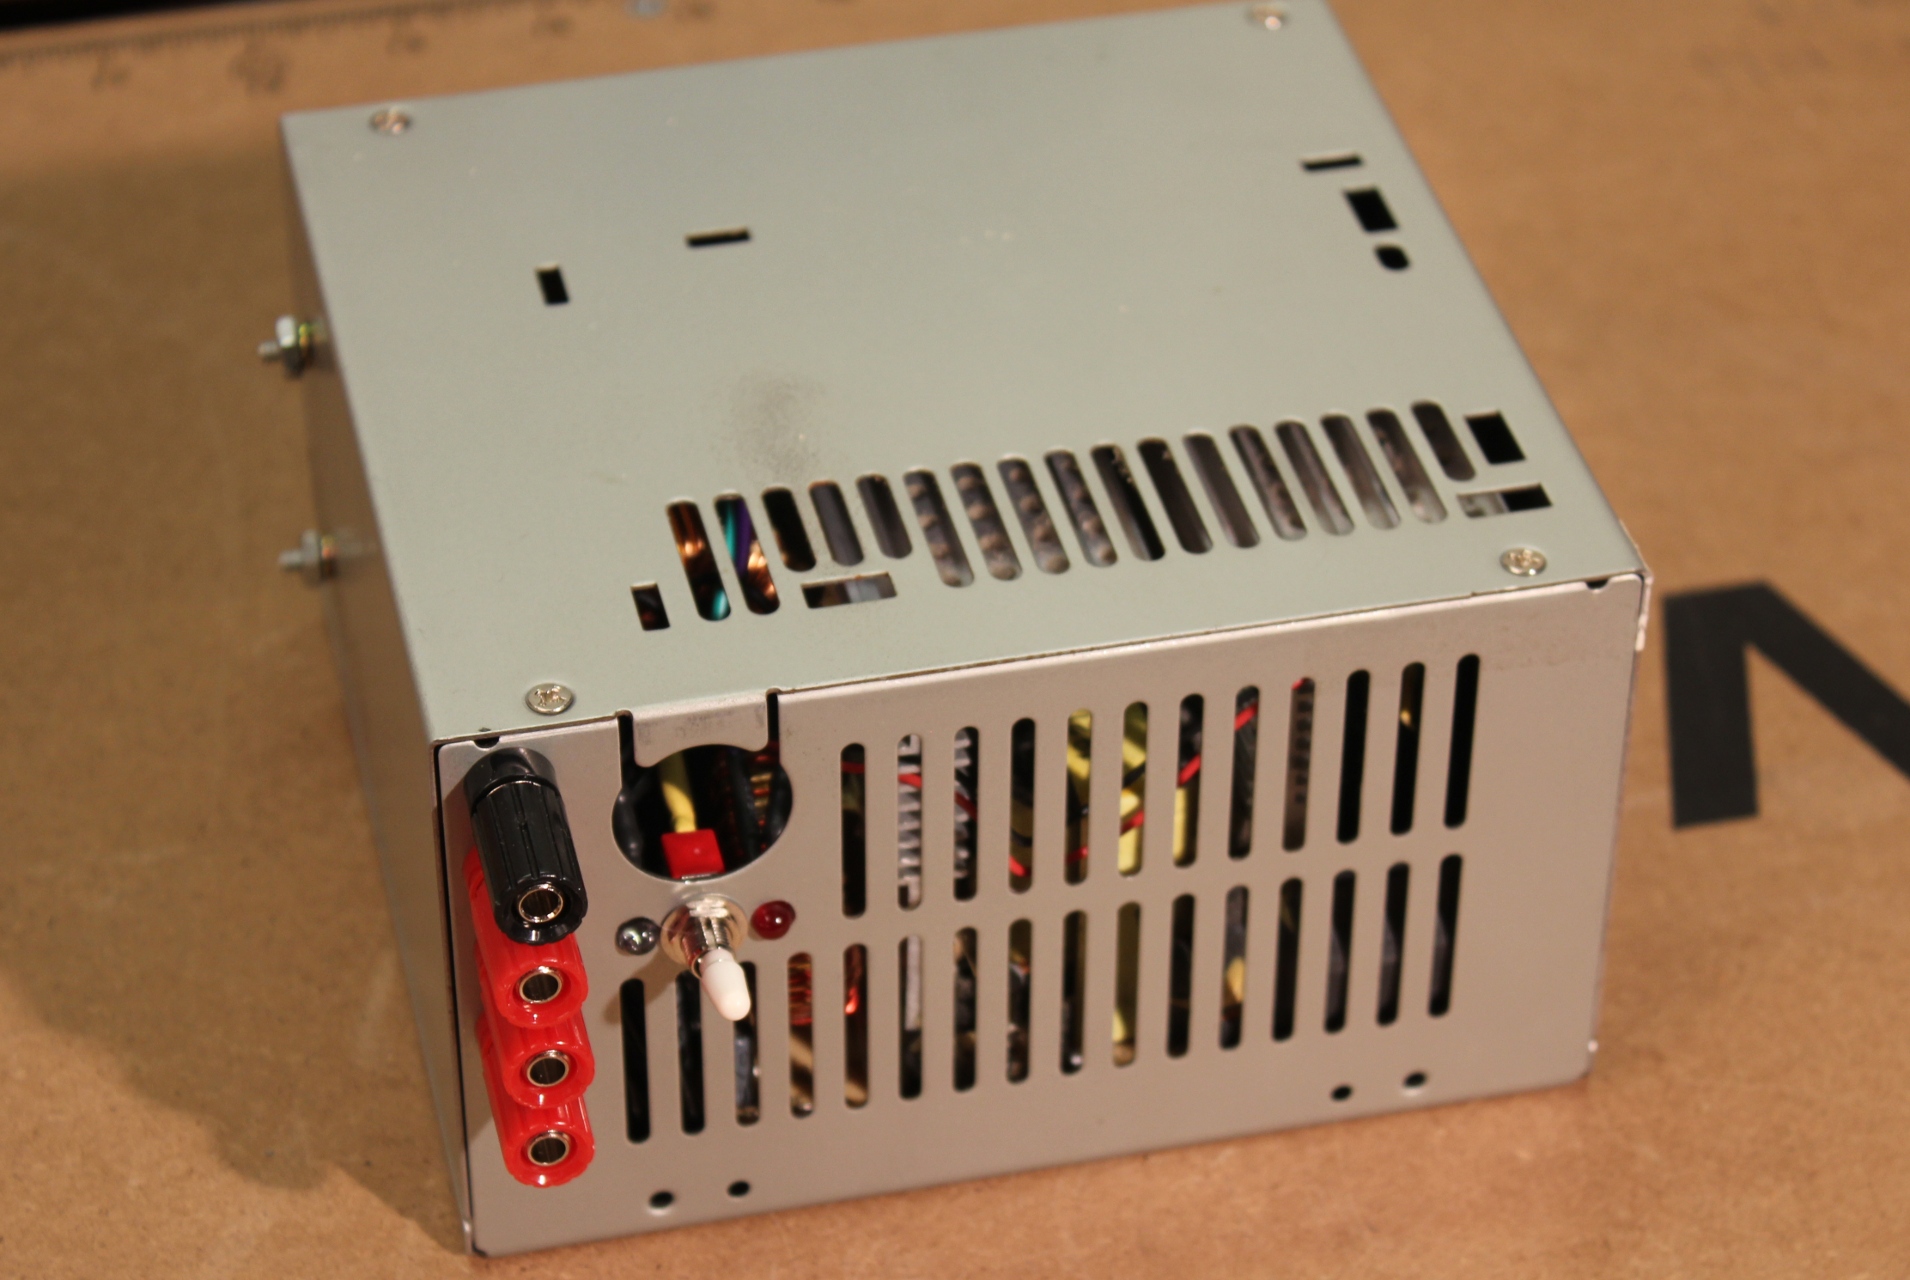
I stumbled upon this video by Phil Levchenko showing how to turn an ATX power supply into a bench power supply. I had an old PSU laying around and thought this would be a perfect way to give it a new life. Phil’s video is great, but I found the video tutorial format a bit tricky to follow at times.
Click through for some pictures, tips and diagrams that you may find helpful.
Doughduino - High-tech Bread Making
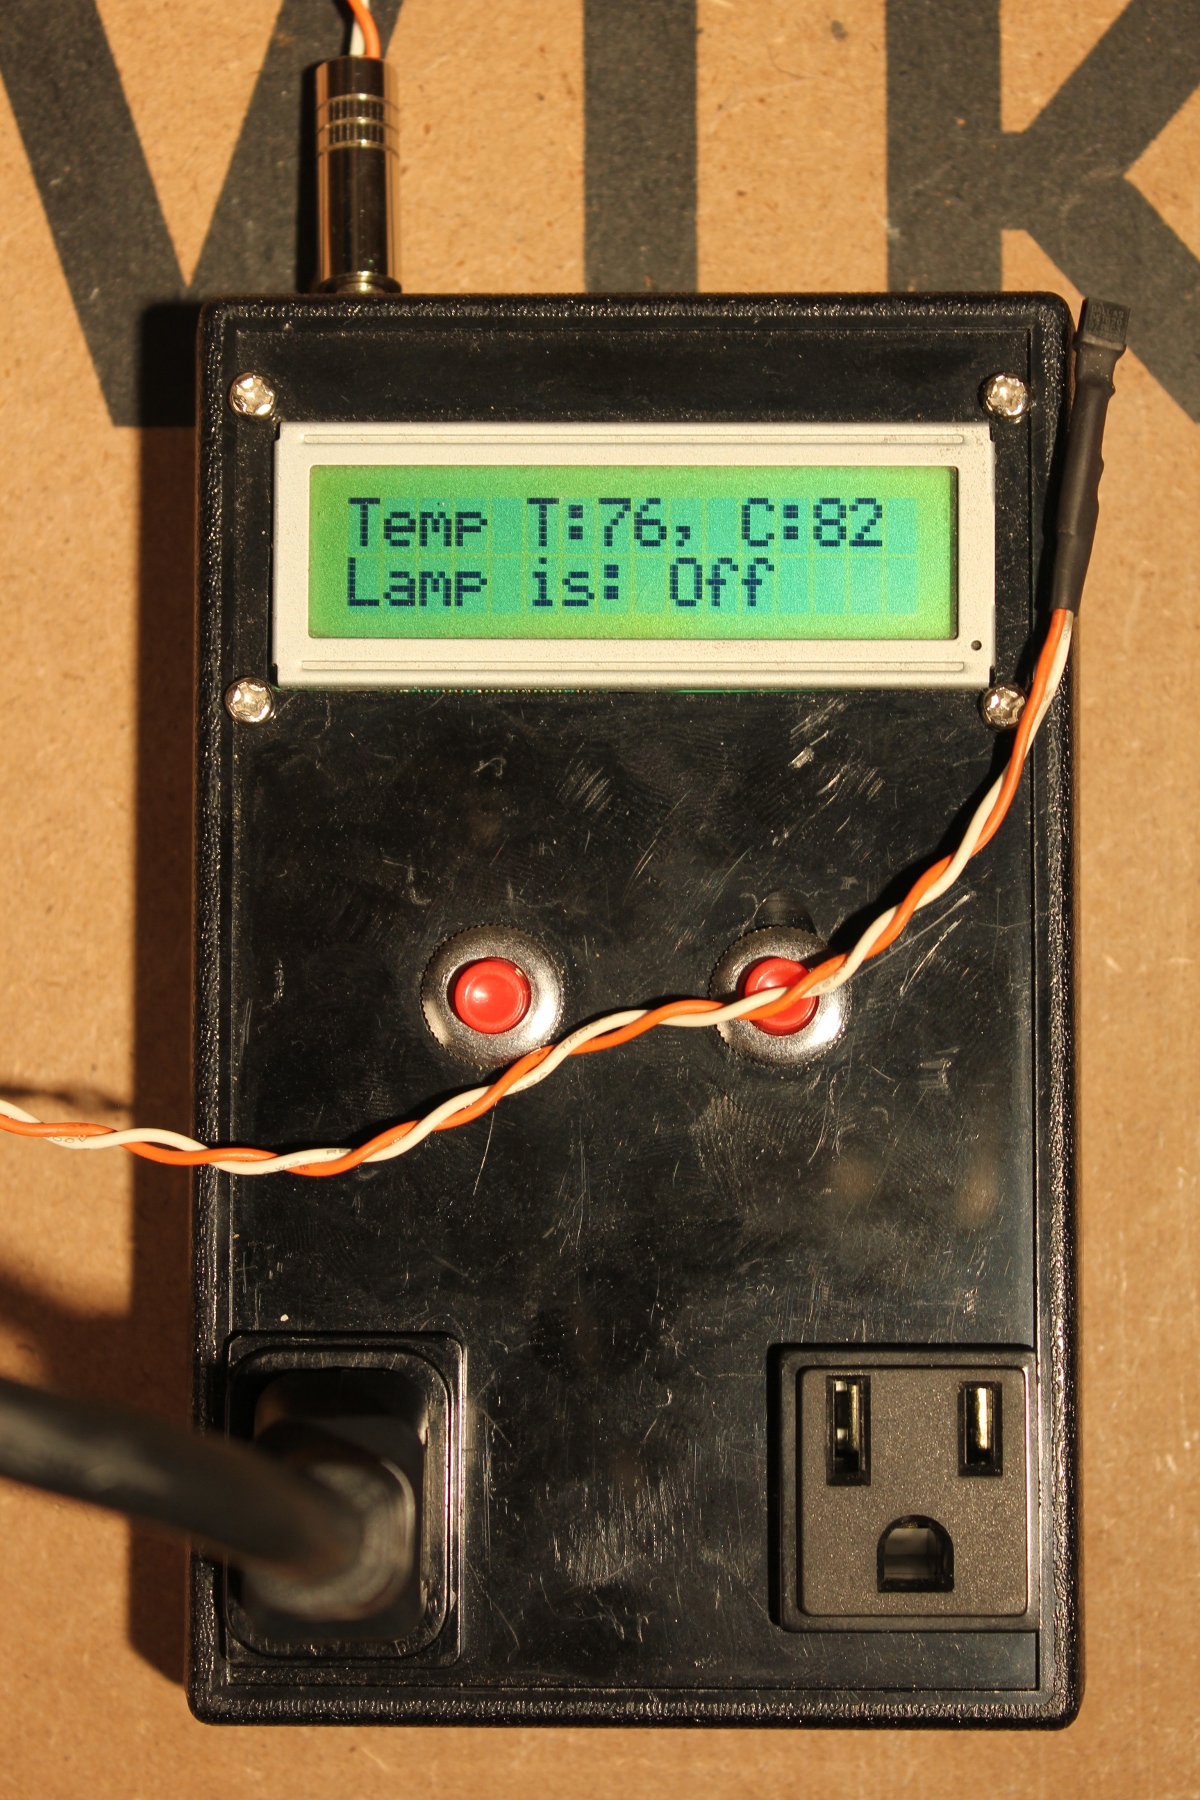
Several months ago a friend of mine really into making bread inquired about a possible solution for proving bread dough and making pre-ferment starters in the winter. You see, here in Canada winters are cold. Very cold. And heat isn’t free. Yeast likes to be in nice warm moist conditions, but my wallet likes to be in the cold with a thick sweater.
So the goal was to create an efficient device that monitors temperature and switches a heat source on/off as necessary to maintain a constant temperature inside of an enclosed space such as a camping cooler.
And here is the result! It’s based on the bare minimum circuitry needed for an Arduino compatible board and then builds on top of that; character LCD display, two buttons, DS18S20 temperature sensor, and a small relay for switching an AC lamp.
Hide Toolbar Buttons in Nautilus 3.x
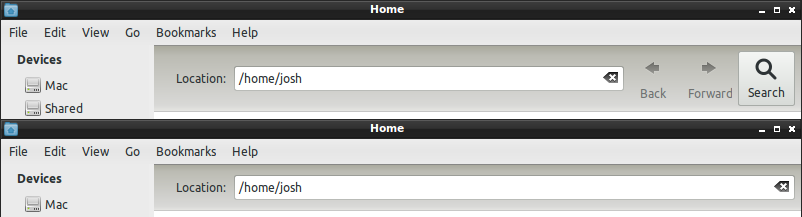
Are you as annoyed as I am about the superfluous screen real estate consumed by the toolbar buttons in Nautilus 3? Of course you are, that’s why the oracle brought you here.
To remove them, modify /usr/share/nautilus/ui/nautilus-toolbar-ui.xml and
comment out all the <toolitem> elements.
<ui>
<toolbar name="Toolbar">
    <!--<toolitem name="Back" action="Back"/>
    <toolitem name="Forward" action="Forward"/>
    <toolitem name="Search" action="Search"/>-->
</toolbar>
</ui>
Sample - Portable Mobile Game Code
I’ve decided I want to try and break into the market of mobile gaming but I needed a way to evaluate how practical it was to target multiple platforms at once. Android and iOS are the main players right now but keeping myself open to others seems like it would be a prudent step. And writing everything from scratch multiple times is not an option.
If we look at all of the popular mobile platforms, they each provide some sort of native development kit all based around a GCC toolchain with OpenGL ES 2.0. So obviously we want to use as much portable C/C++ as possible, but what about all the little (and not so little) differences between the platforms? I needed to get my hands dirty and write a proof of concept.

The result is a simple bouncing ball simulation and it runs on Android, iOS, and desktop (Mac, Windows, Linux). Box2D is used for the physics engine, and the rest of the code is licensed under the permissive beerware license; please respect the license and buy me a beer… if we ever meet.
Canon 2 Stage Shutter Switch
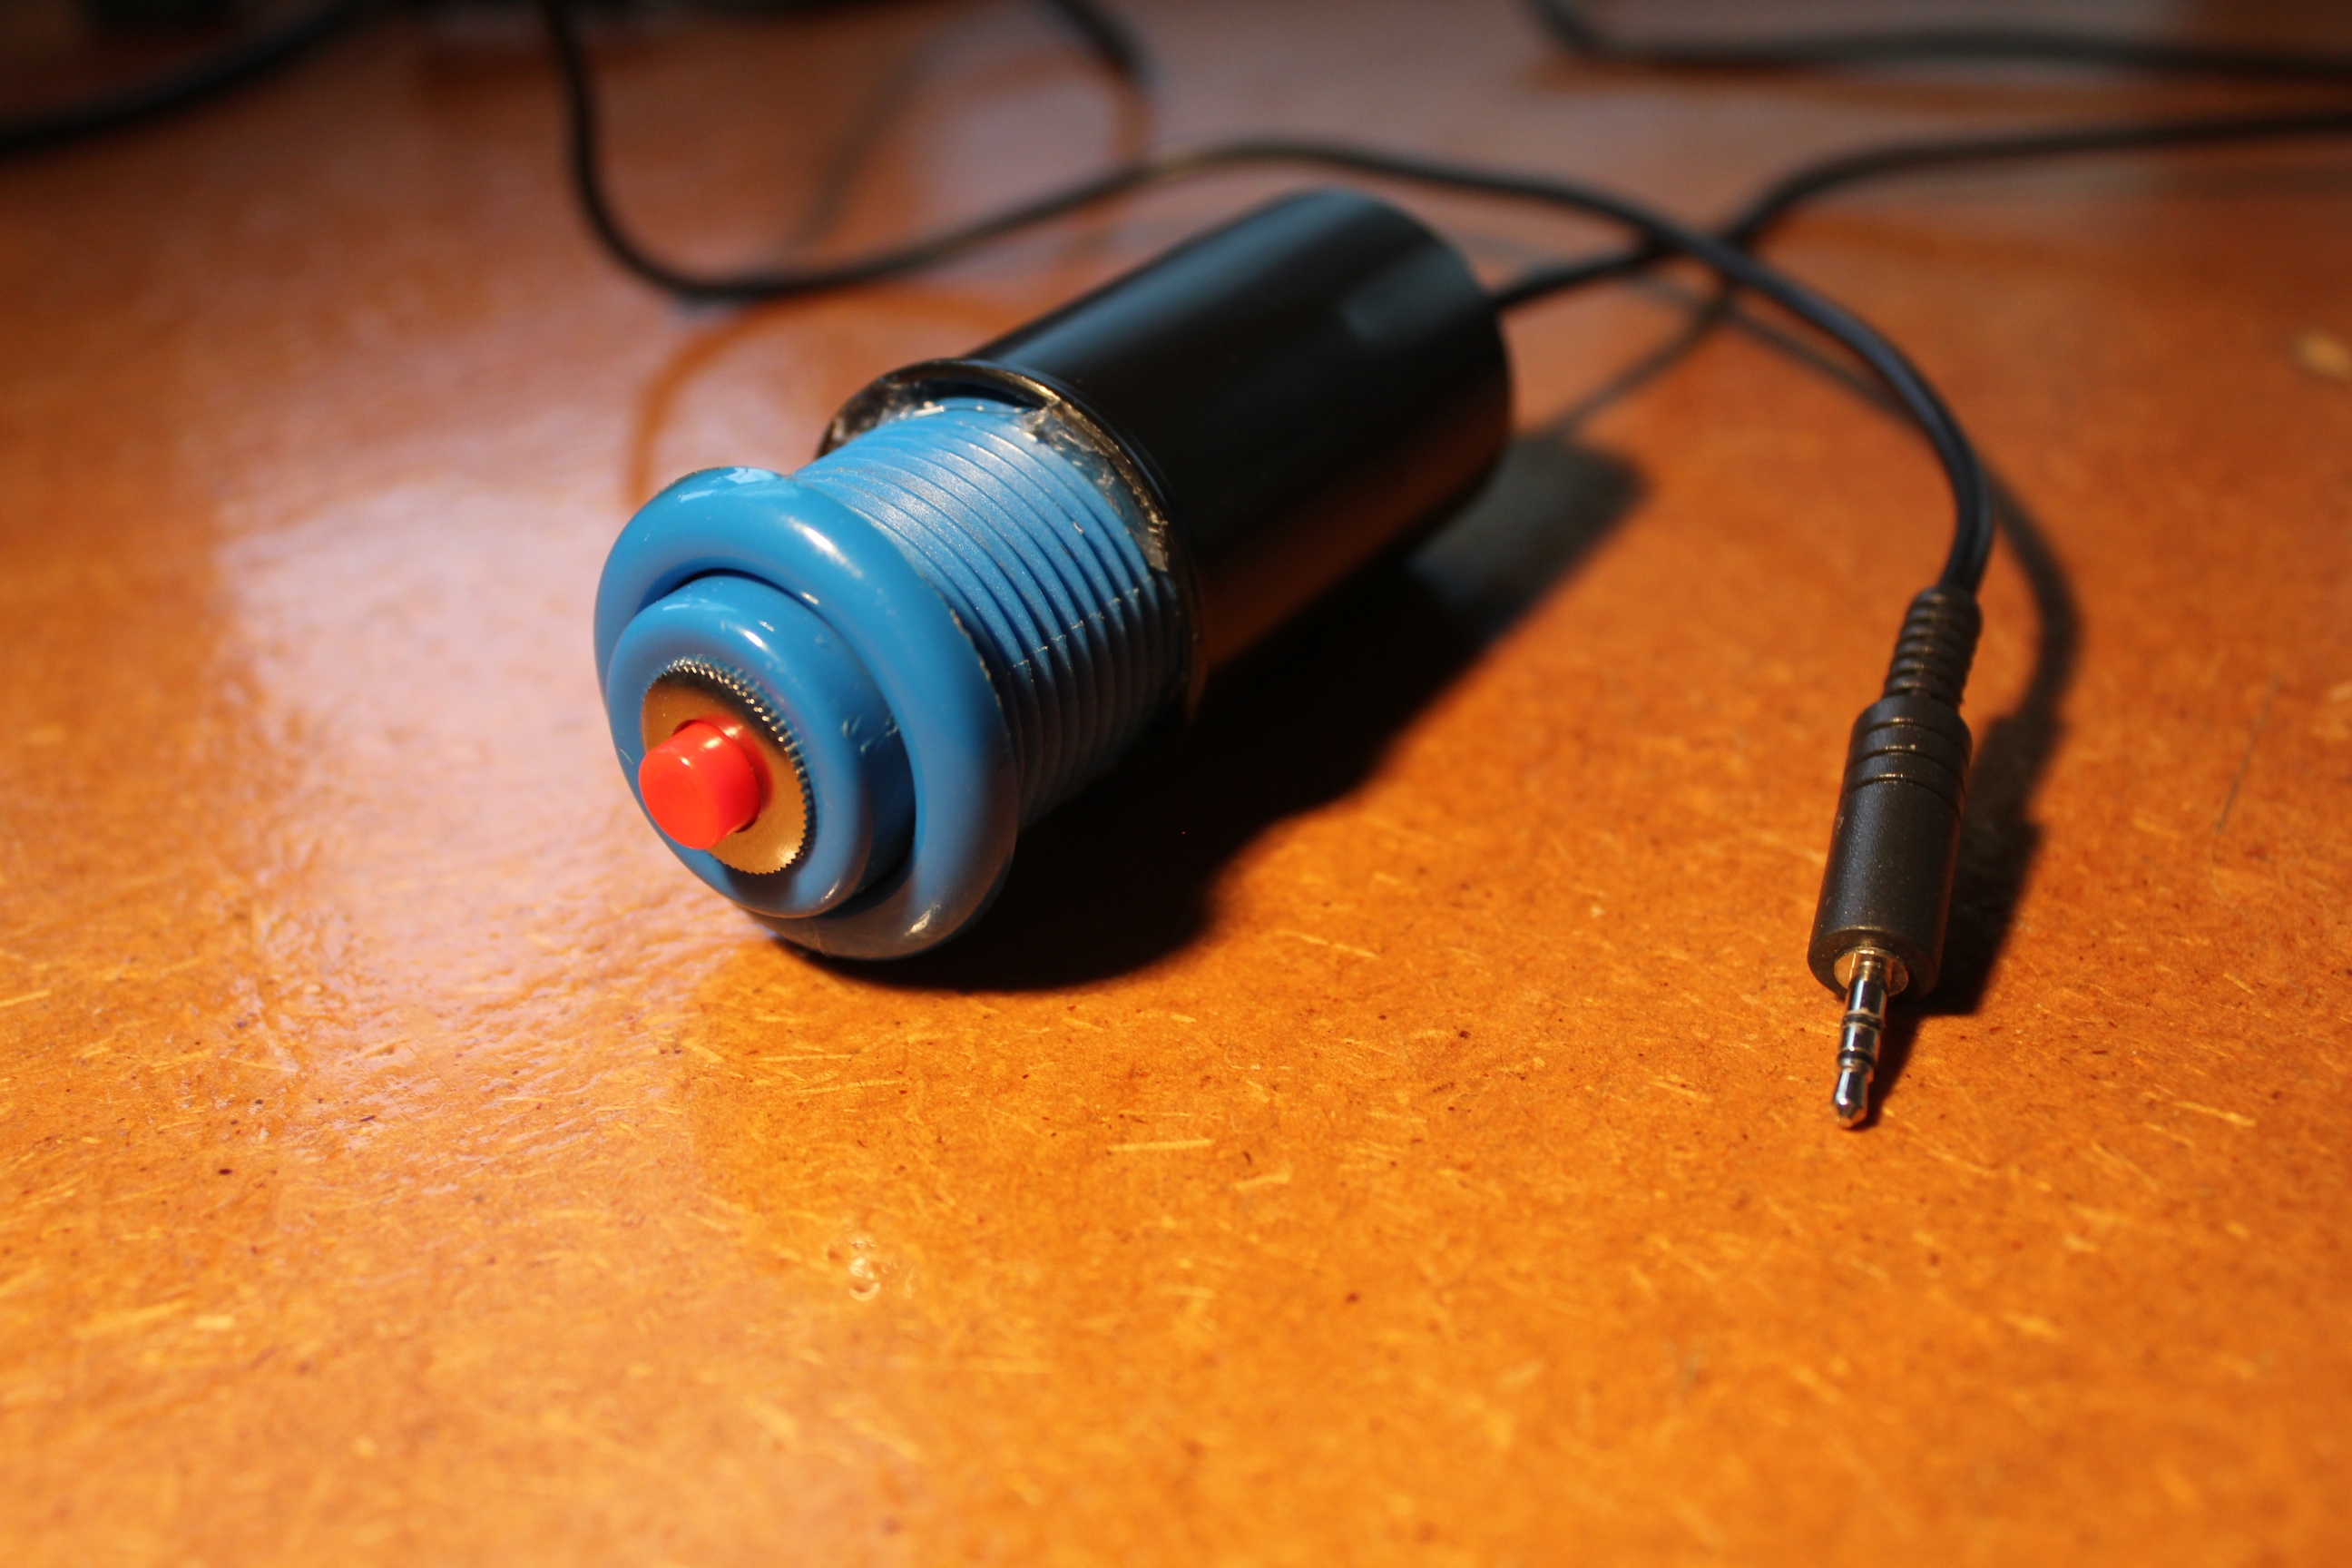
Here is a nifty weekend project. It’s a 2-stage shutter remote for my Canon T2i DSLR. The red push button is a full press and the arcade button is a half press. Since it requires less force to push the arcade button than it does the red push button, it functions exactly as the cameras built-in shutter switch. I got the inspiration for this project from a guide on diyphotography.net.
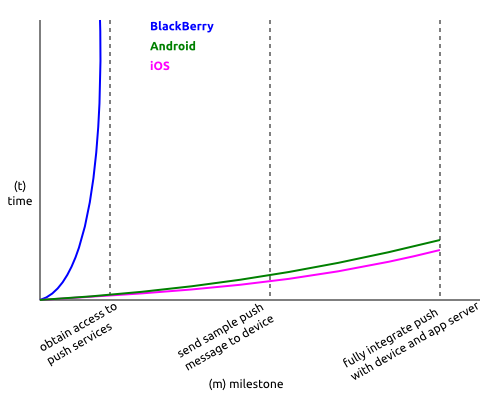
BlackBerry Push Service - Fail
This really is depressing. Being Canadian and all I really want to root for the home team. Moreover I hate polluting my blog with complaints about BlackBerry development. Alas, here we go again…
Todays topic: BlackBerry Push Service. BlackBerry push can be routed through BlackBerry Internet Service or it can route through a BlackBerry Enterprise Server. The difference? BIS is the one you want to use if you are a developer targeting the consumer market at large. To route push notifications through BIS, you must request to evaluate the push service. It also appears you must submit another request when you want to go live, but I haven’t made it that far.
This is where the problem lies. I have submitted three requests in the past two weeks with no response. Each time I submit one, I’m greeted with a friendly message:
“Thank you, someone will contact you in two business days“
Bottom line I can’t finish OR test my app without access to this service.
What about the other guys?
This is where it gets sad. The software I’m working on is also being developed in parallel for Android and iOS. So what does the process look like for the other platforms?
Android
The Android Cloud to Device Messaging framework also requires developers to signup to access the service. The difference being two seconds after you fill out the signup form you are ready to go!
Slightly off topic, but the C2DM API is extremely simple to use. It was a pleasure to work with since I could use basic Unix shell scripting to send requests to the service during testing.
Apple
After you register as an iOS developer (and you drop $100 US for the privilege), Apple gives you access to something called the iOS Provisioning Portal which is a web interface for generating all manor of certificates and mobile provisioning bits and bobs. In this portal access to the APNS (Apple Push Notification Service) can also be enabled with a few mouse clicks… instantly.
So what have I done so far?
Not wait on RIM, that’s for sure! In the last two weeks I have managed to completely finish the iOS and Android versions of my app including full push integration.
Let me say that again. In the time it’s taking RIM to grant me permission to write software that uses their services, I have created the same thing on competing platforms.
Wire Harness Lacing - A Dead Art?
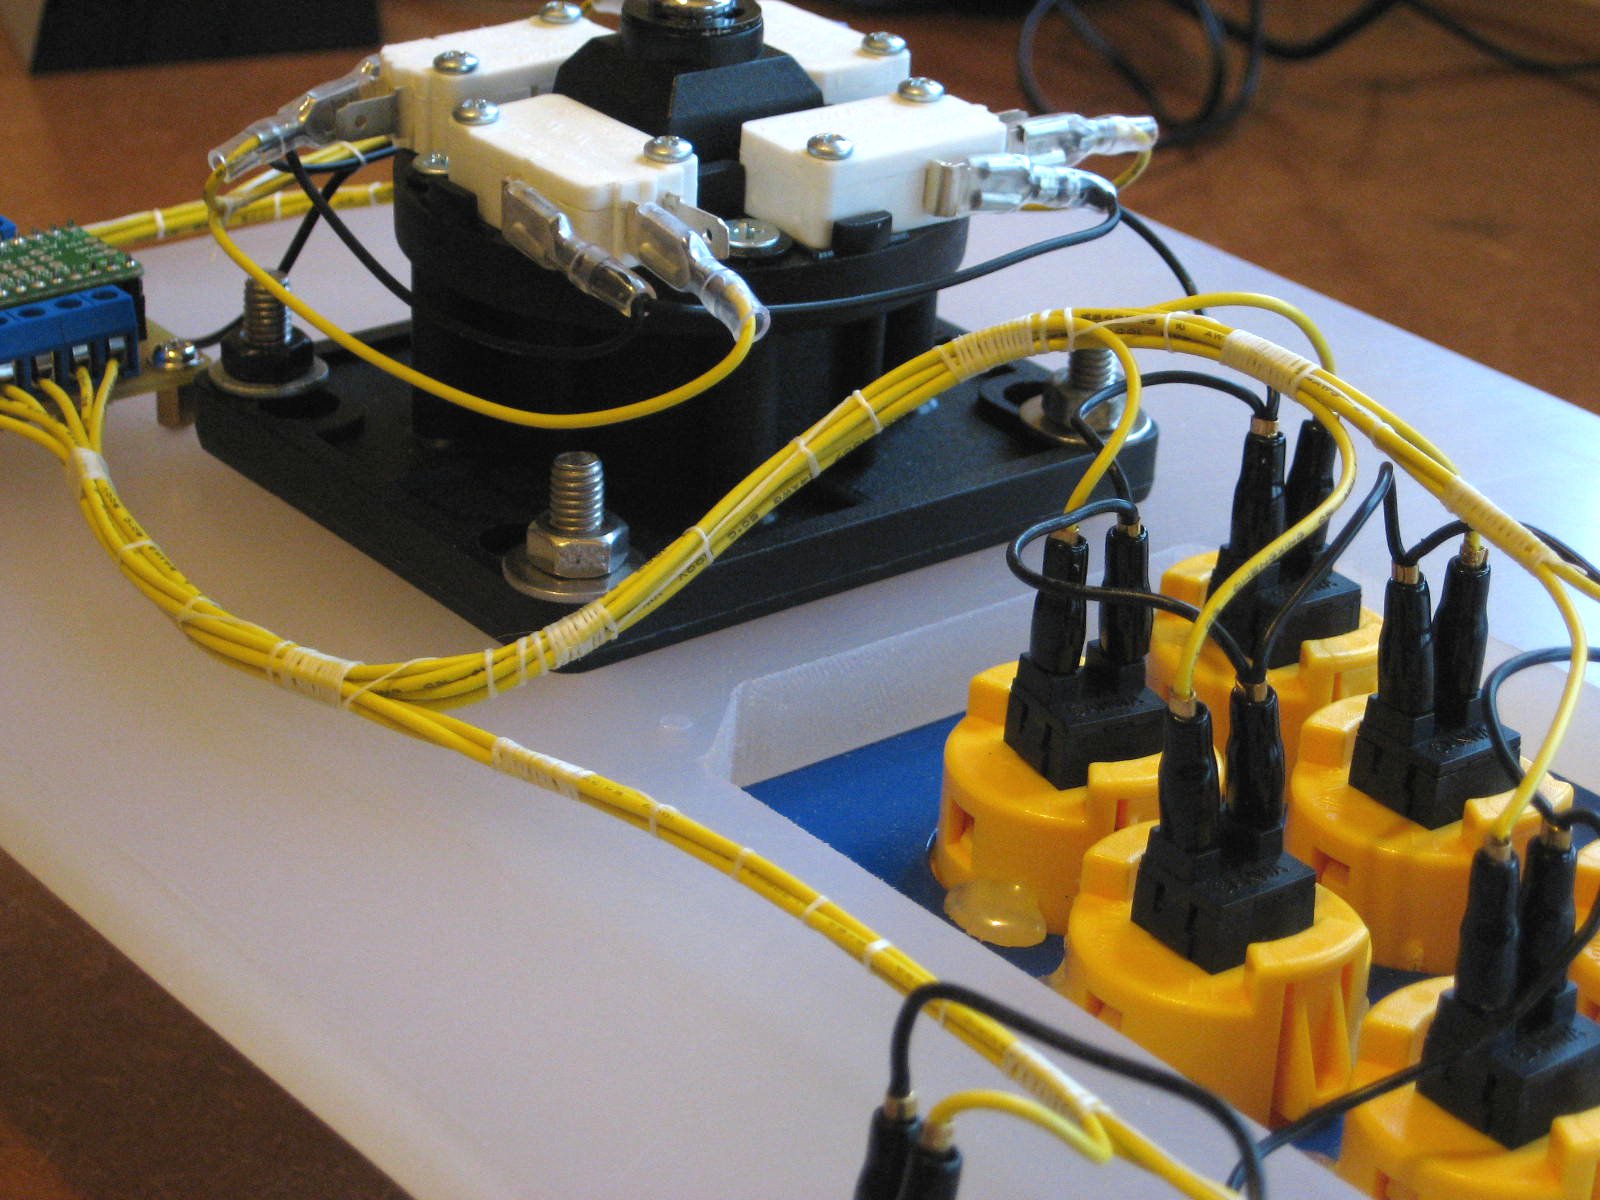
I don’t pretend to be a master of wire lacing. To be honest this is my first attempt but I am thoroughly pleased with the results. I was inspired by a recent article by Keith Neufeld in which he showed off his x0xb0x Wiring Harnesses.
This is my latest arcade joystick build incorporating my recent teensy++ based controller. Locating resources on the web describing the art of wire harness lacing can be tricky as it doesn’t seem to be a popular practice but I found a decent writeup here. The wires on my controller are 24 gauge so the thick string Keith used would have been overkill. Instead I opted for waxed dental floss to wrap the wires (tip: waxed is important as it helps the knots stay tight).