A short time ago Handbrake began to ship with default encoding settings for the “Normal” profile using 2-pass h264 encoding. Sadly my XBox and XBMC just weren’t up to the task of decoding all those fancy h264 bits in software anymore.
Naturally instead of adjusting the encoding parameters, I decided to begin the hunt for a new video player… oh and it has to be cheaper than that AppleTV thing since it does h264. It also has to be similarly quiet, power efficient, and small.

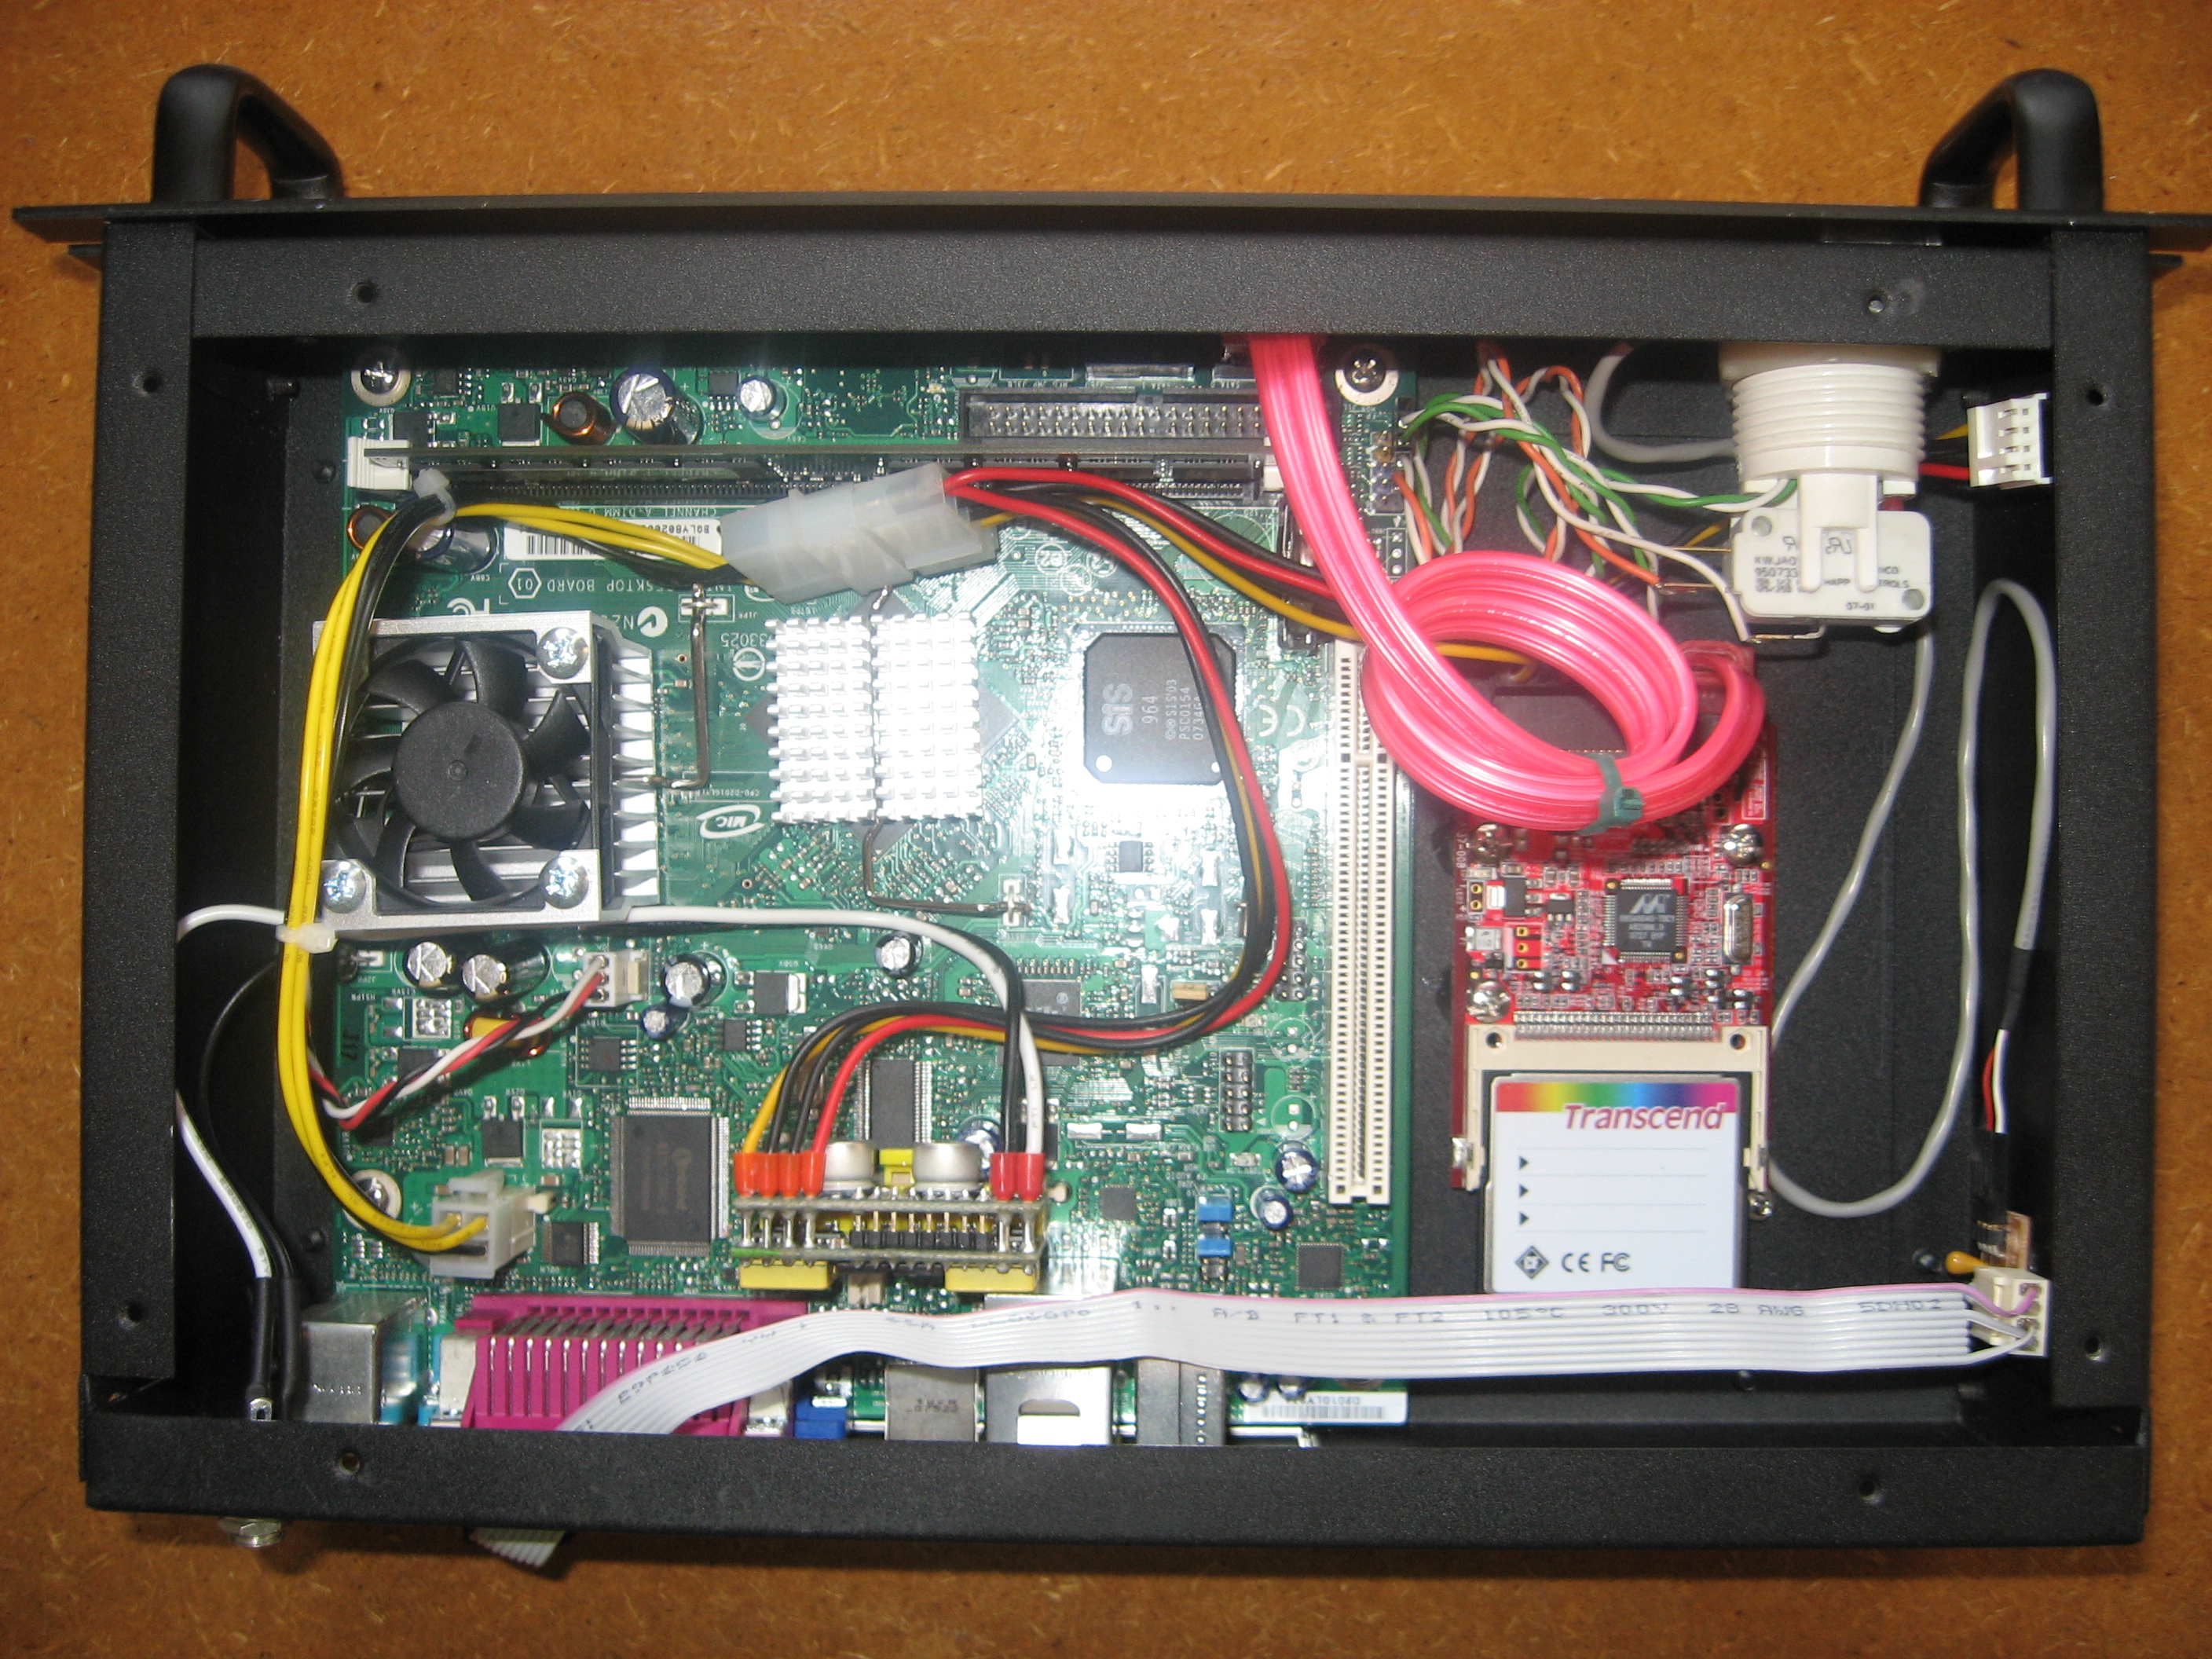
Well this is the result. It’s a bit bigger than an AppleTV but it’s certainly quiet and power efficient. And I actually quite like the look of it.
Hardware
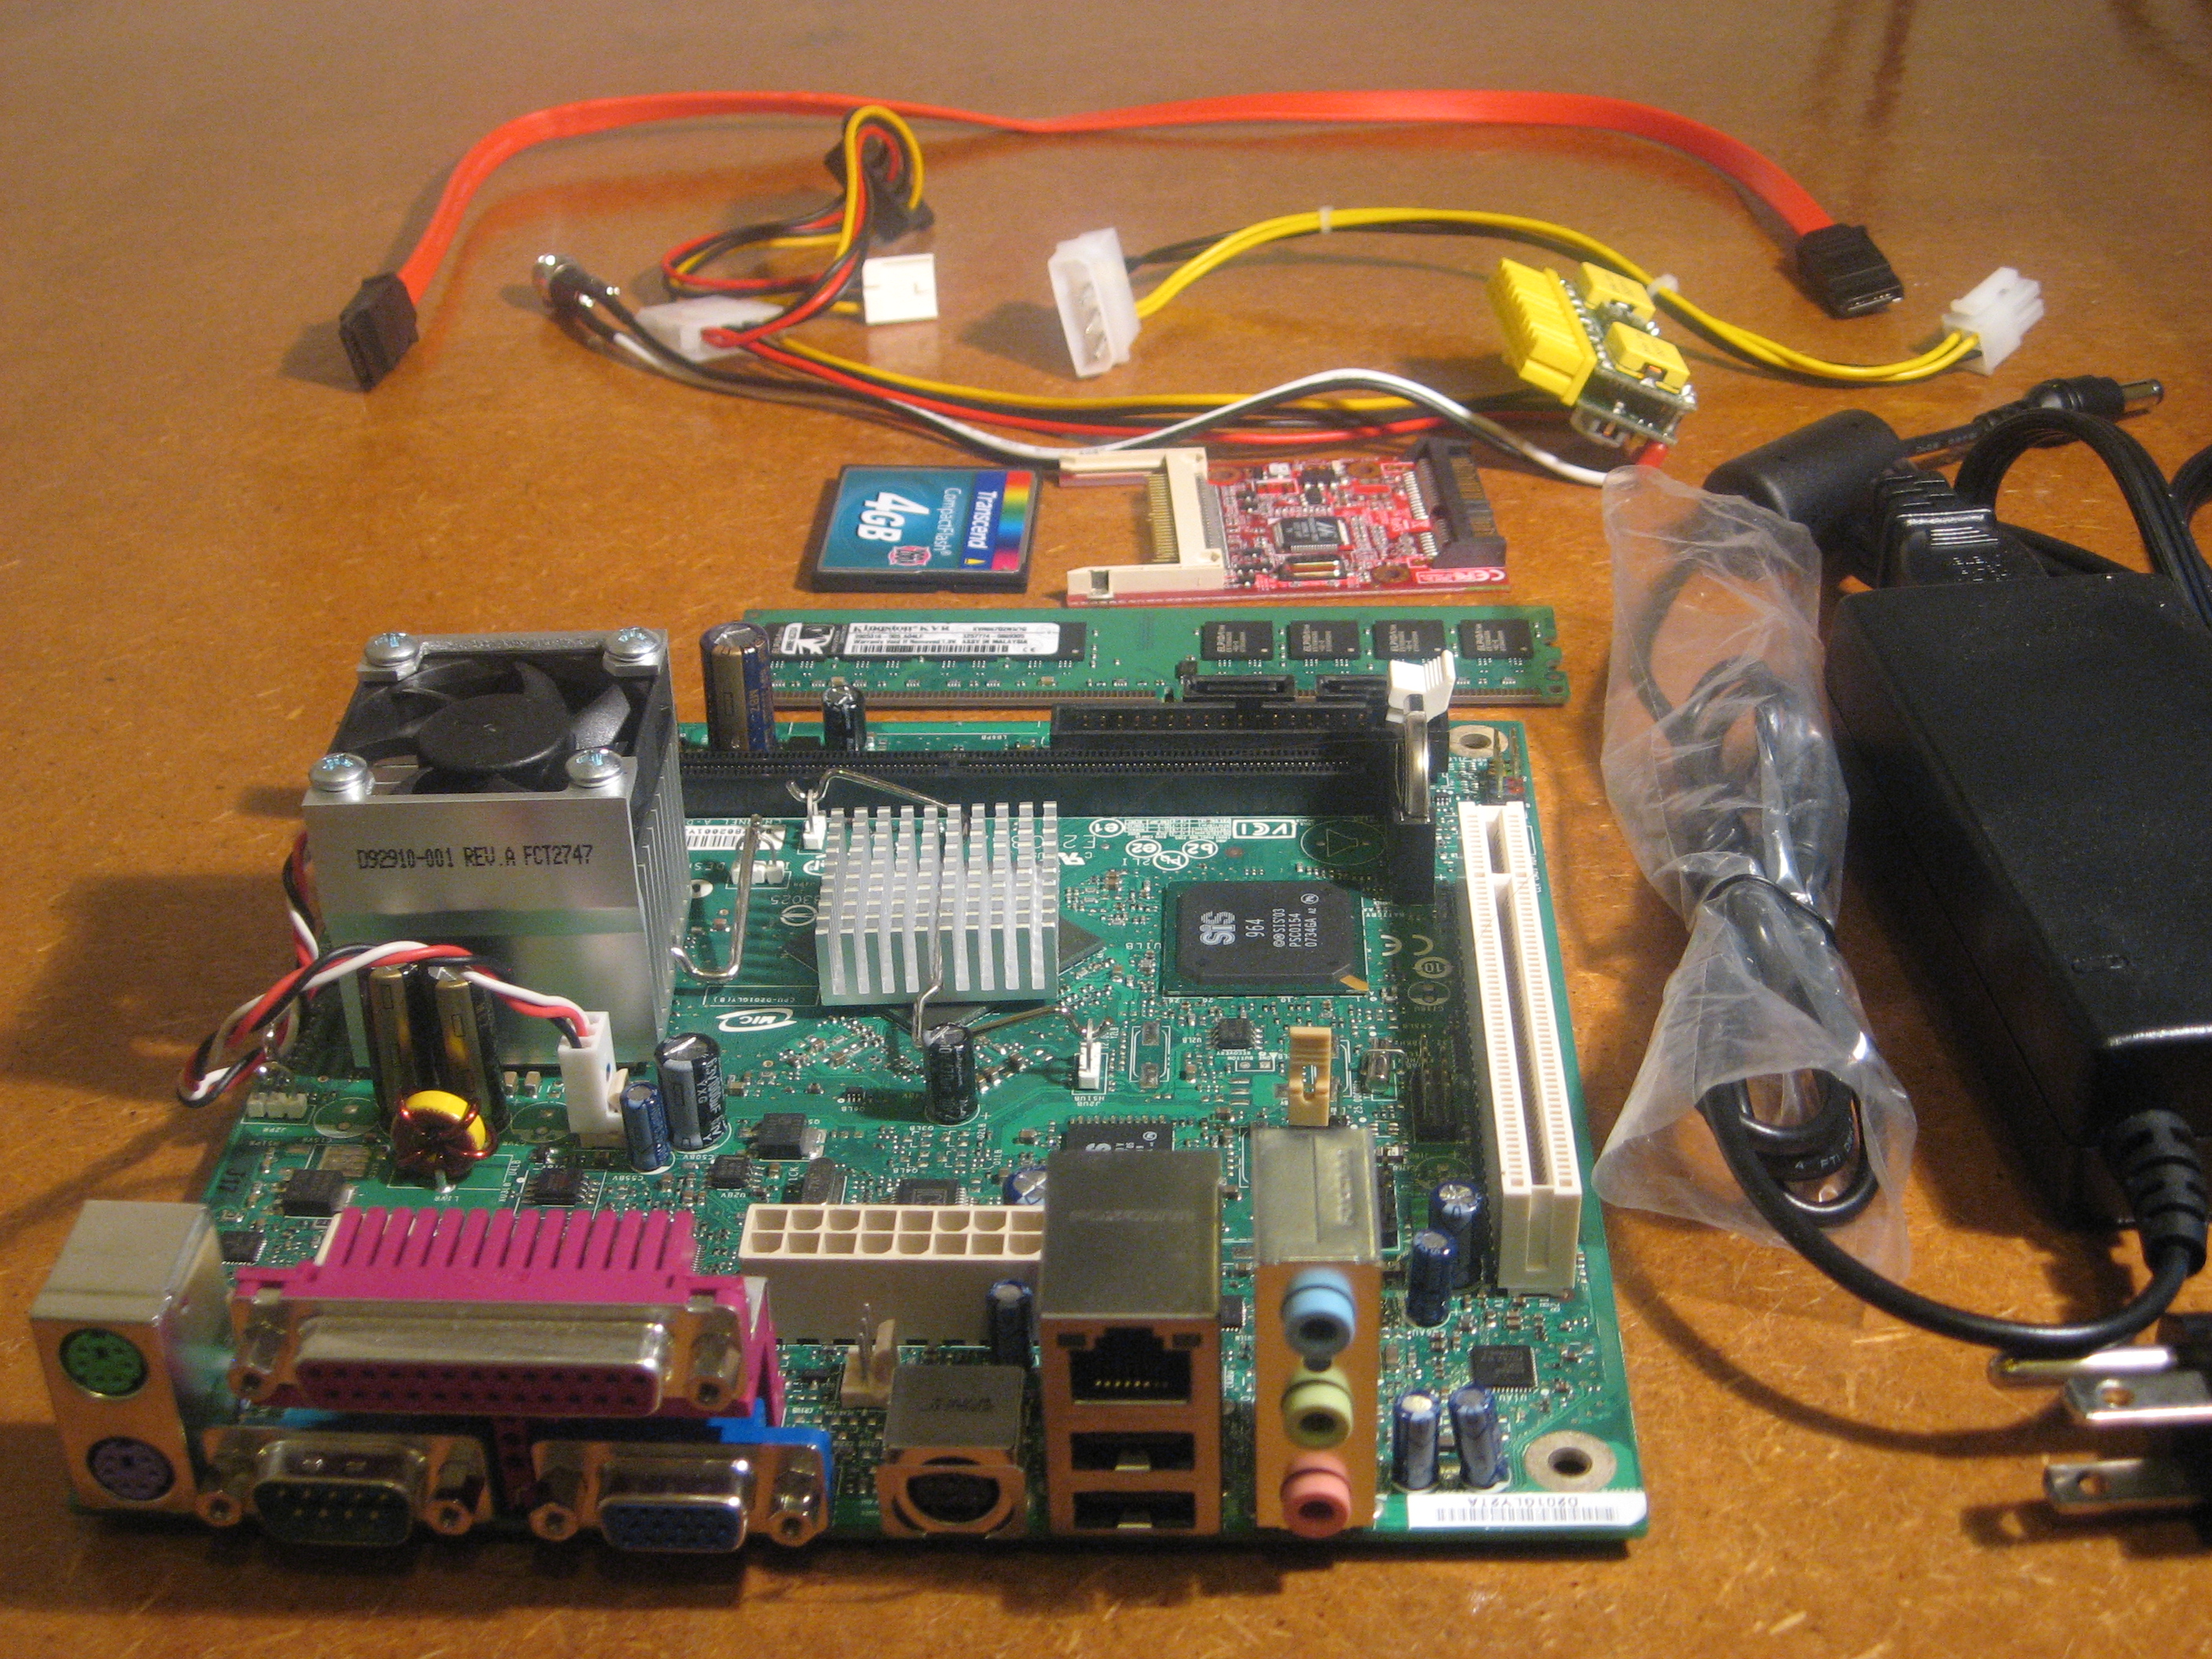
D201GLY2TA MiniITX board, 1GB Kingston DDR2 667MHz, picoPSU 120W, Transcend 4GB x266 CF, and SAT2CF by startech.com. Board, PSU/AC-DC converter came from mini-box.com, the memory and CF card from canadacomputers.com and the CF-SATA adaptor from ncix.com. Cost breakdown:
| Item | Cost | Comments |
|---|---|---|
| D201GLY2TA | $75.00 | crappy frackin BIOS, not very Linux friendly…but it’s CHEAP! |
| picoPSU-120 | $54.95 | small, efficient, awesome… nuff said |
| CF200 IDE to CF | $9.50 | BIOS is garbage, or the adaptor sucks… needless to say $10 down the crap shoot |
| 1GB Memory | $29.99 | it works |
| Trancend 4GB CF | $51.99 | also, just works |
| SAT2CF | $38.04 | slooooooow, as frack! but so far not much of an issue |
Grand total including taxes, shipping and brokerage fees… aprox. $370 CDN. Mother, %$@#! That’s way more than the AppleTV. Oh well, at least I didn’t have to give Apple Inc. any more of my hard earned money and this thing should be much more customizable… right? Read on for details of the software.
Linux Distro
For this build I choose Arch Linux. It’s fast and simple. I considered using Crux but running a compiler on this thing would be painful.
The details of getting Arch installed are boring. It is covered in great detail in the arch install guide. I will however mention that I went with a swap-less install and used JFS file system for my root and home partitions and ext2 for the boot partition.
This article provides some PKGBUILD files so a good understanding of the Arch Build System is required.
Kernel
Any lean mean system has to have a custom kernel. At least that’s what I tell myself to justify the number of hours burned configuring, compiling, testing, configuring, compiling, testing, configuring, compiling… well you get the picture. All essential hardware drivers are compiled directly into the kernel and I used modules for stuff that I thought I might use, but not on a regular basis. I also applied a patch to add DRI access to the GPU.
Here is a tar.gz with my PKGBUILD, .config, and patch files: kernel26259-D201GLY2.tar.gz
Since the kernel has all essential hardware drivers already, the initial ram disk is not required. The grub config looks like:
title  Arch Linux
root   (hd0,0)
kernel /vmlinuz26259-D201GLY2 root=/dev/sda3 ro acpi=noirq
The bit about acpi=noirq was required otherwise the kernel would panic when initializing the SATA controller.
Extended Flash Life
I was a bit concerned with repeated writes to the CF card so I moved the /tmp and /var/log directories to a temporary file system. I don’t care if these two directories get nuked each time the system shuts down, so the changes are trivial:
Add these lines to /etc/fstab
none  /tmp      tmpfs   size=64M 0 0
none  /var/log  tmpfs   size=64M 0 0
And fix the permissions of the /tmp directory in /etc/rc.local
chmod 777 /tmp
chmod +t /tmp
Graphics Driver
Remember when I said this board isn’t the most Linux friendly? Well that’s because of the SiS northbridge and southbridge chipsets. Everything works ok, except the graphics driver. Apparently this dude (who works for SiS) has developed a 3D driver but can’t distribute it.
Thomas Winischhofer has done some great work on a better driver but he got frustrated with vendors using his work and not getting anything out of it. iMedia Linux comes bundled with a pretty good version of Thomas’s driver that gives you accelerated XVideo and support for high resolution modes and they have been kind enough to post the source.
This modified driver is by far the best solution I could find. Here is the PKGBUILD. It pulls source from here which is the same source from iMedia Linux, I just cleaned up the autoconf/automake files so that it would build cleanly on Arch.
Serial console
Having serial port console access is a nicety that can help during the debug stages. Basically, once configured you can connect the system via an RS232 null modem cable to say a laptop and watch the kernel output, interact with the grub boot loader, and login to a shell as if you where sitting at a physical terminal, without having to connect the system to a monitor.
This board however only has one serial port and I need this port for my IR receiver, so I had to revert these changes after the initial setup and testing of the system.
Never the less, here is what’s needed to setup serial port access.
In /boot/grub/menu.lst add the following near the top of the file:
serial --unit=0 --speed=38400
terminal --timeout=2 serial console
Append console=ttyS0,38400 to the kernel parameters in /boot/gub/menu.lst, eg:
kernel /vmlinuz root=/dev/[root device] ro console=ttyS0,38400
And in /etc/inittab change one of the virtual consoles to:
c0:2345:respawn:/sbin/agetty 38400 ttyS0 linux
In order to login as root, add ttyS0 to the list of console in /etc/securetty.
Getting boot times down
I’m afraid “instant on” is beyond the realm of this hardware but to make the boot times a bit more respectable I performed the following tweaks, most of which came from this Speedup Boot ArchWiki page.
Comment out unused virtual console in /etc/inittab:
c0:2345:respawn:/sbin/agetty -8 38400 vc/1 linux
#c1:2345:respawn:/sbin/agetty -8 38400 vc/1 linux
#c2:2345:respawn:/sbin/agetty -8 38400 vc/2 linux
#c3:2345:respawn:/sbin/agetty -8 38400 vc/3 linux
#c4:2345:respawn:/sbin/agetty -8 38400 vc/4 linux
#c5:2345:respawn:/sbin/agetty -8 38400 vc/5 linux
#c6:2345:respawn:/sbin/agetty -8 38400 vc/6 linux
Since the kernel has all drivers statically compiled, disable module auto-load in /etc/rc.conf
MOD_AUTOLOAD=”no”
# put any modules you need here
MODULES=(cifs lirc_serial)
Fork startup of as many services as possible, and remove ones you don’t need:
DAEMONS=(network @syslog-ng @crond @sshd @alsa @lircd @acpid @netfs)
Append quiet to the kernel parameters in /boot/gub/menu.lst, eg:
kernel /vmlinuz root=/dev/[root device] ro quiet
After all of this I was able to get 14 seconds from grub to GUI. Not too shabby!
Handle Powerbutton
This comes directly from the ArchWiki page on how to shutdown by powerbutton.
Install acpid then create a file called /etc/acpi/events/poweroff with the contents:
event=button/power (PWRF)
action=/sbin/poweroff
Make sure /etc/rc.conf has acpid in the DAEMONS list.
Graphical Frontend
I tried a few mediacenter frontends but by far the most efficient while still being a bit fancy is MMS. At the time of writing the latest stable build was 1.0.8.5 but the 1.1.x series is much more interesting. Here is a PKGBUILD to compile from one of the nightly snapshots.
To boot directly into MMS, first add a dedicated user:
$ useradd -m -G wheel,audio mediacenter
Add MMS command to /home/mediacenter/.xinitrc:
exec mms
And finally update /etc/initab to load the GUI on startup:
id:5:initdefault:
[...]
x:5:once:/bin/su mediacenter -l -c "/bin/bash --login -c startx >/dev/null 2>&1"
MMS is highly configurable (lots of documentation in the MMS Wiki). It’s best to copy any customizations to the configuration files into your home directory so that later upgrades to MMS don’t overwrite your changes. For each file, copy it from /etc/mms/**file** to ~/.mms/**file**.
Short summary of my changes:
# ~/.mms/Config
out_dev = sdl
...
fullscreen = true
...
# important! for the best experience, set these to same
# res as X (see /etc/X11/xorg.conf)
h_res = 1360
v_res = 768
...
input = lirc
# ~/.mms/GenericPlayerConfig
...
# disable splash and gui controls in xine
generic_movie_opts = --no-splash -I %f %a
# ~/.mms/MovieConfig
...
mov_dir = /media/video
Installing and Configuring LIRC
Unfortunately due to the custom kernel, the official package in pacman repository won’t work. Not too big of a deal though, just copy lirc files from ABS and update them. Change PKGBUILD to reflect the kernel version, and change the --with-kerneldir compile time switch.
# ...
_kernver=2.6.25.9-D201GLY2
# ...
./configure --enable-sandboxed --prefix=/usr --with-driver=all \
                --with-kerneldir=/home/josh/mediacenter/kernel26259-D201GLY2/src/linux-2.6.25.9 \
                --with-moduledir=/lib/modules/${_kernver}/kernel/drivers/misc \
                || return 1
The ArchWiki has a great page on lirc. Here you can find details on configuring lirc to work with your remote control.
Once the remote control is configured, you still need to make sure MMS and xine know how to use it. MMS keeps it’s lirc configuration files in /etc/mms/input/lirc/. To get a complete listing of the lirc options in xine, run the command:
$ xine --keymap=lirc
Take what you want from the defaults and save them to the file ~/.lircrc (hint: you can safely remove the remote = xxxxx, unless you have multiple remotes interfacing with xine).
Custom Components
To make our mediacenter pc complete we need a few components that you can’t really get over the shelf.
Infrared Receiver
Not too many chicks are going to be impressed when you pull out your keyboard to play a video or browse your music collection. That’s why a remote control interface is a must. For that, there is LIRC. For this project I went for the dirt simple homebrew serial port receiver. It’s worth mentioning that LIRC supports all sorts of receiver hardware, so you have lots of options.
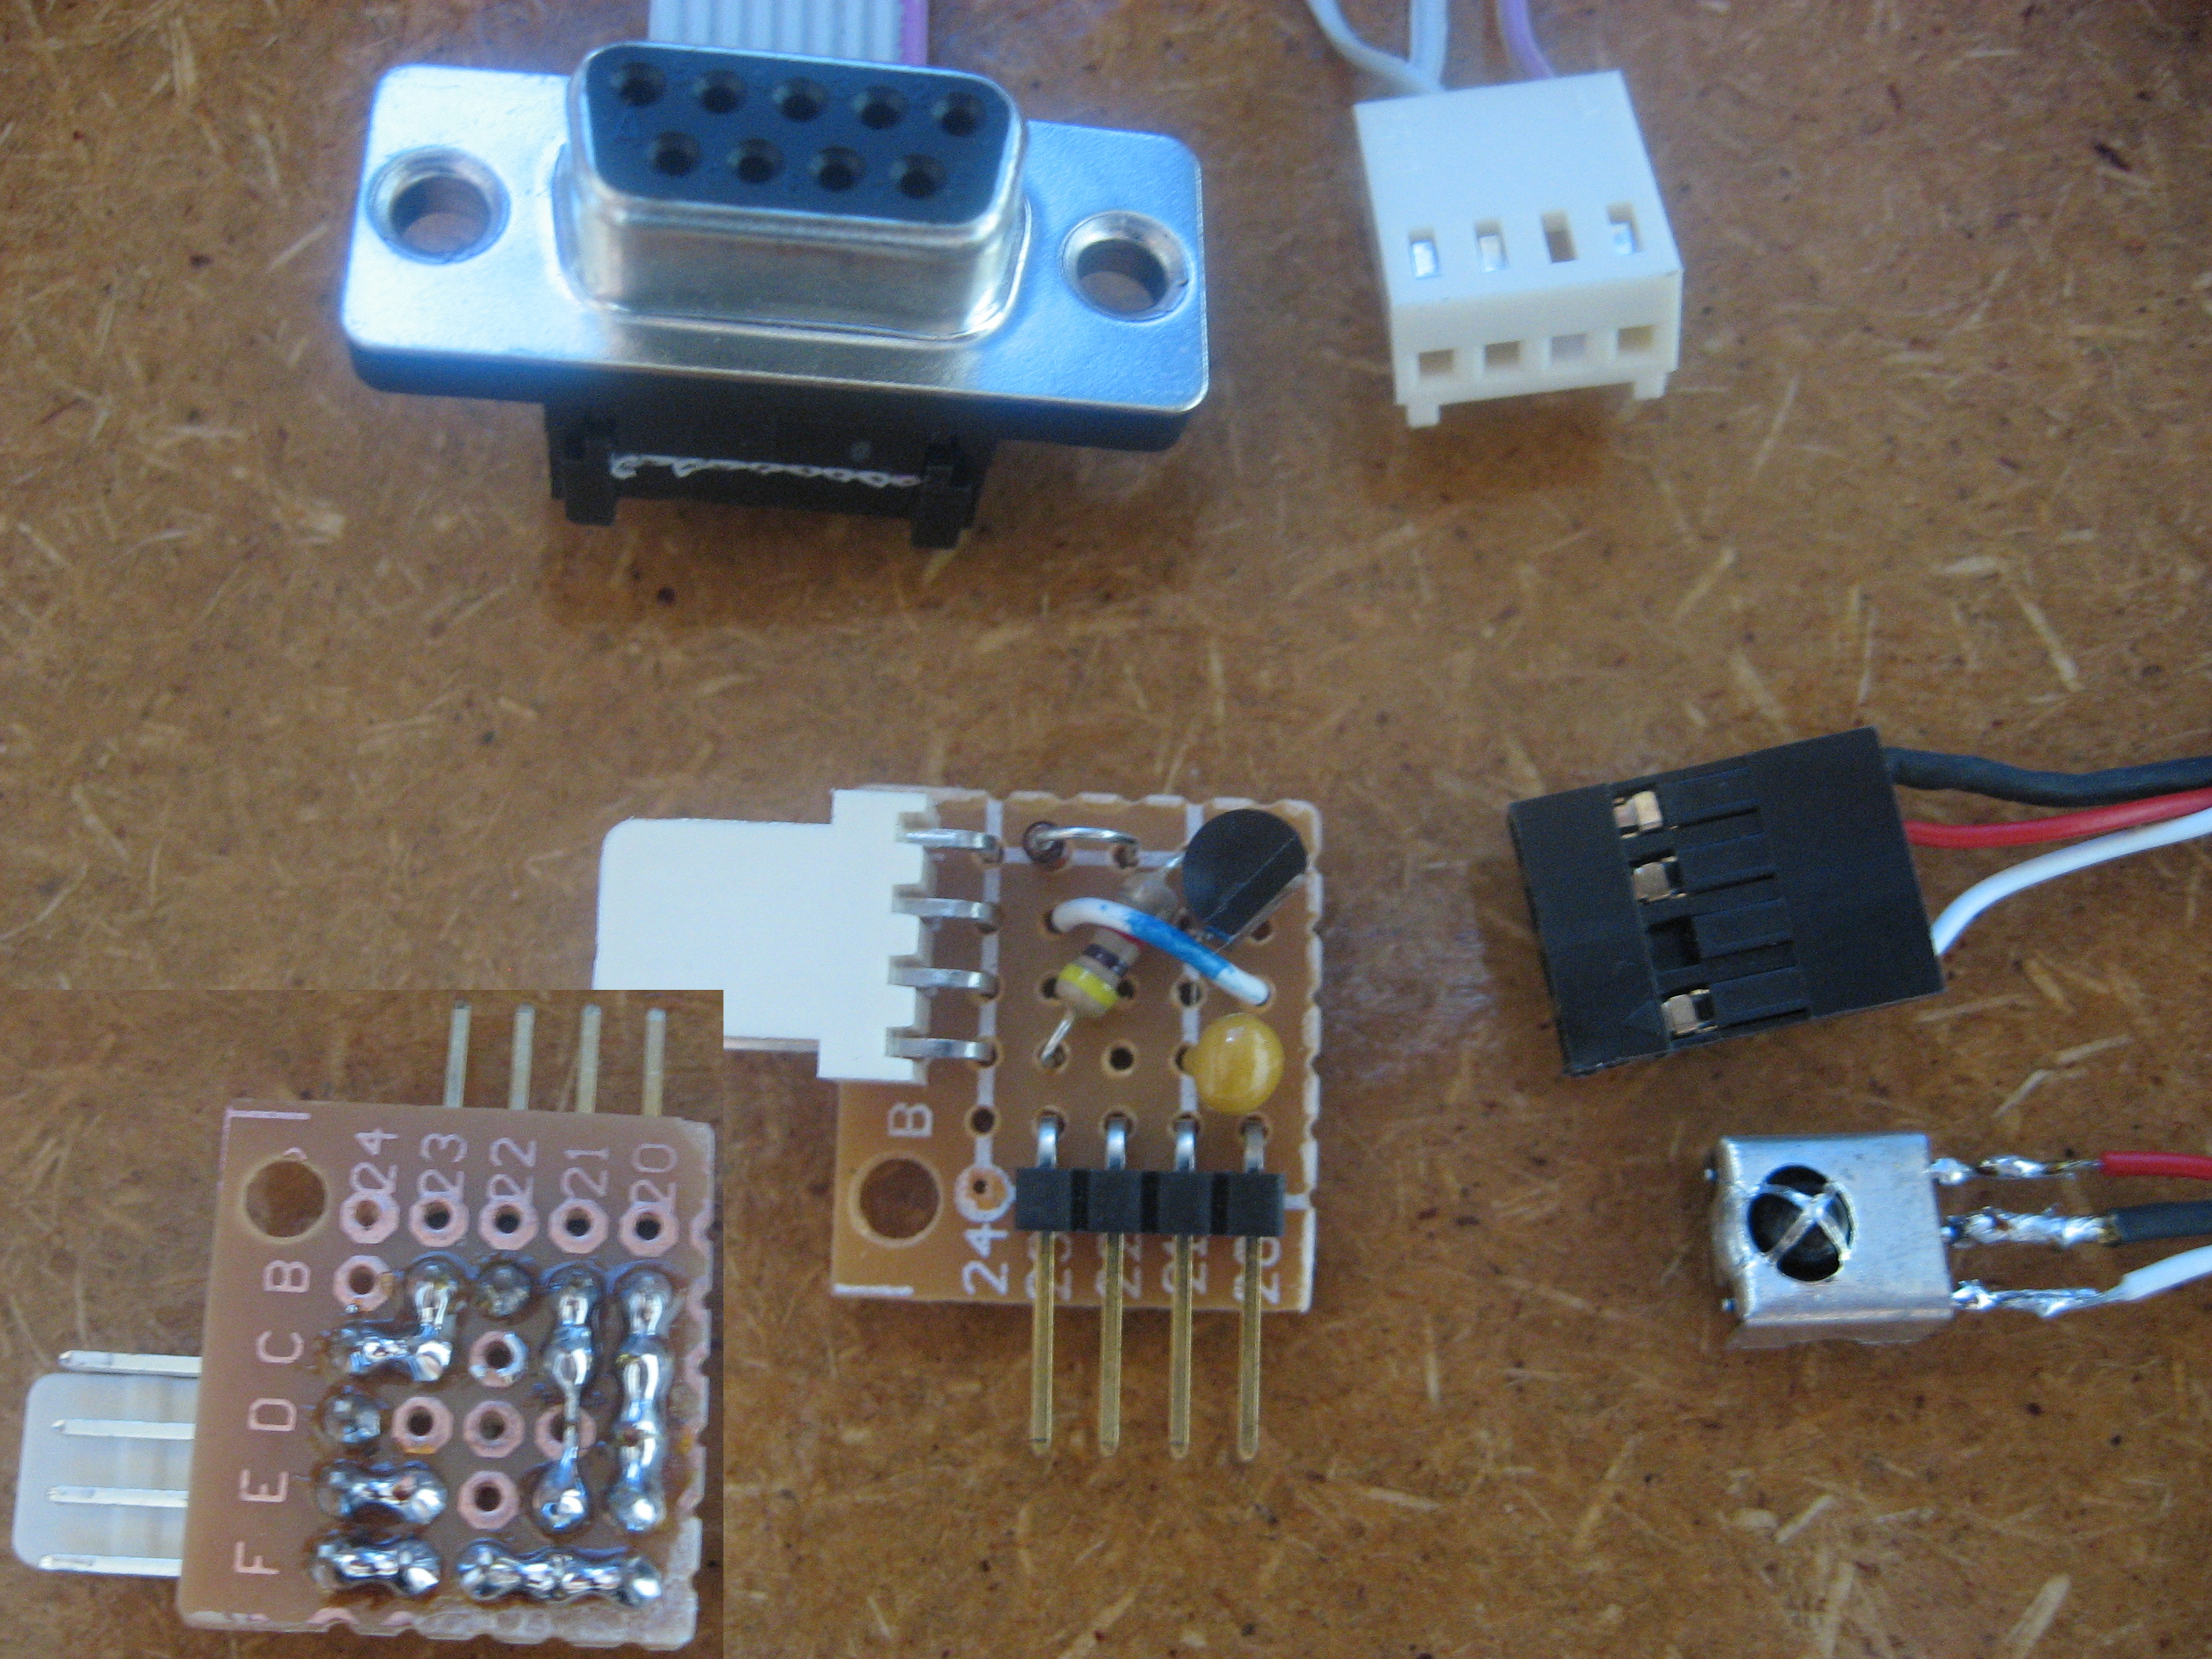
The layout for this board can be found here. All parts where purchased from Creatron Inc. (which is an awesome store BTW).
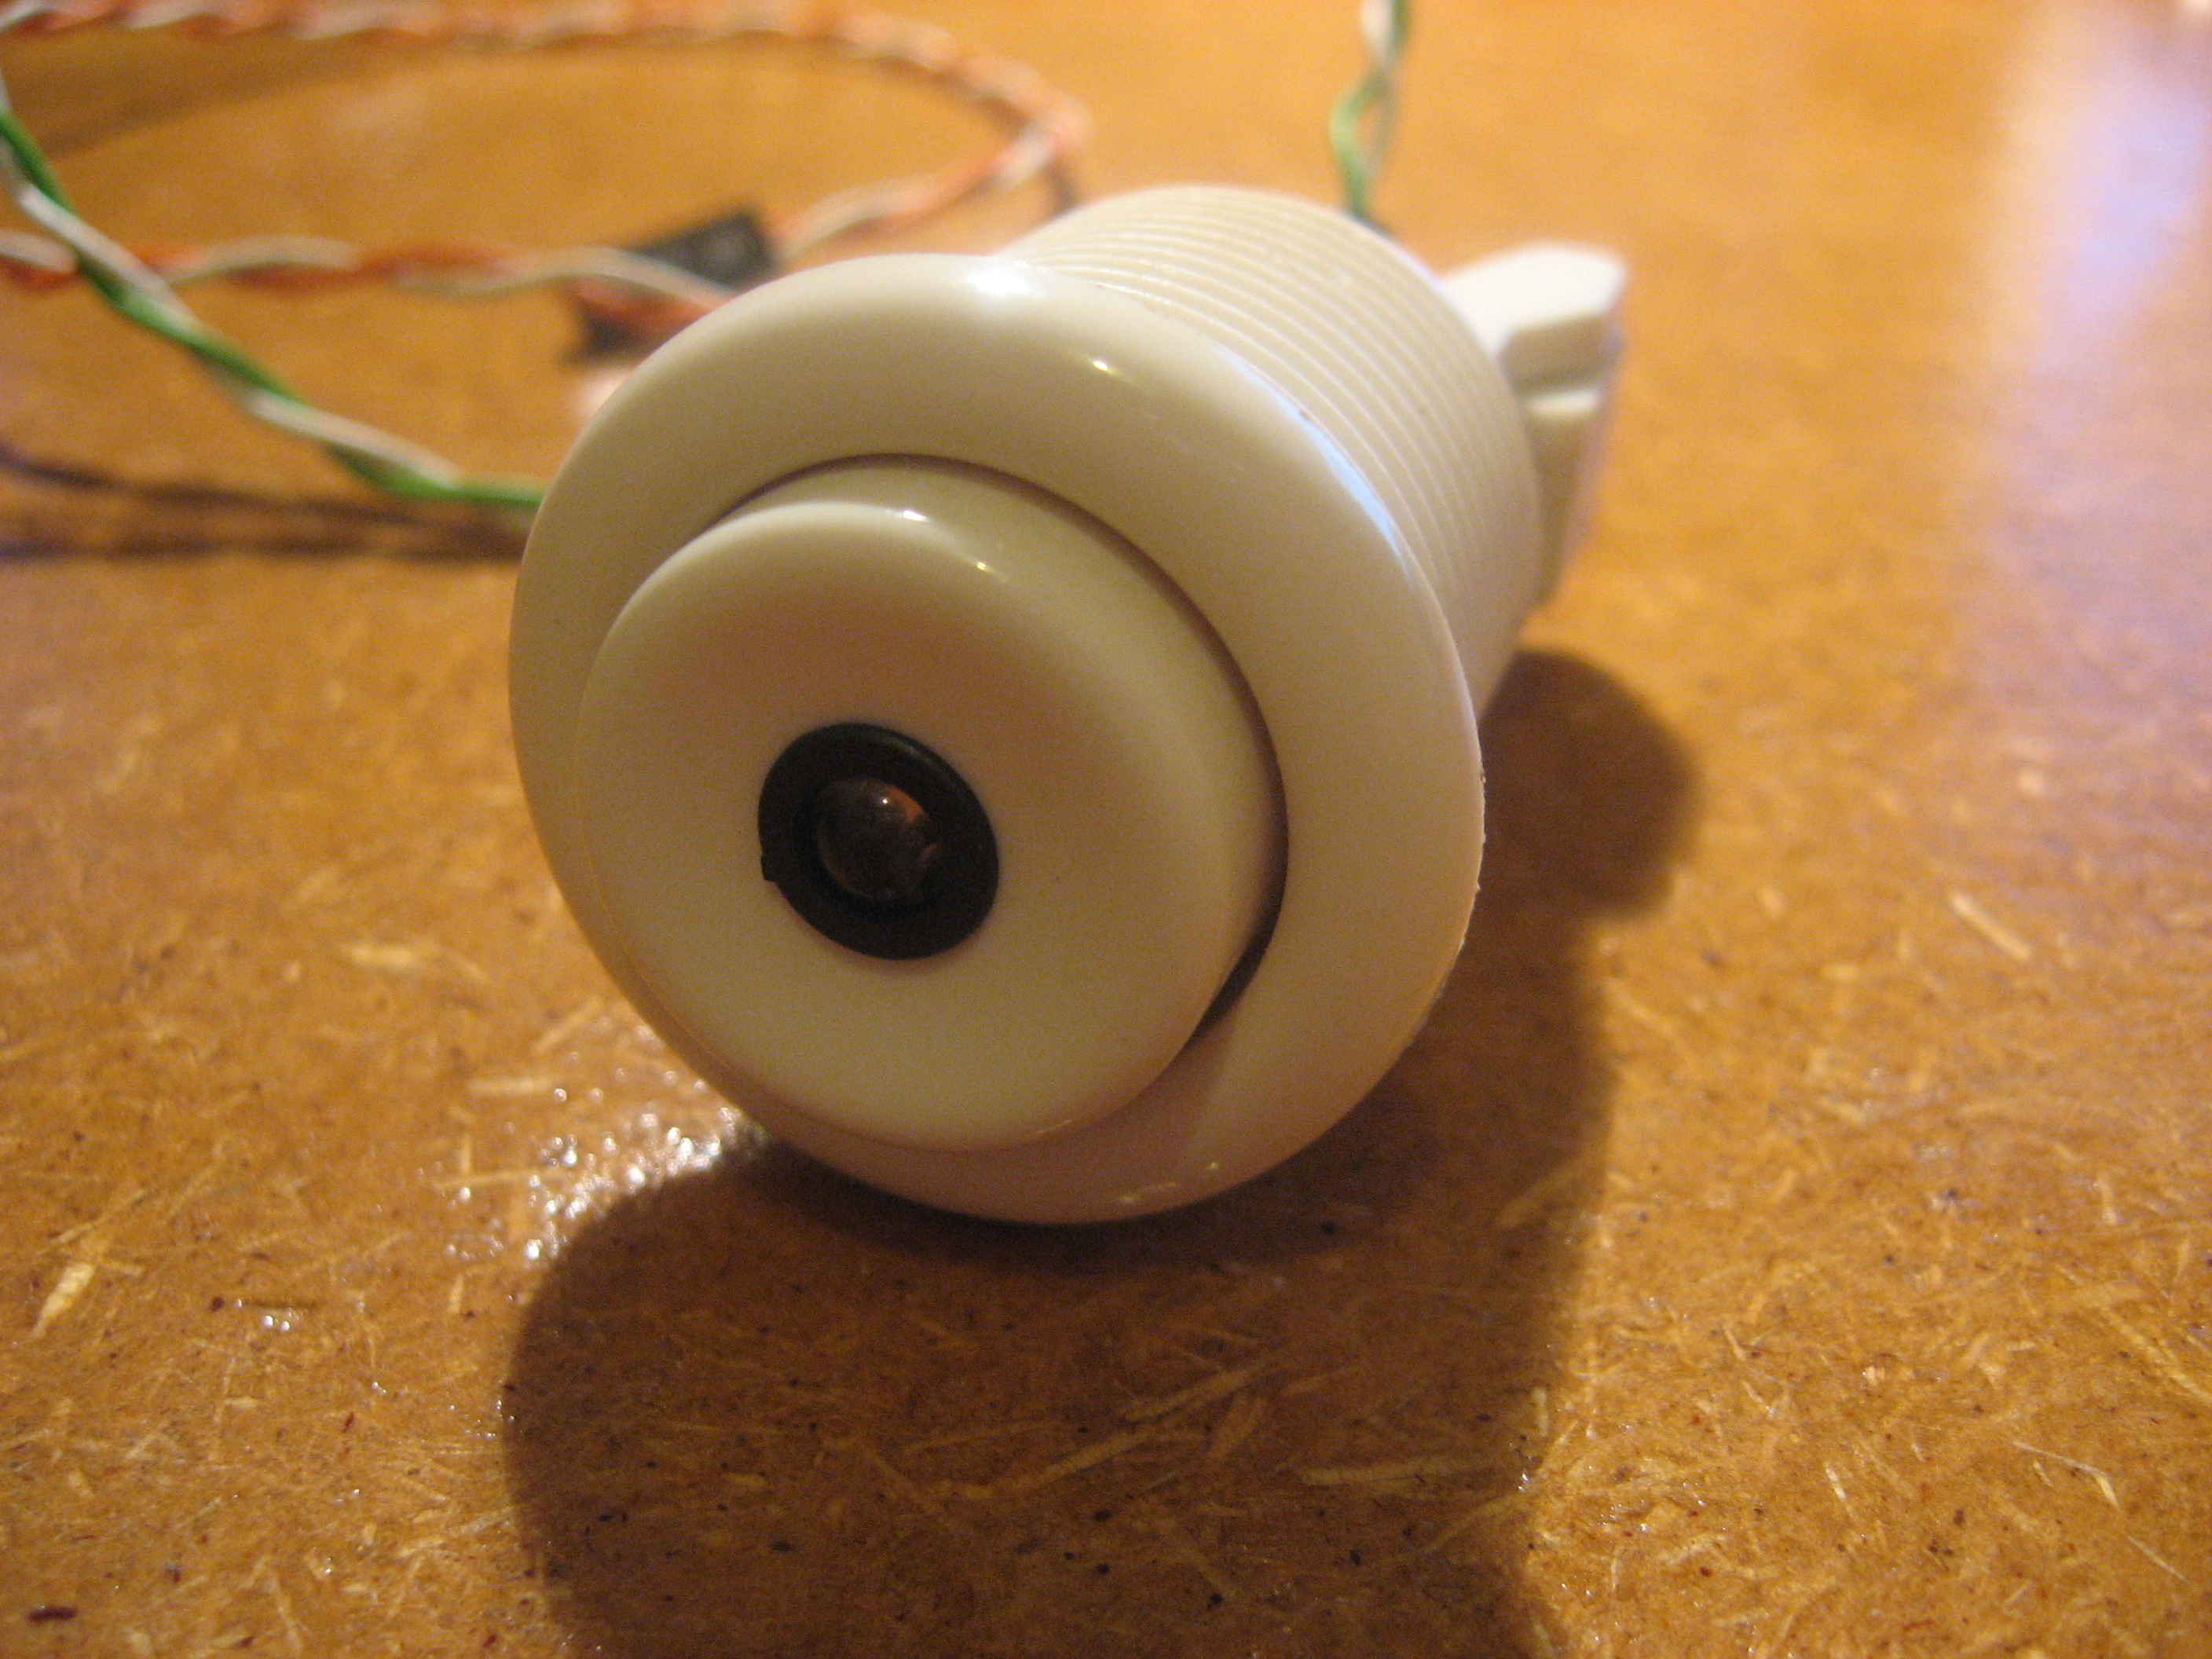
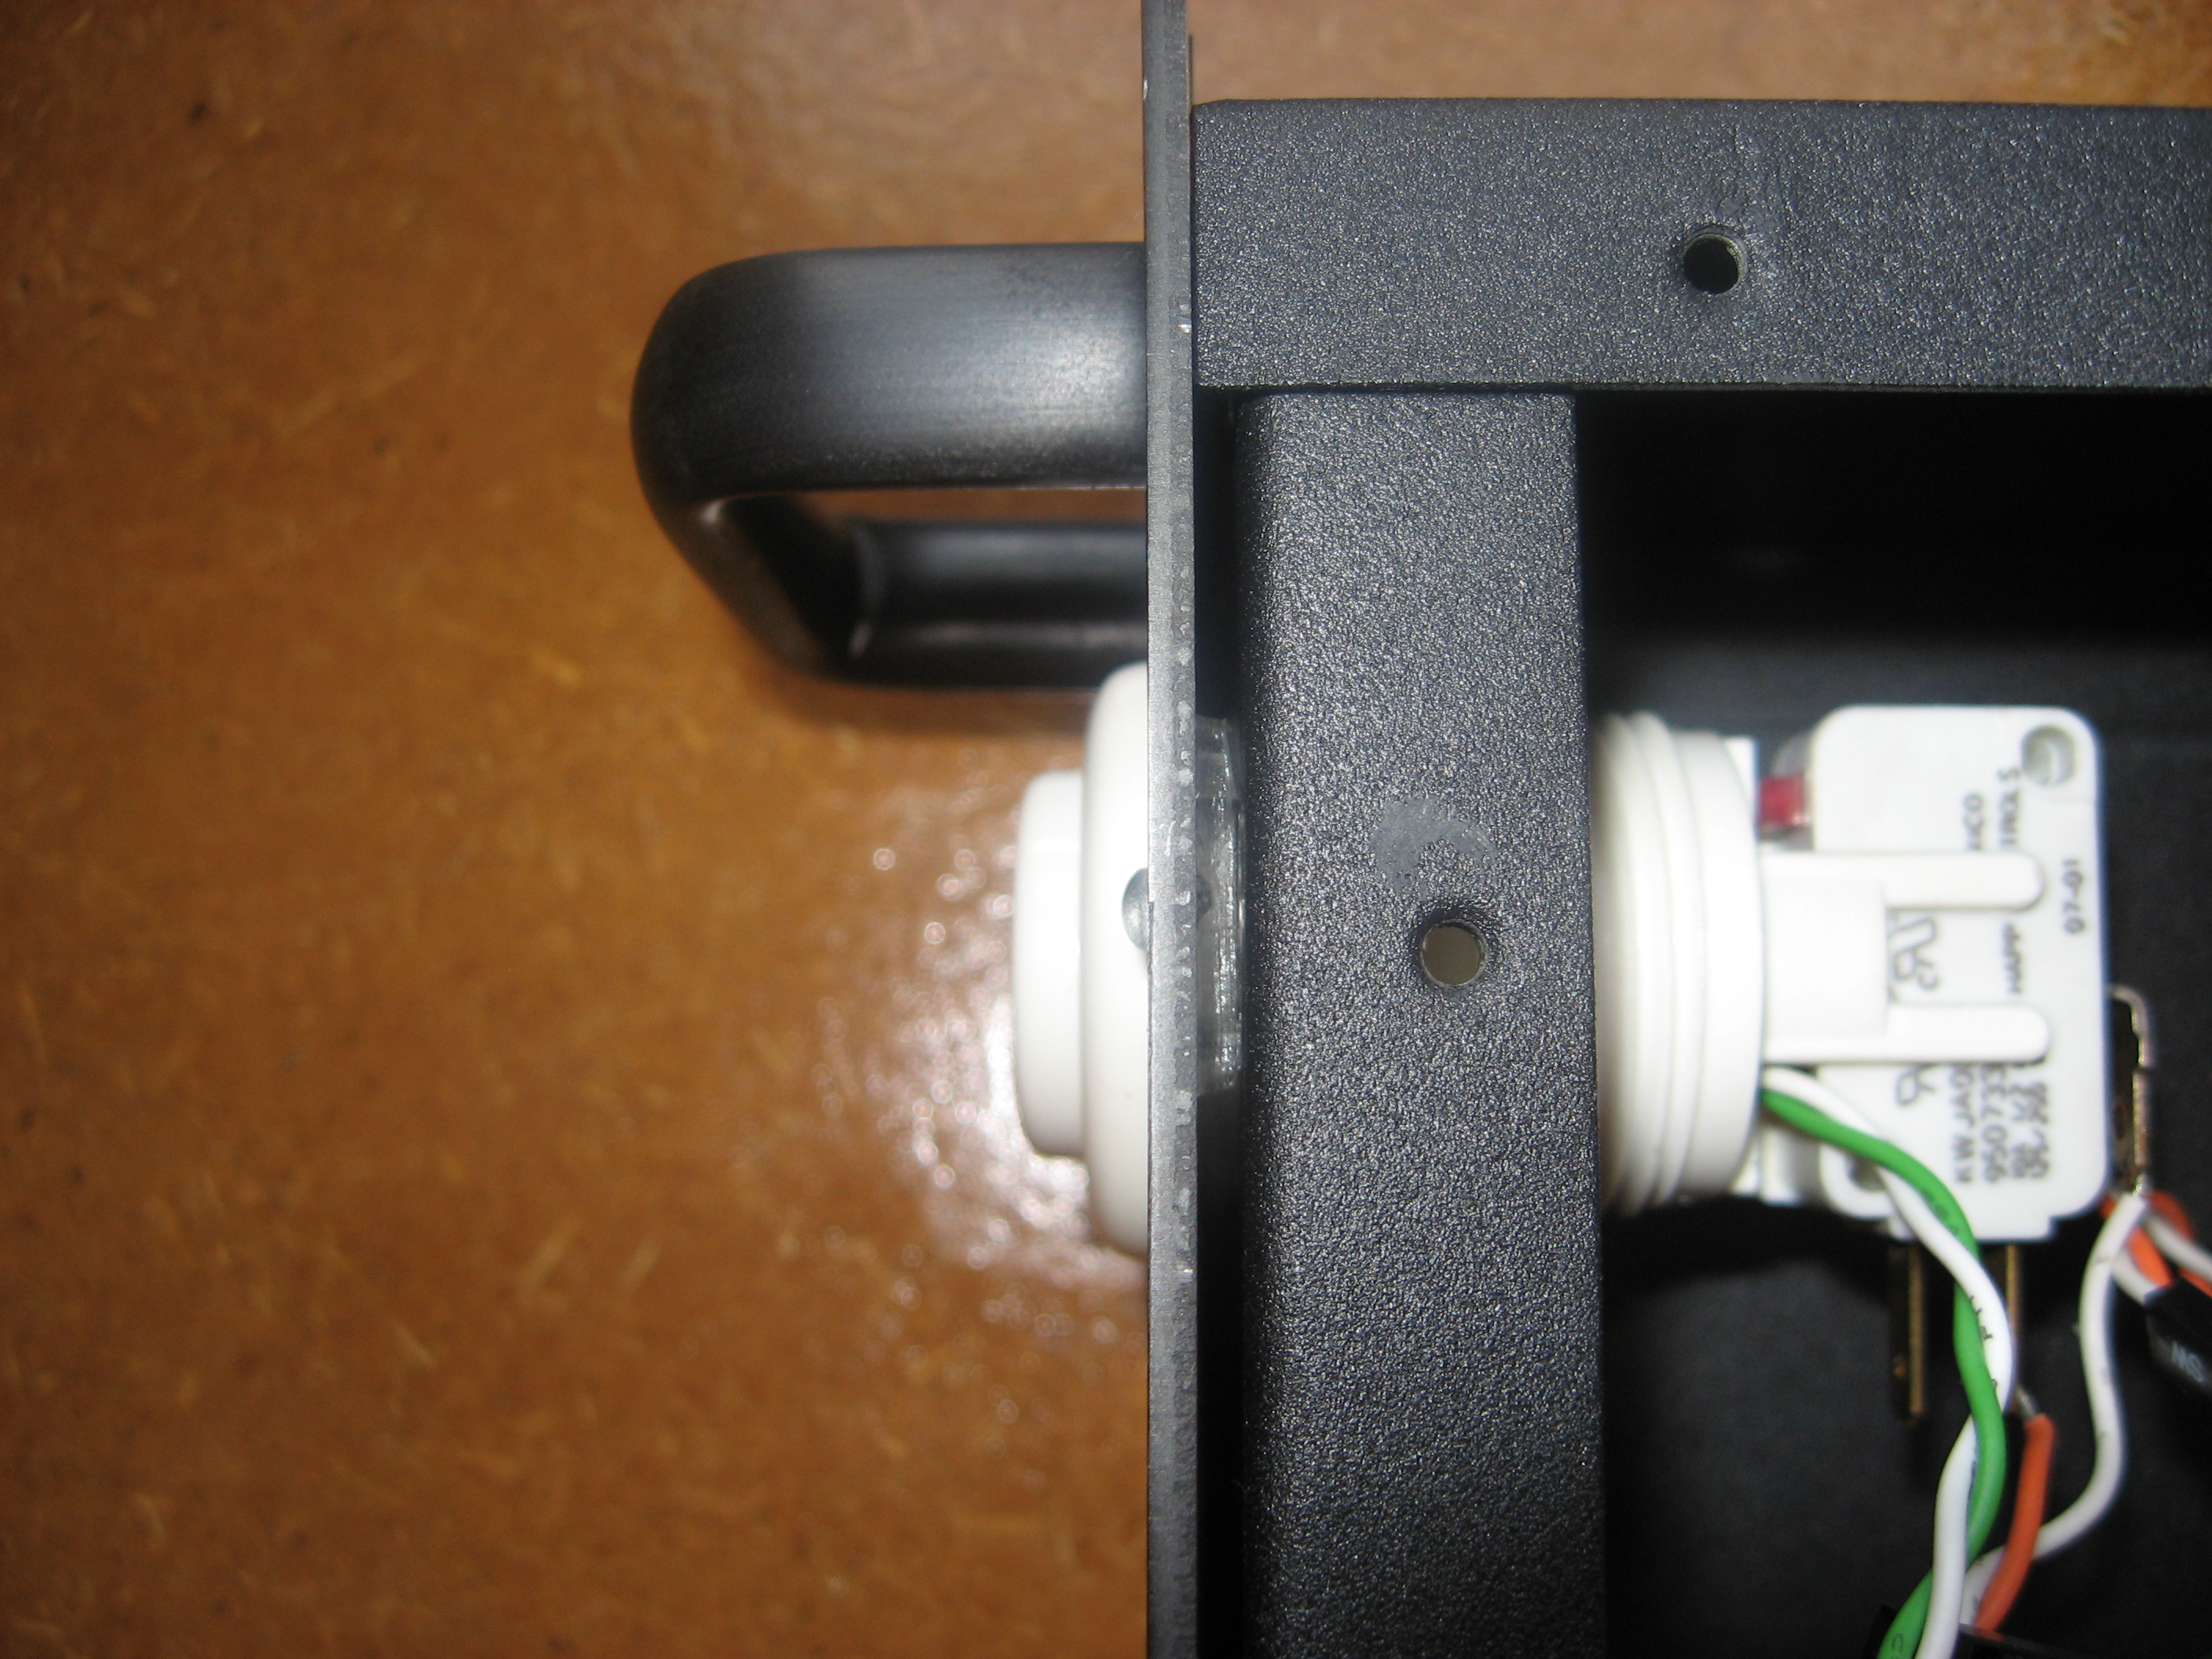
Power Button
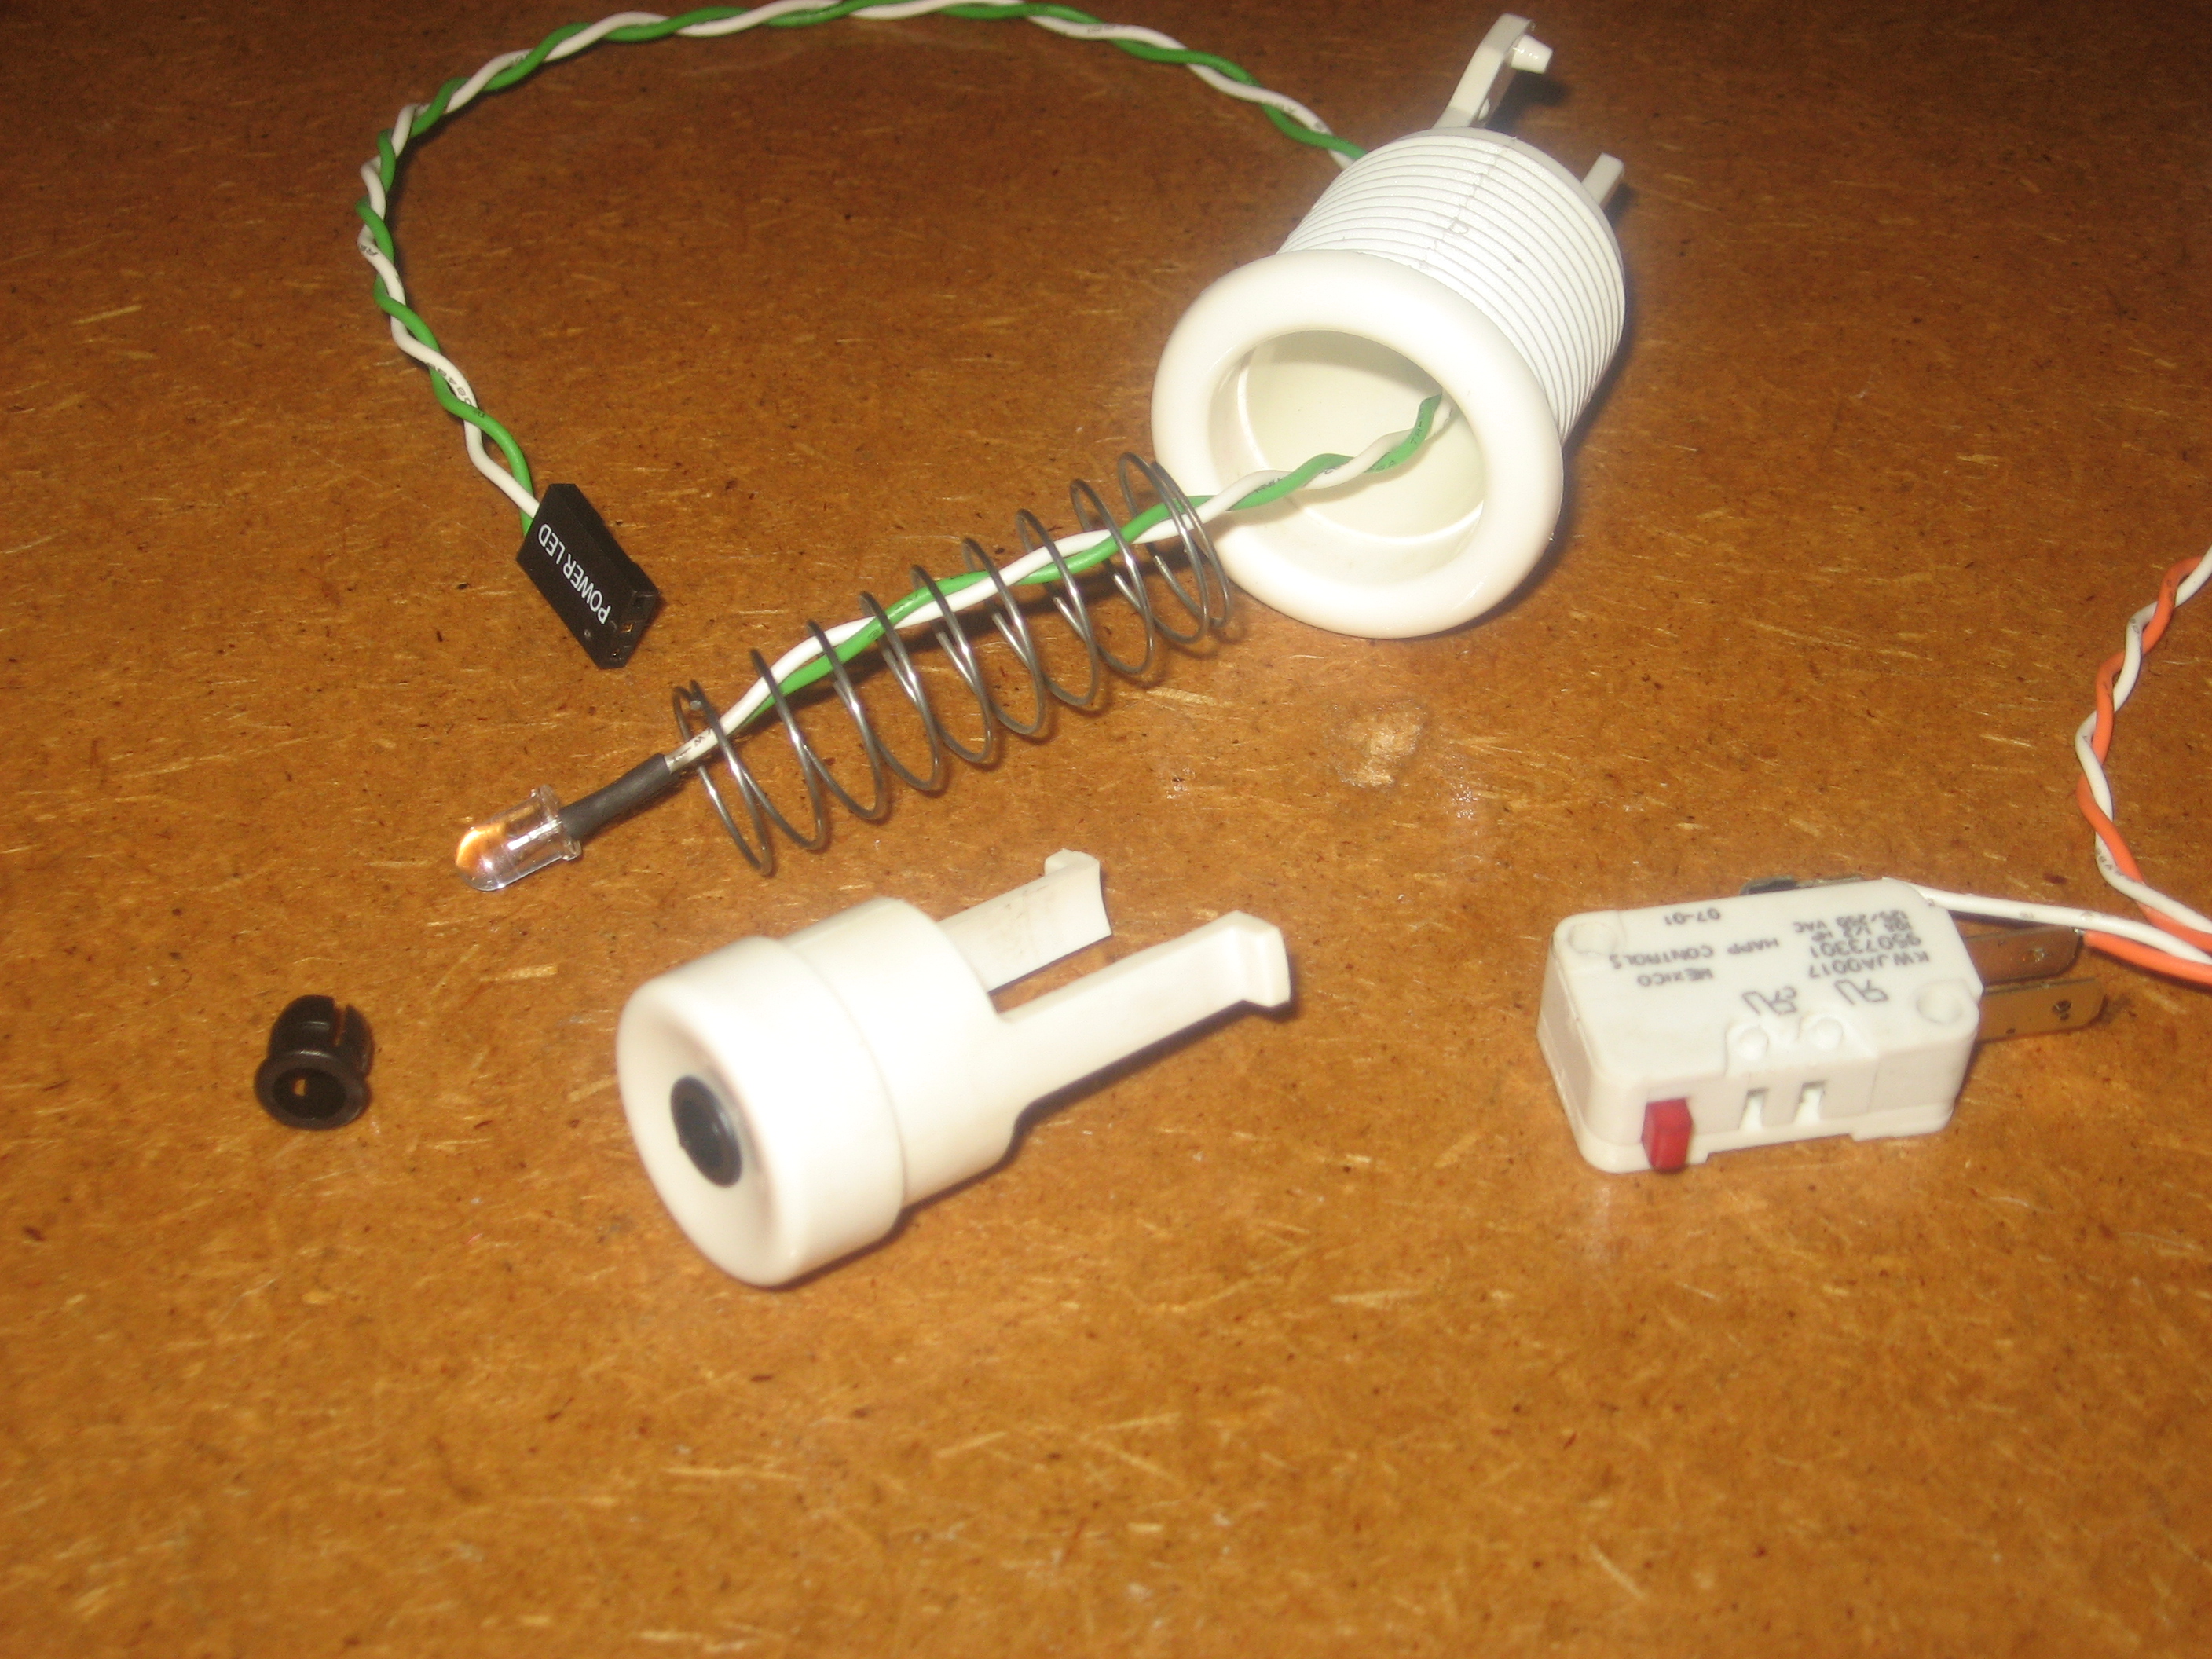
I had a pile of old arcade machine buttons lying around and thought that it would make for an interesting element in the case design. In the center is a blue LED mounted in a LED socket. The black thing on the work bench is what the LED socket looks like. The whole drilled in the button is 1/4” in diameter.
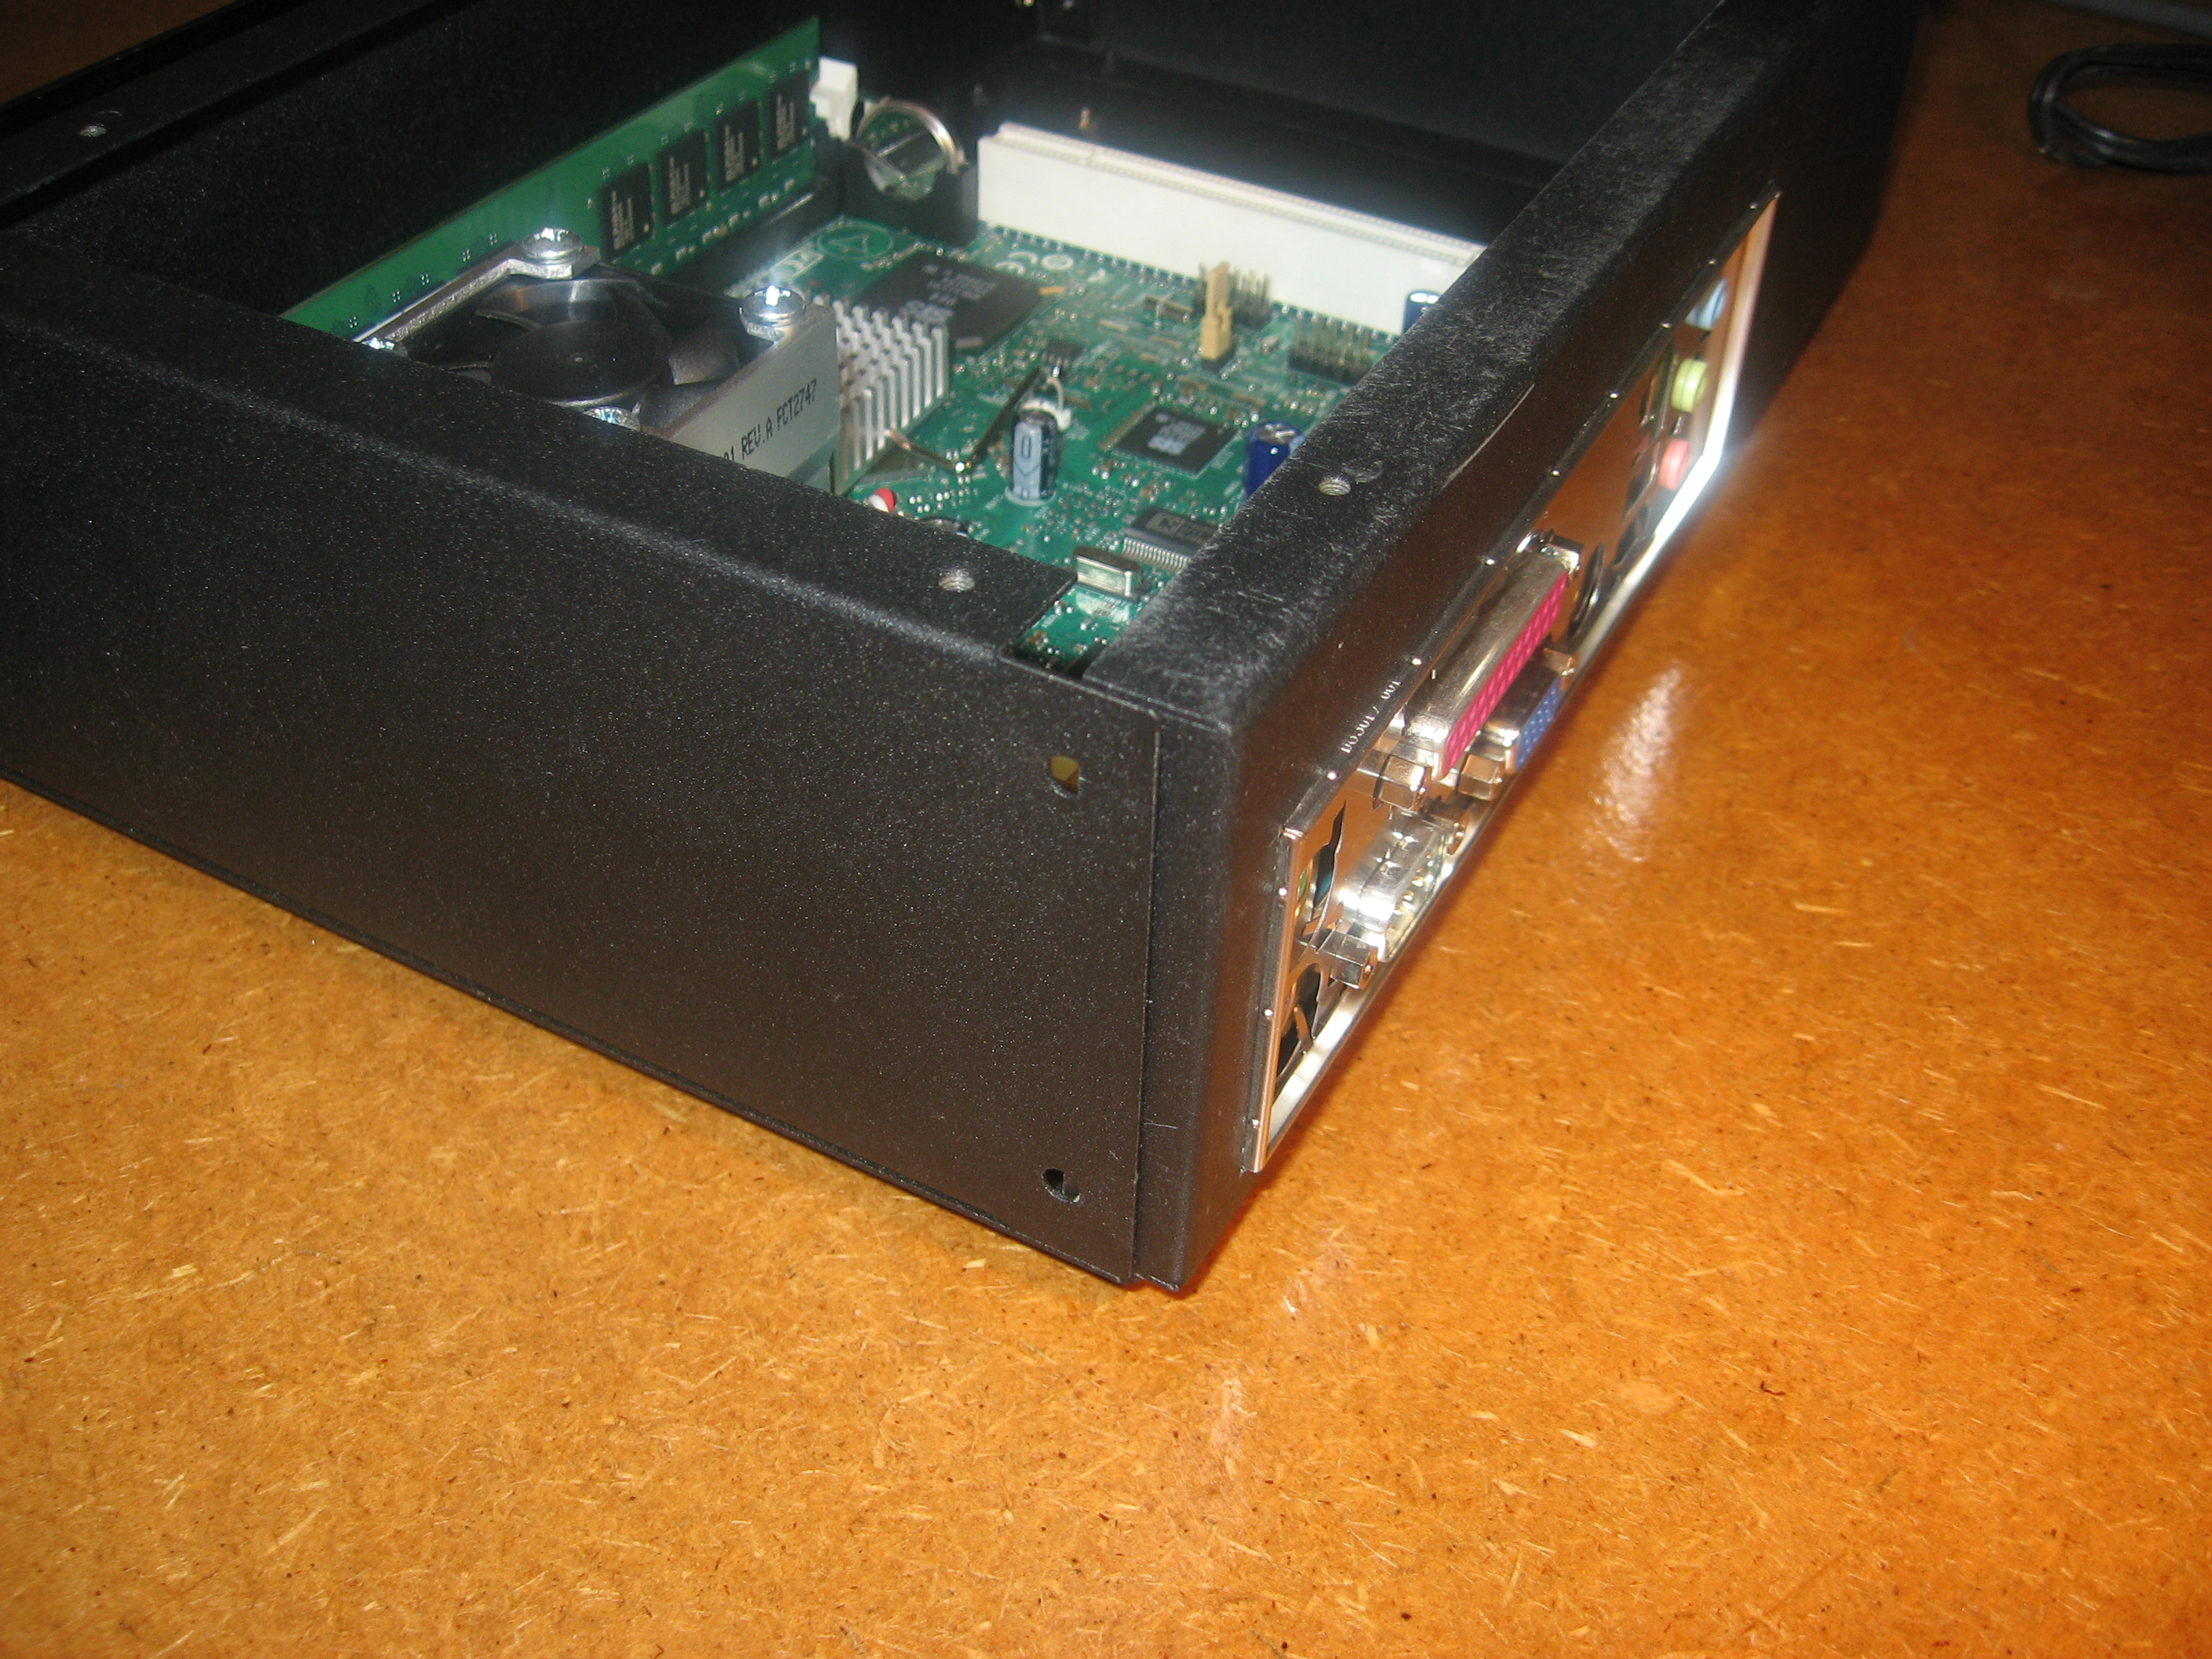
Case Construction
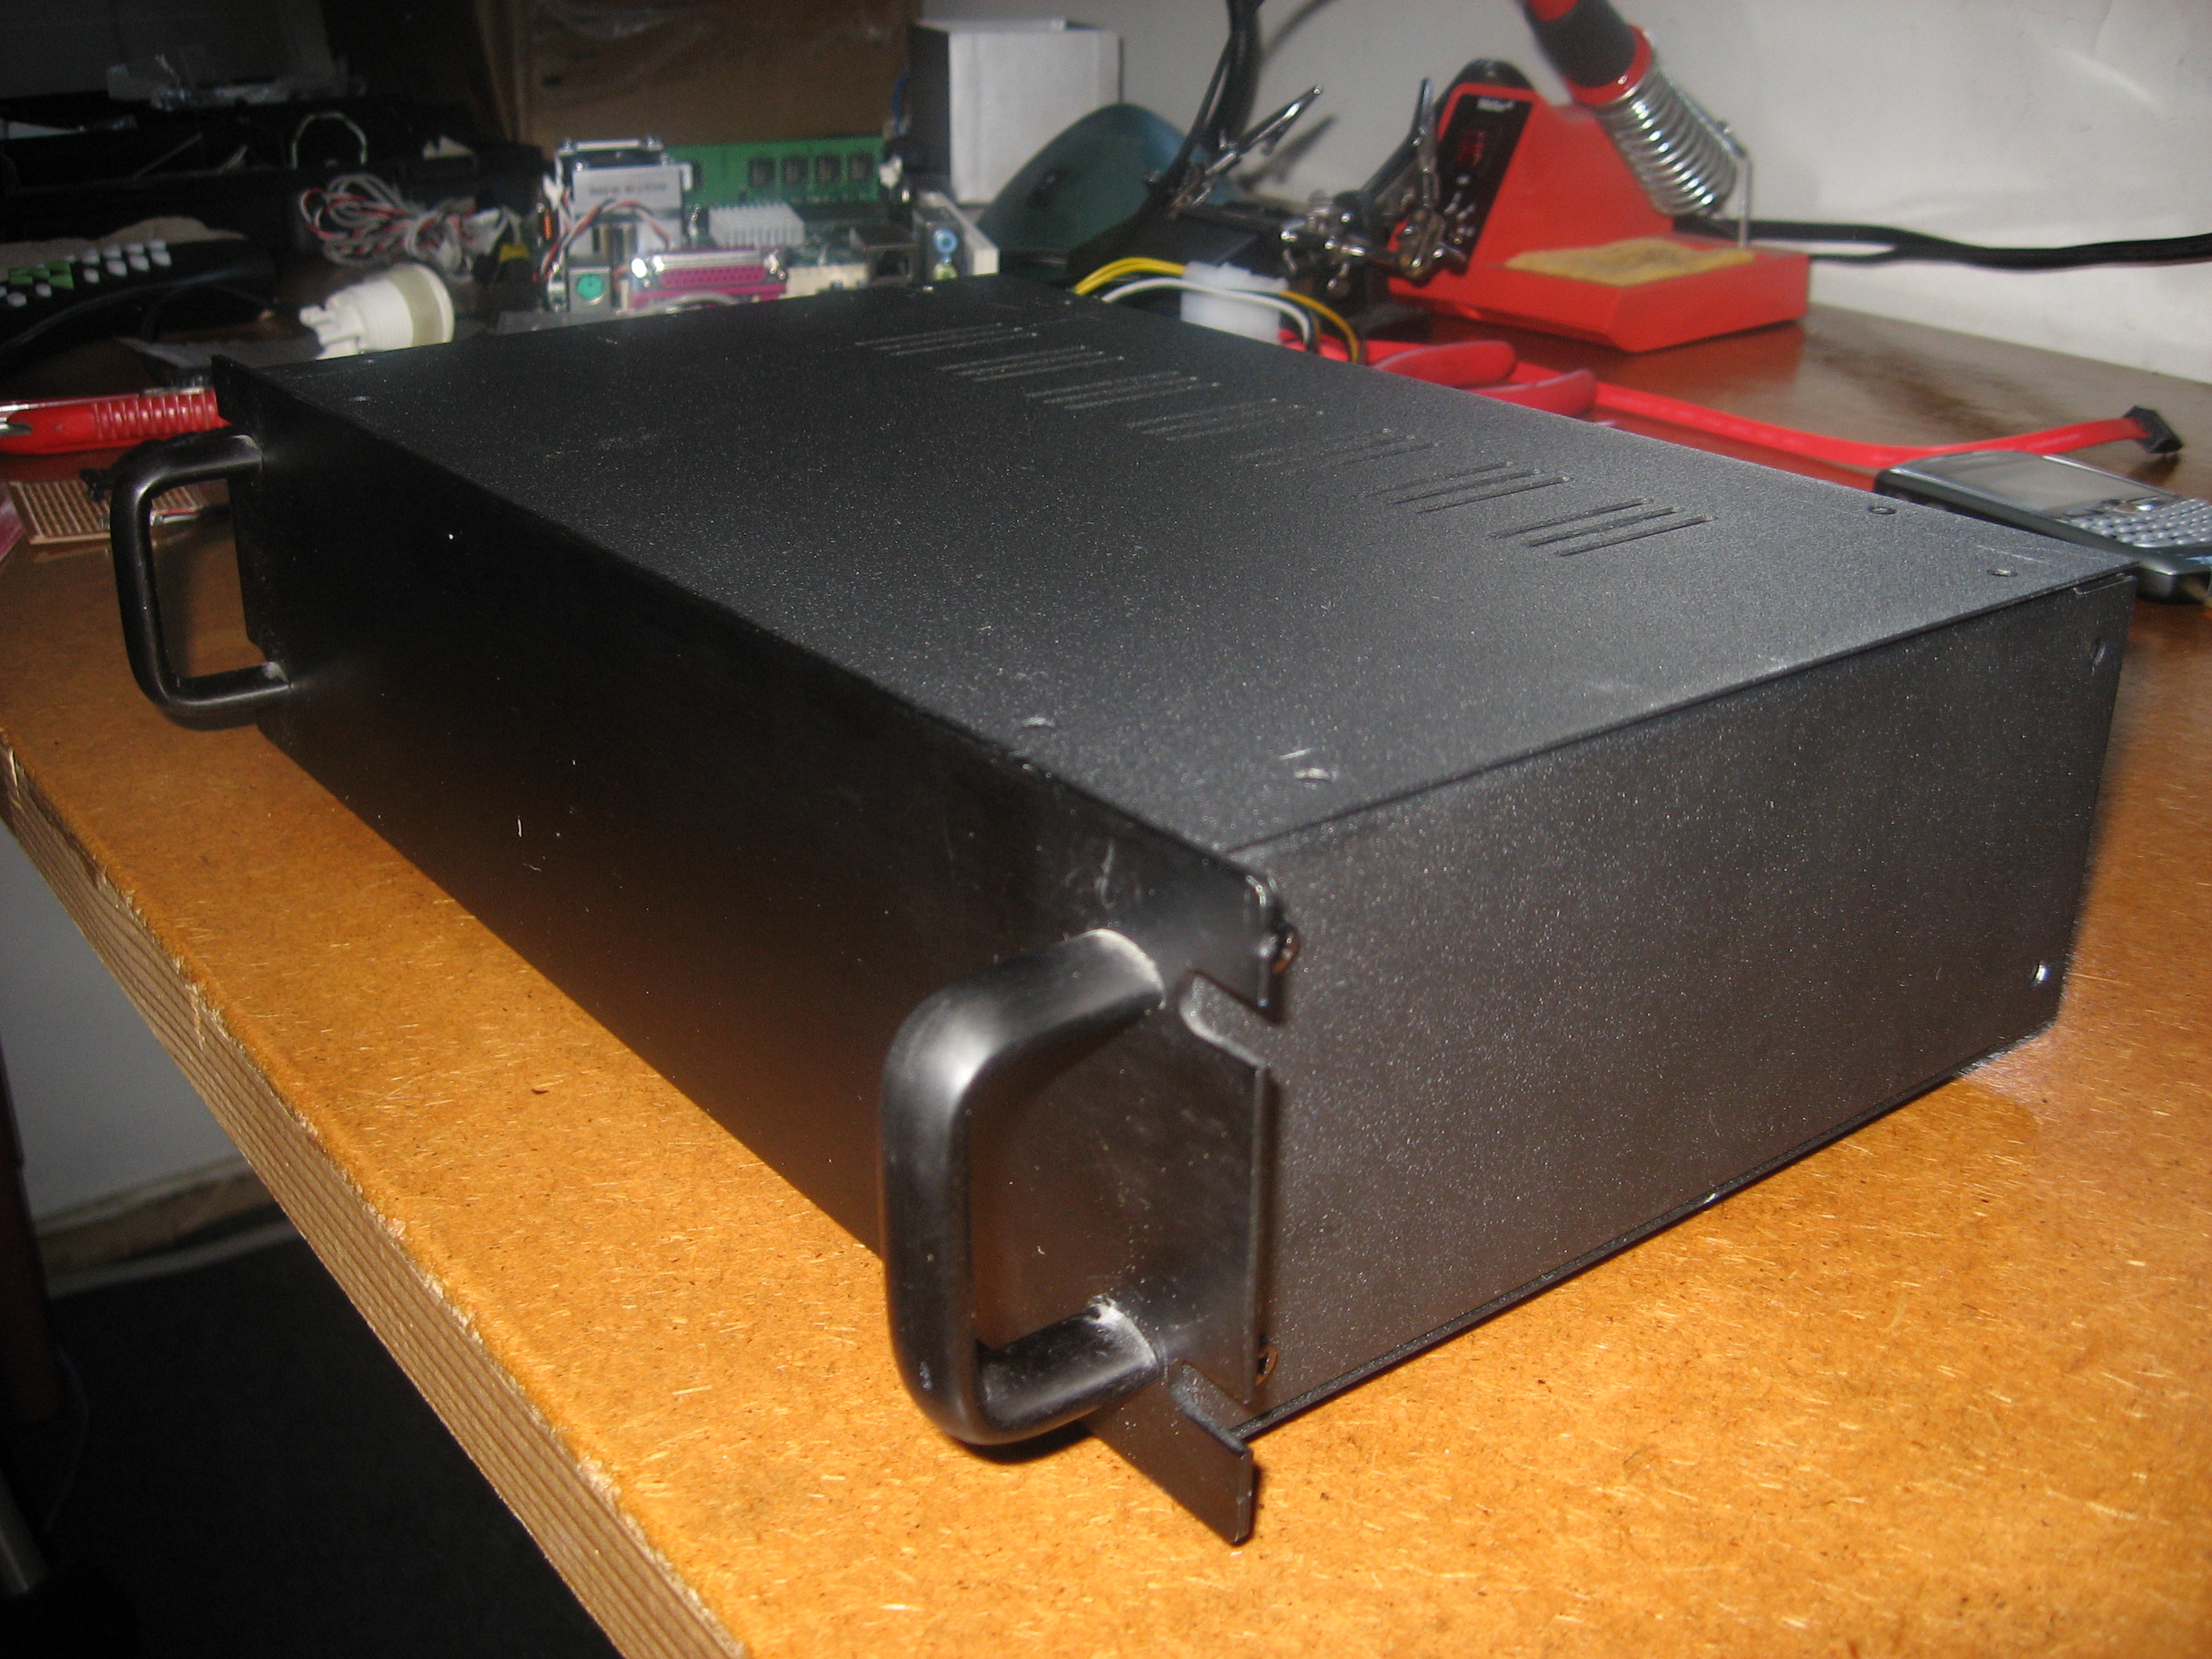
I found this case at Supremetronic near College & Spadina in Toronto. The size is almost perfect (about an 1/8” shy on the depth) and it kinda looks like a rack mount computer case.
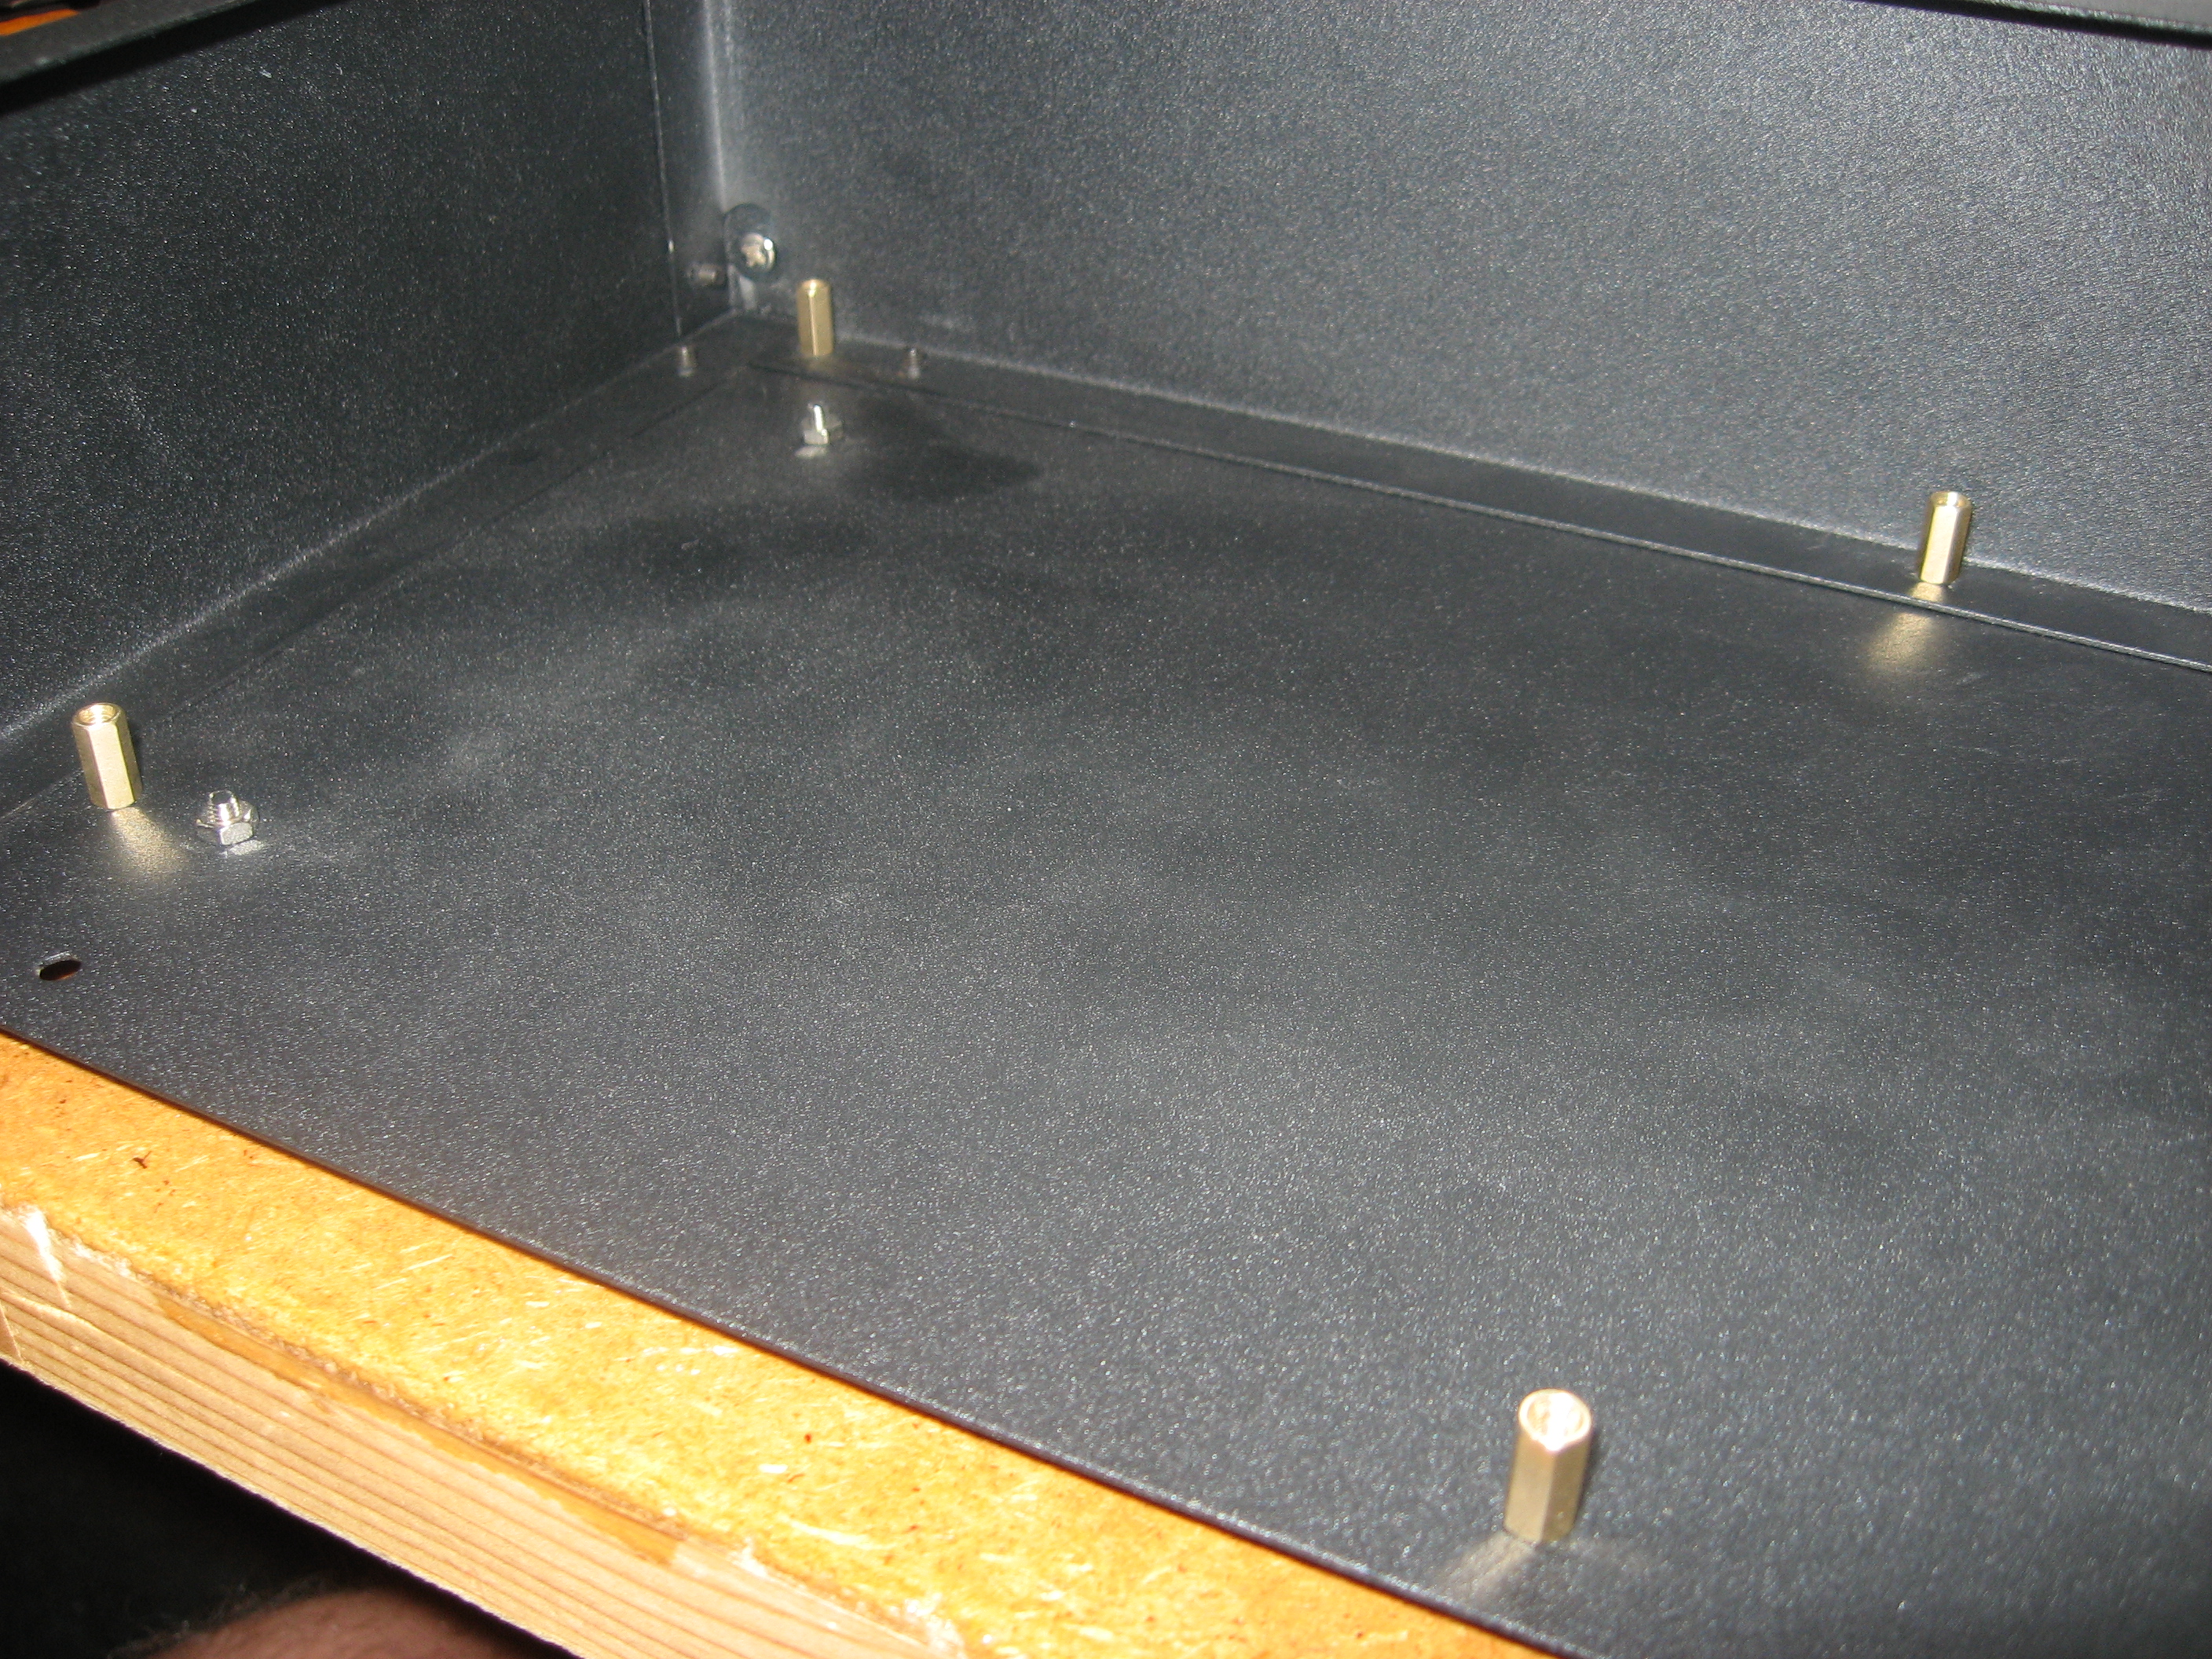
Supremetronic also carries a wide variety of hardware for mounting components inside of cases such as machine thread screws, nuts, and threaded studs.
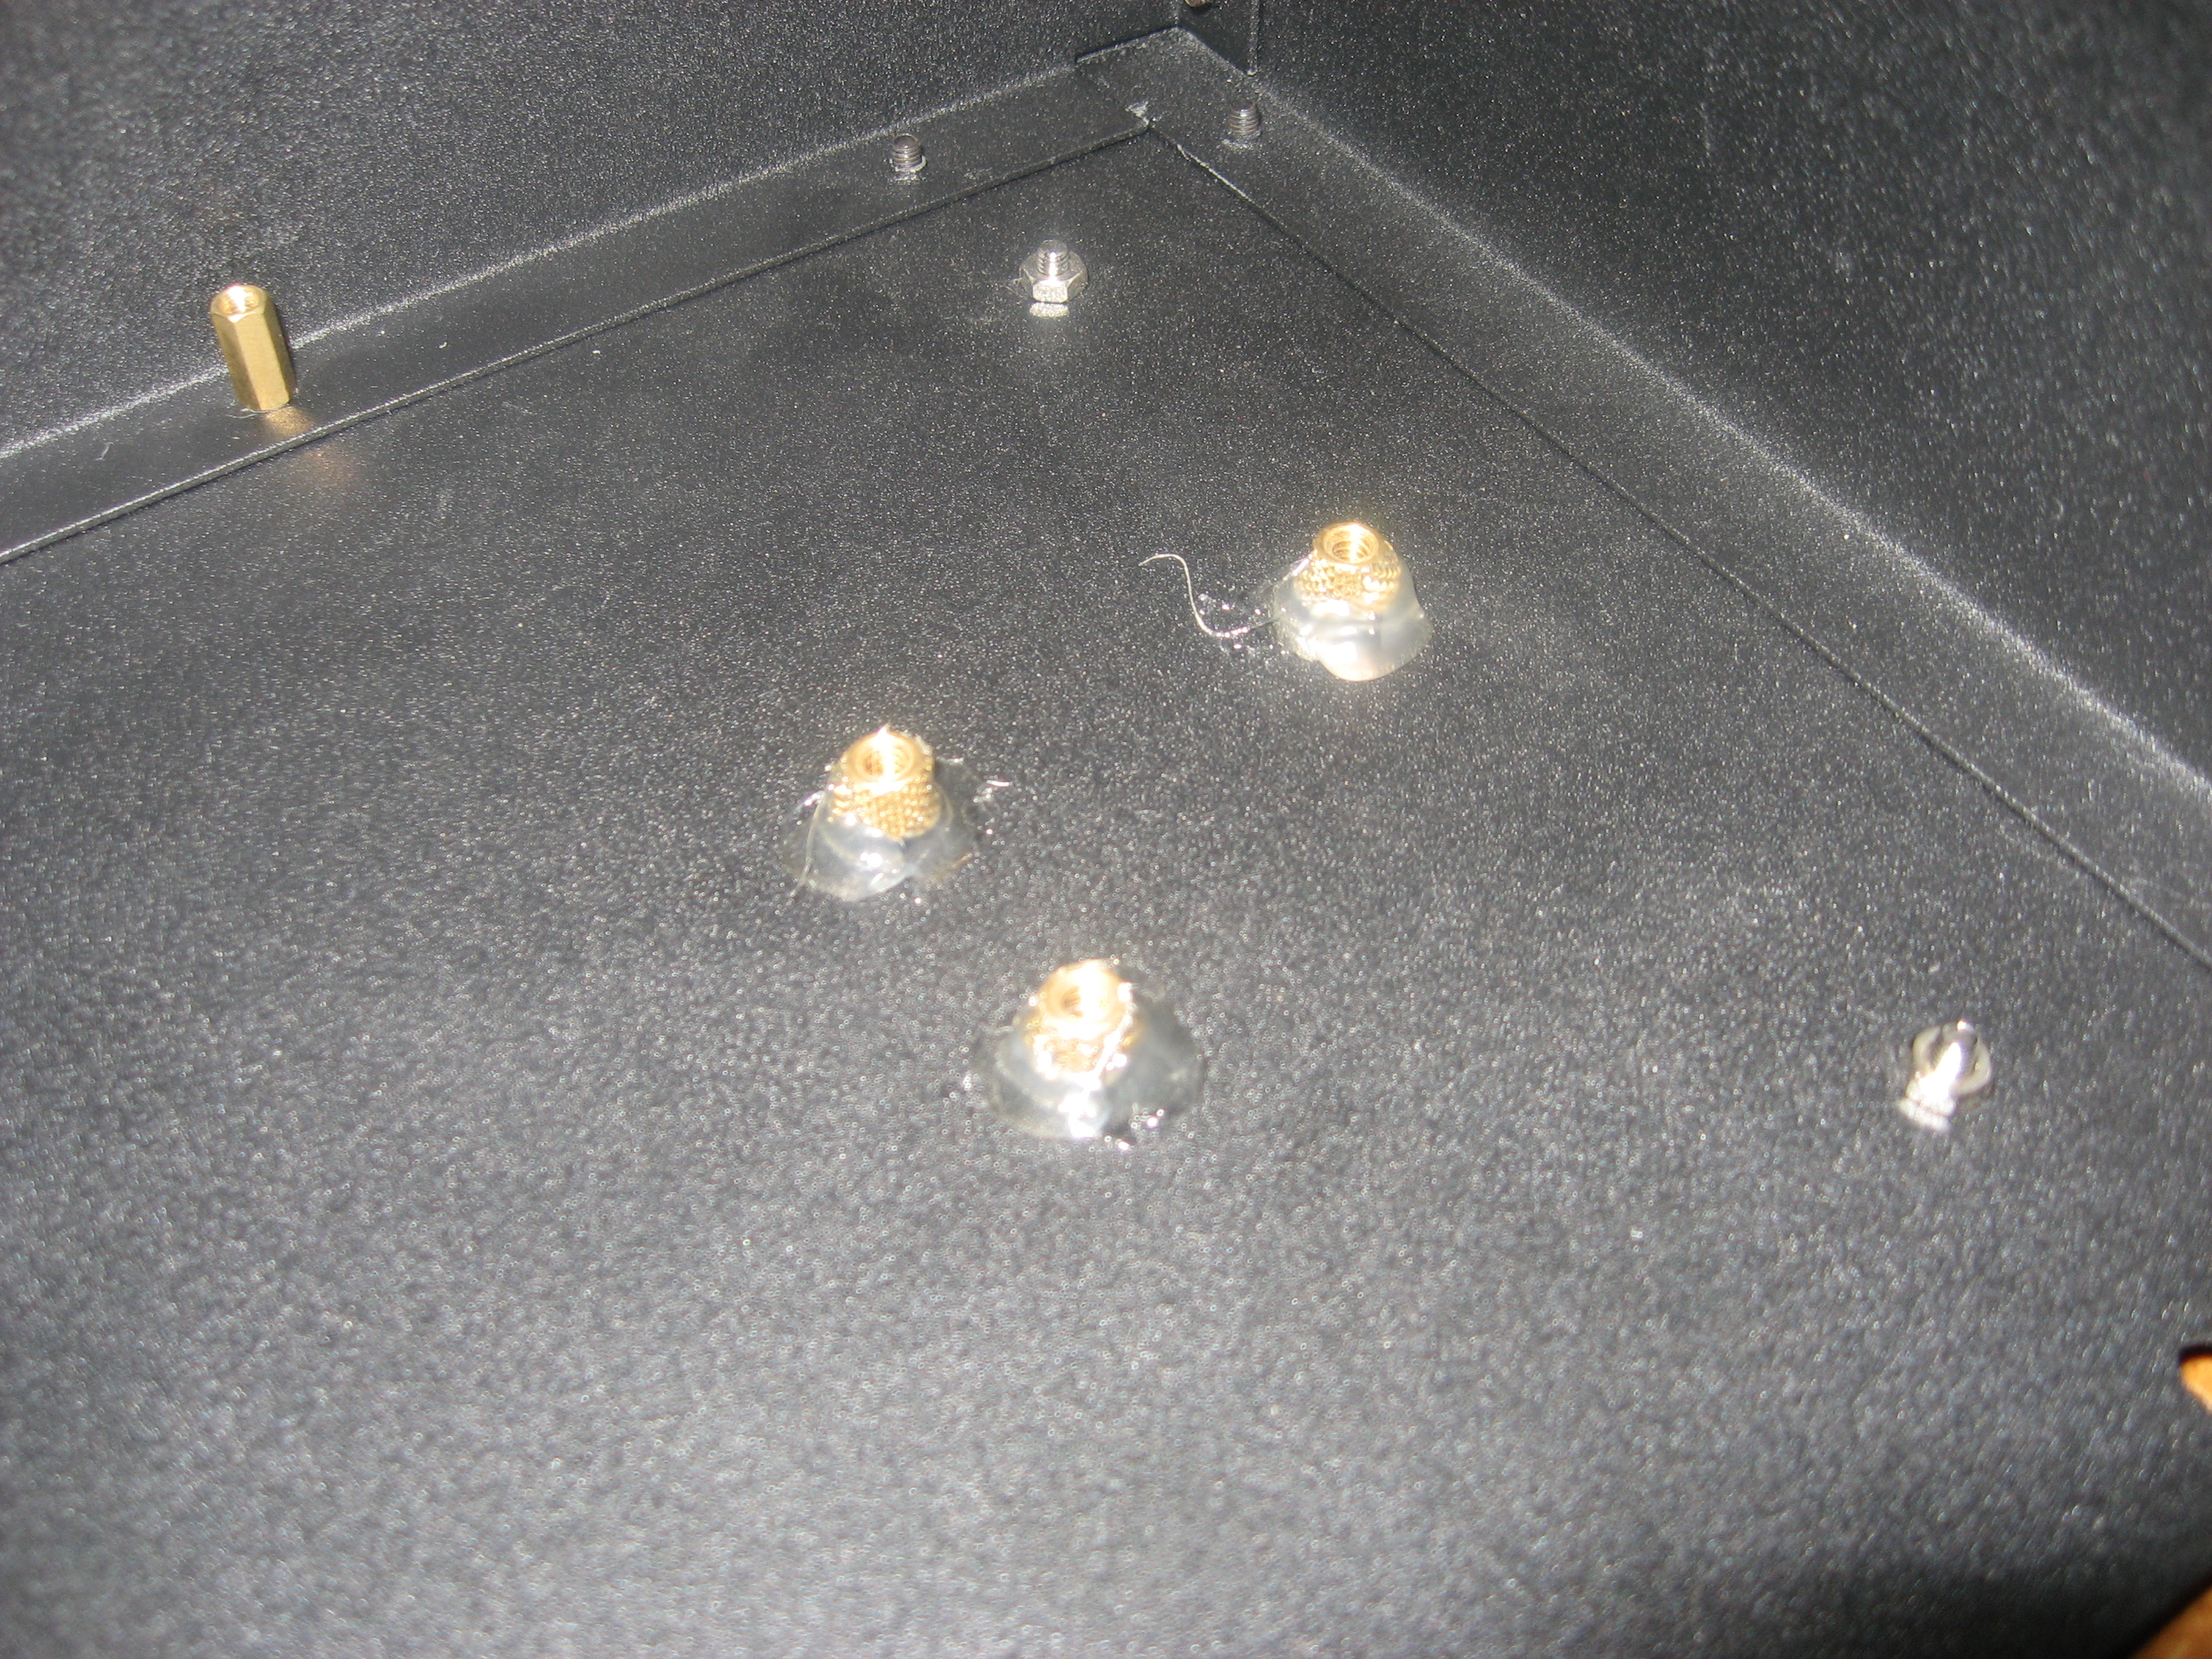
These studs for mounting the motherboard are fitted into wholes drilled into the bottom plate with nuts on the other side.
I used hot glue and some threaded copper lugs for mounting the CF-to-SATA adaptor. This way I can easily remove the mounts later on and move them if needed.
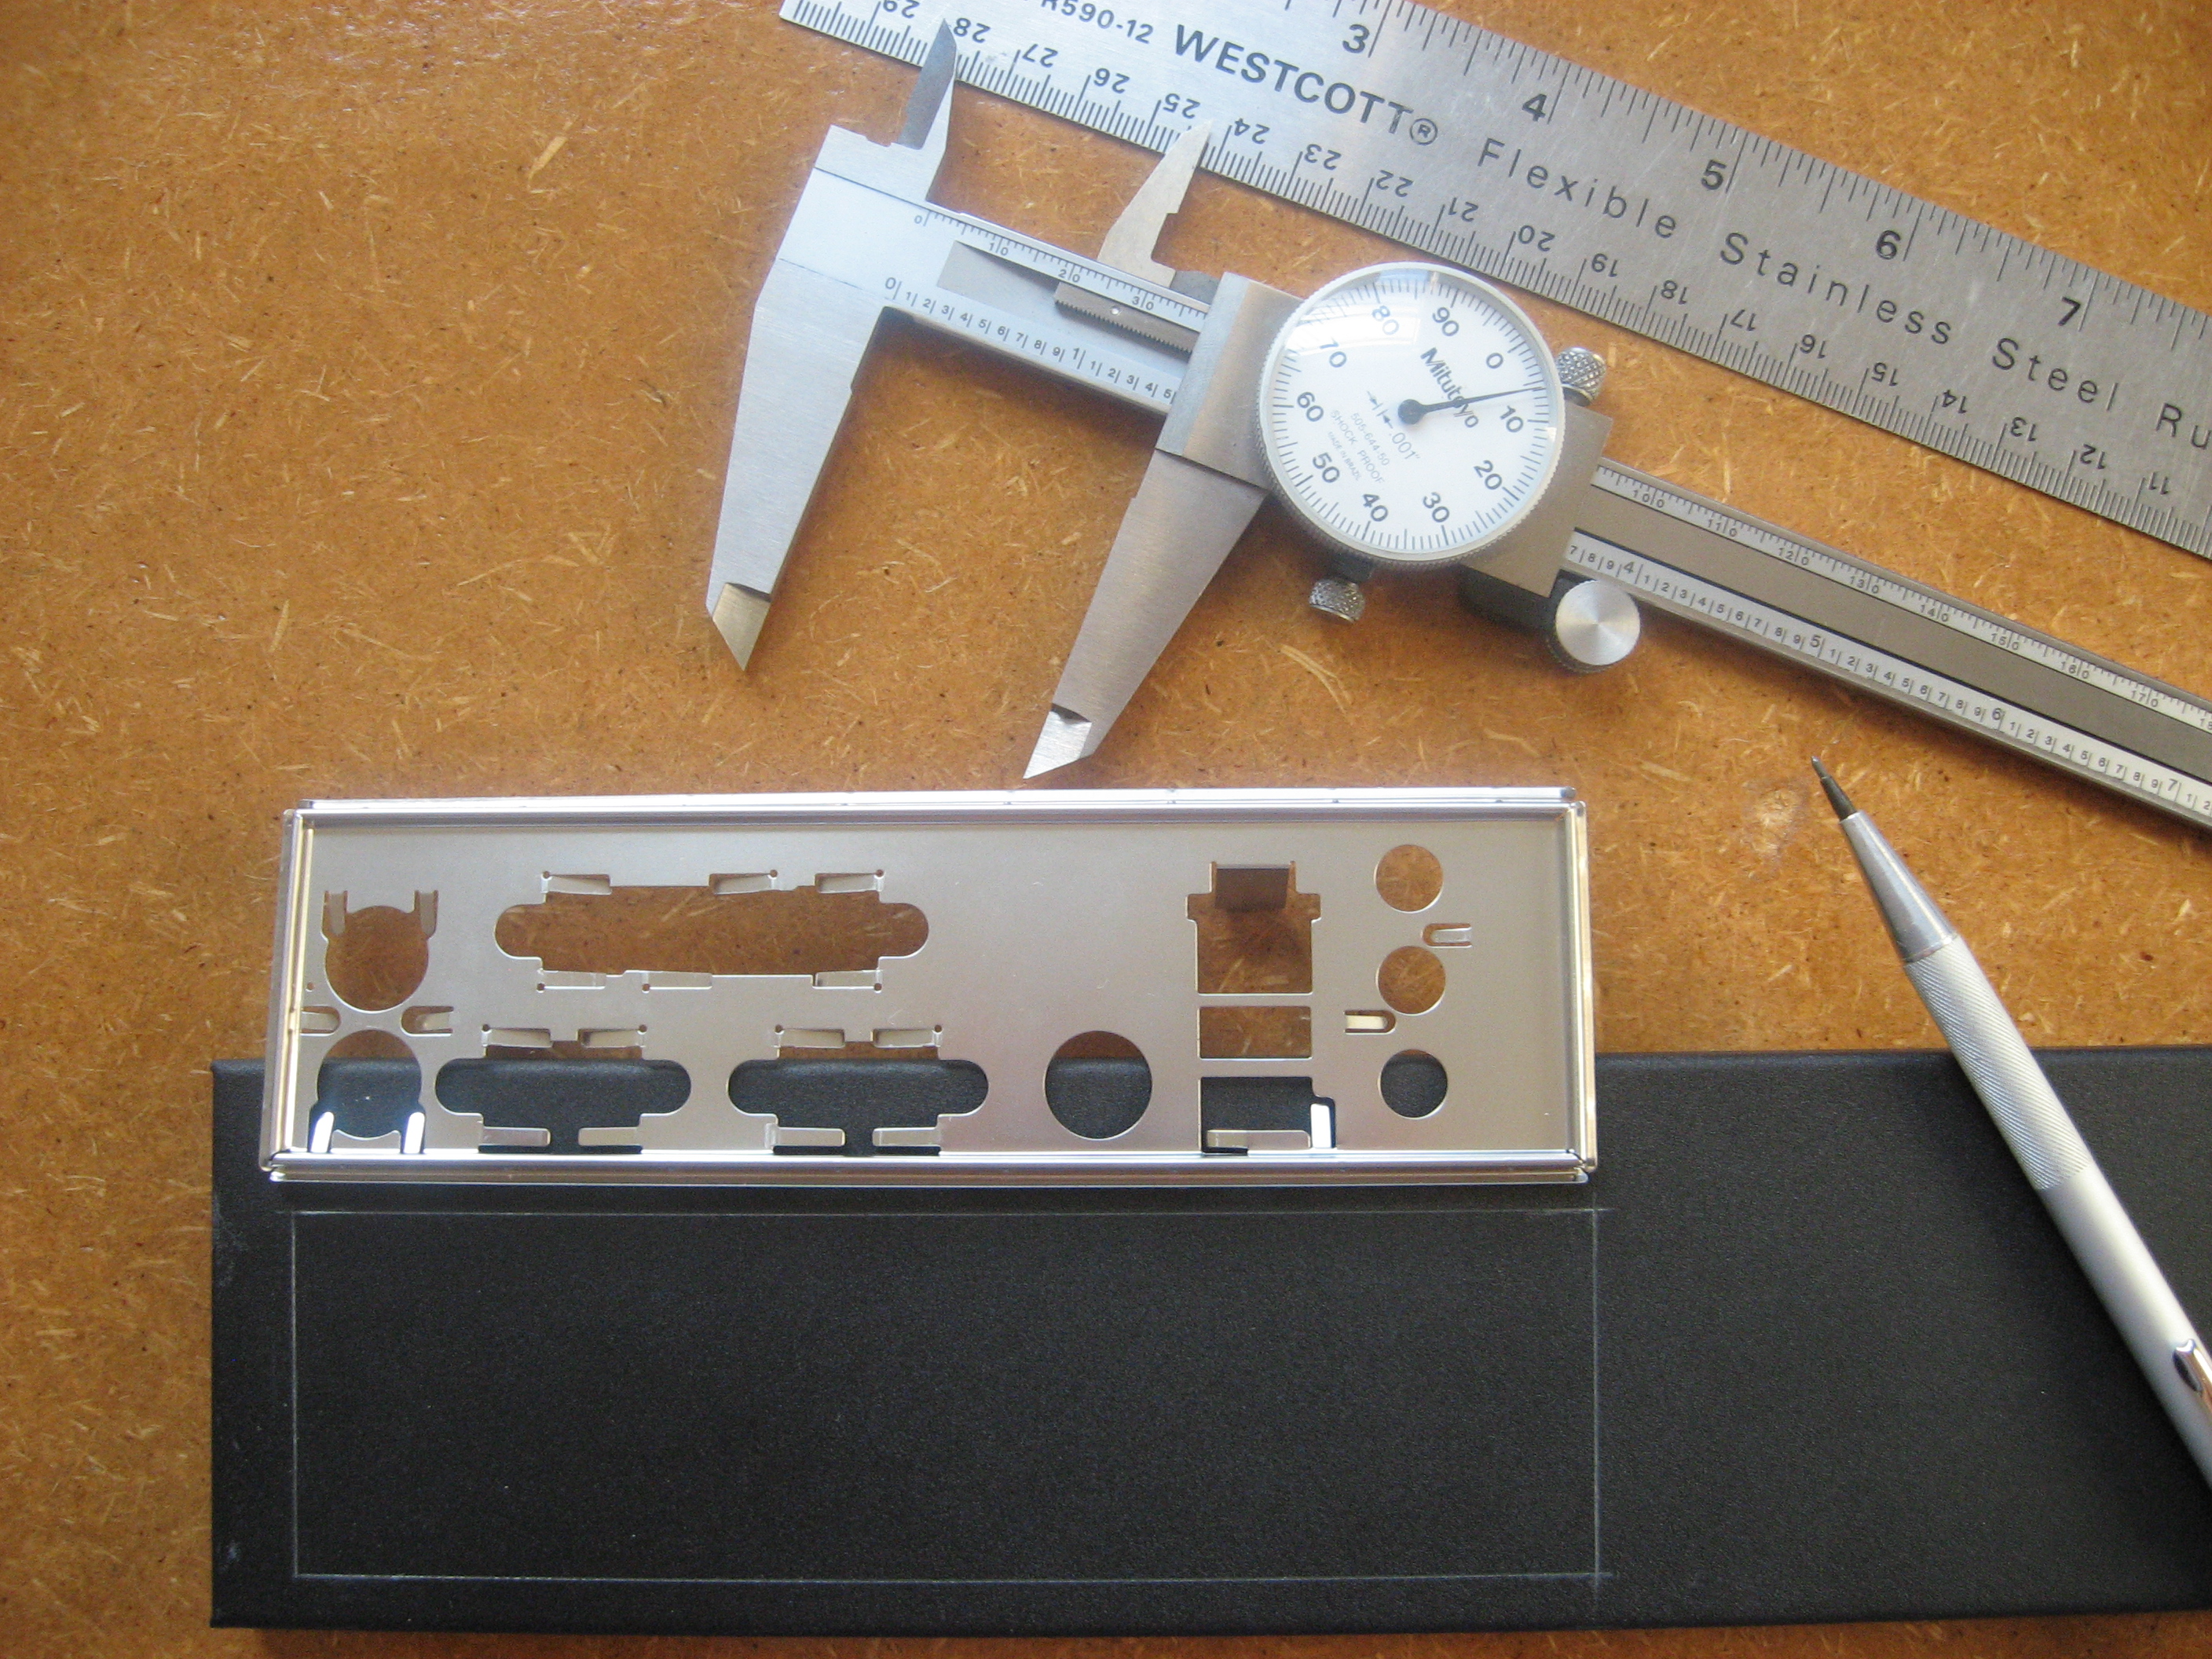
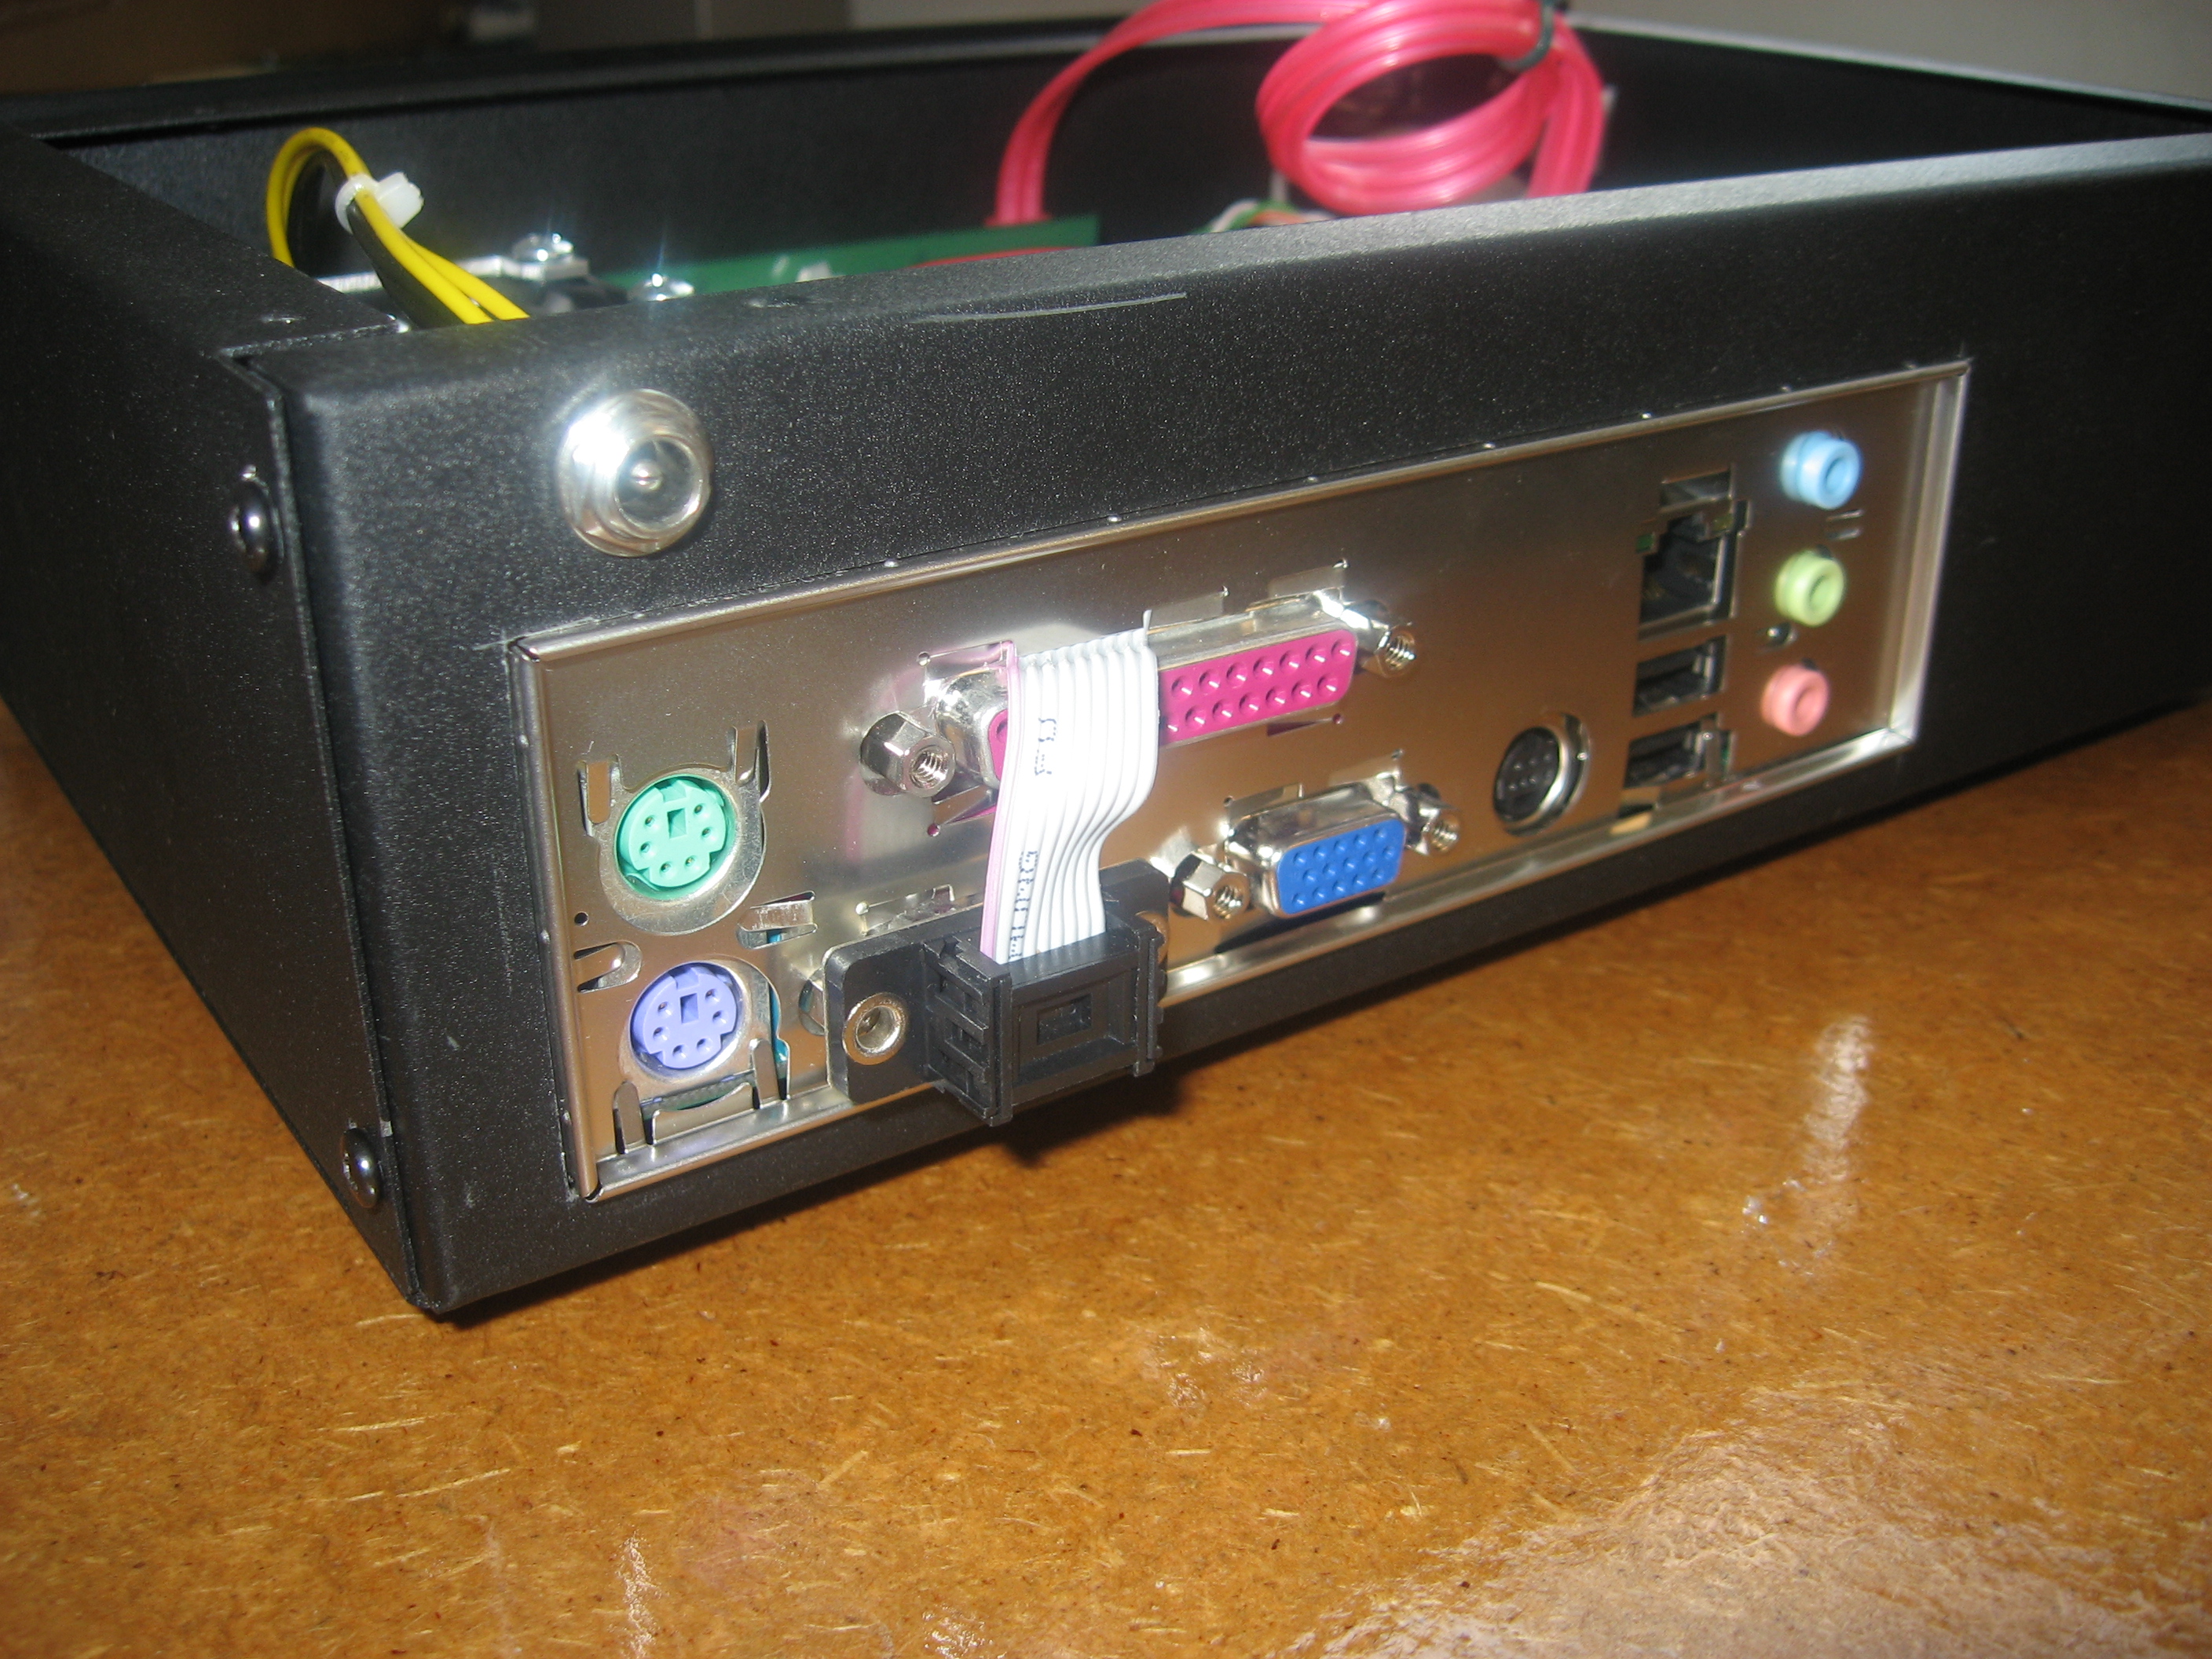
Rear IO Panel
With the motherboard in place, dry fitting the IO panel reveals the distance from the bottom edge and left edge of the case where the panel cutout should go.
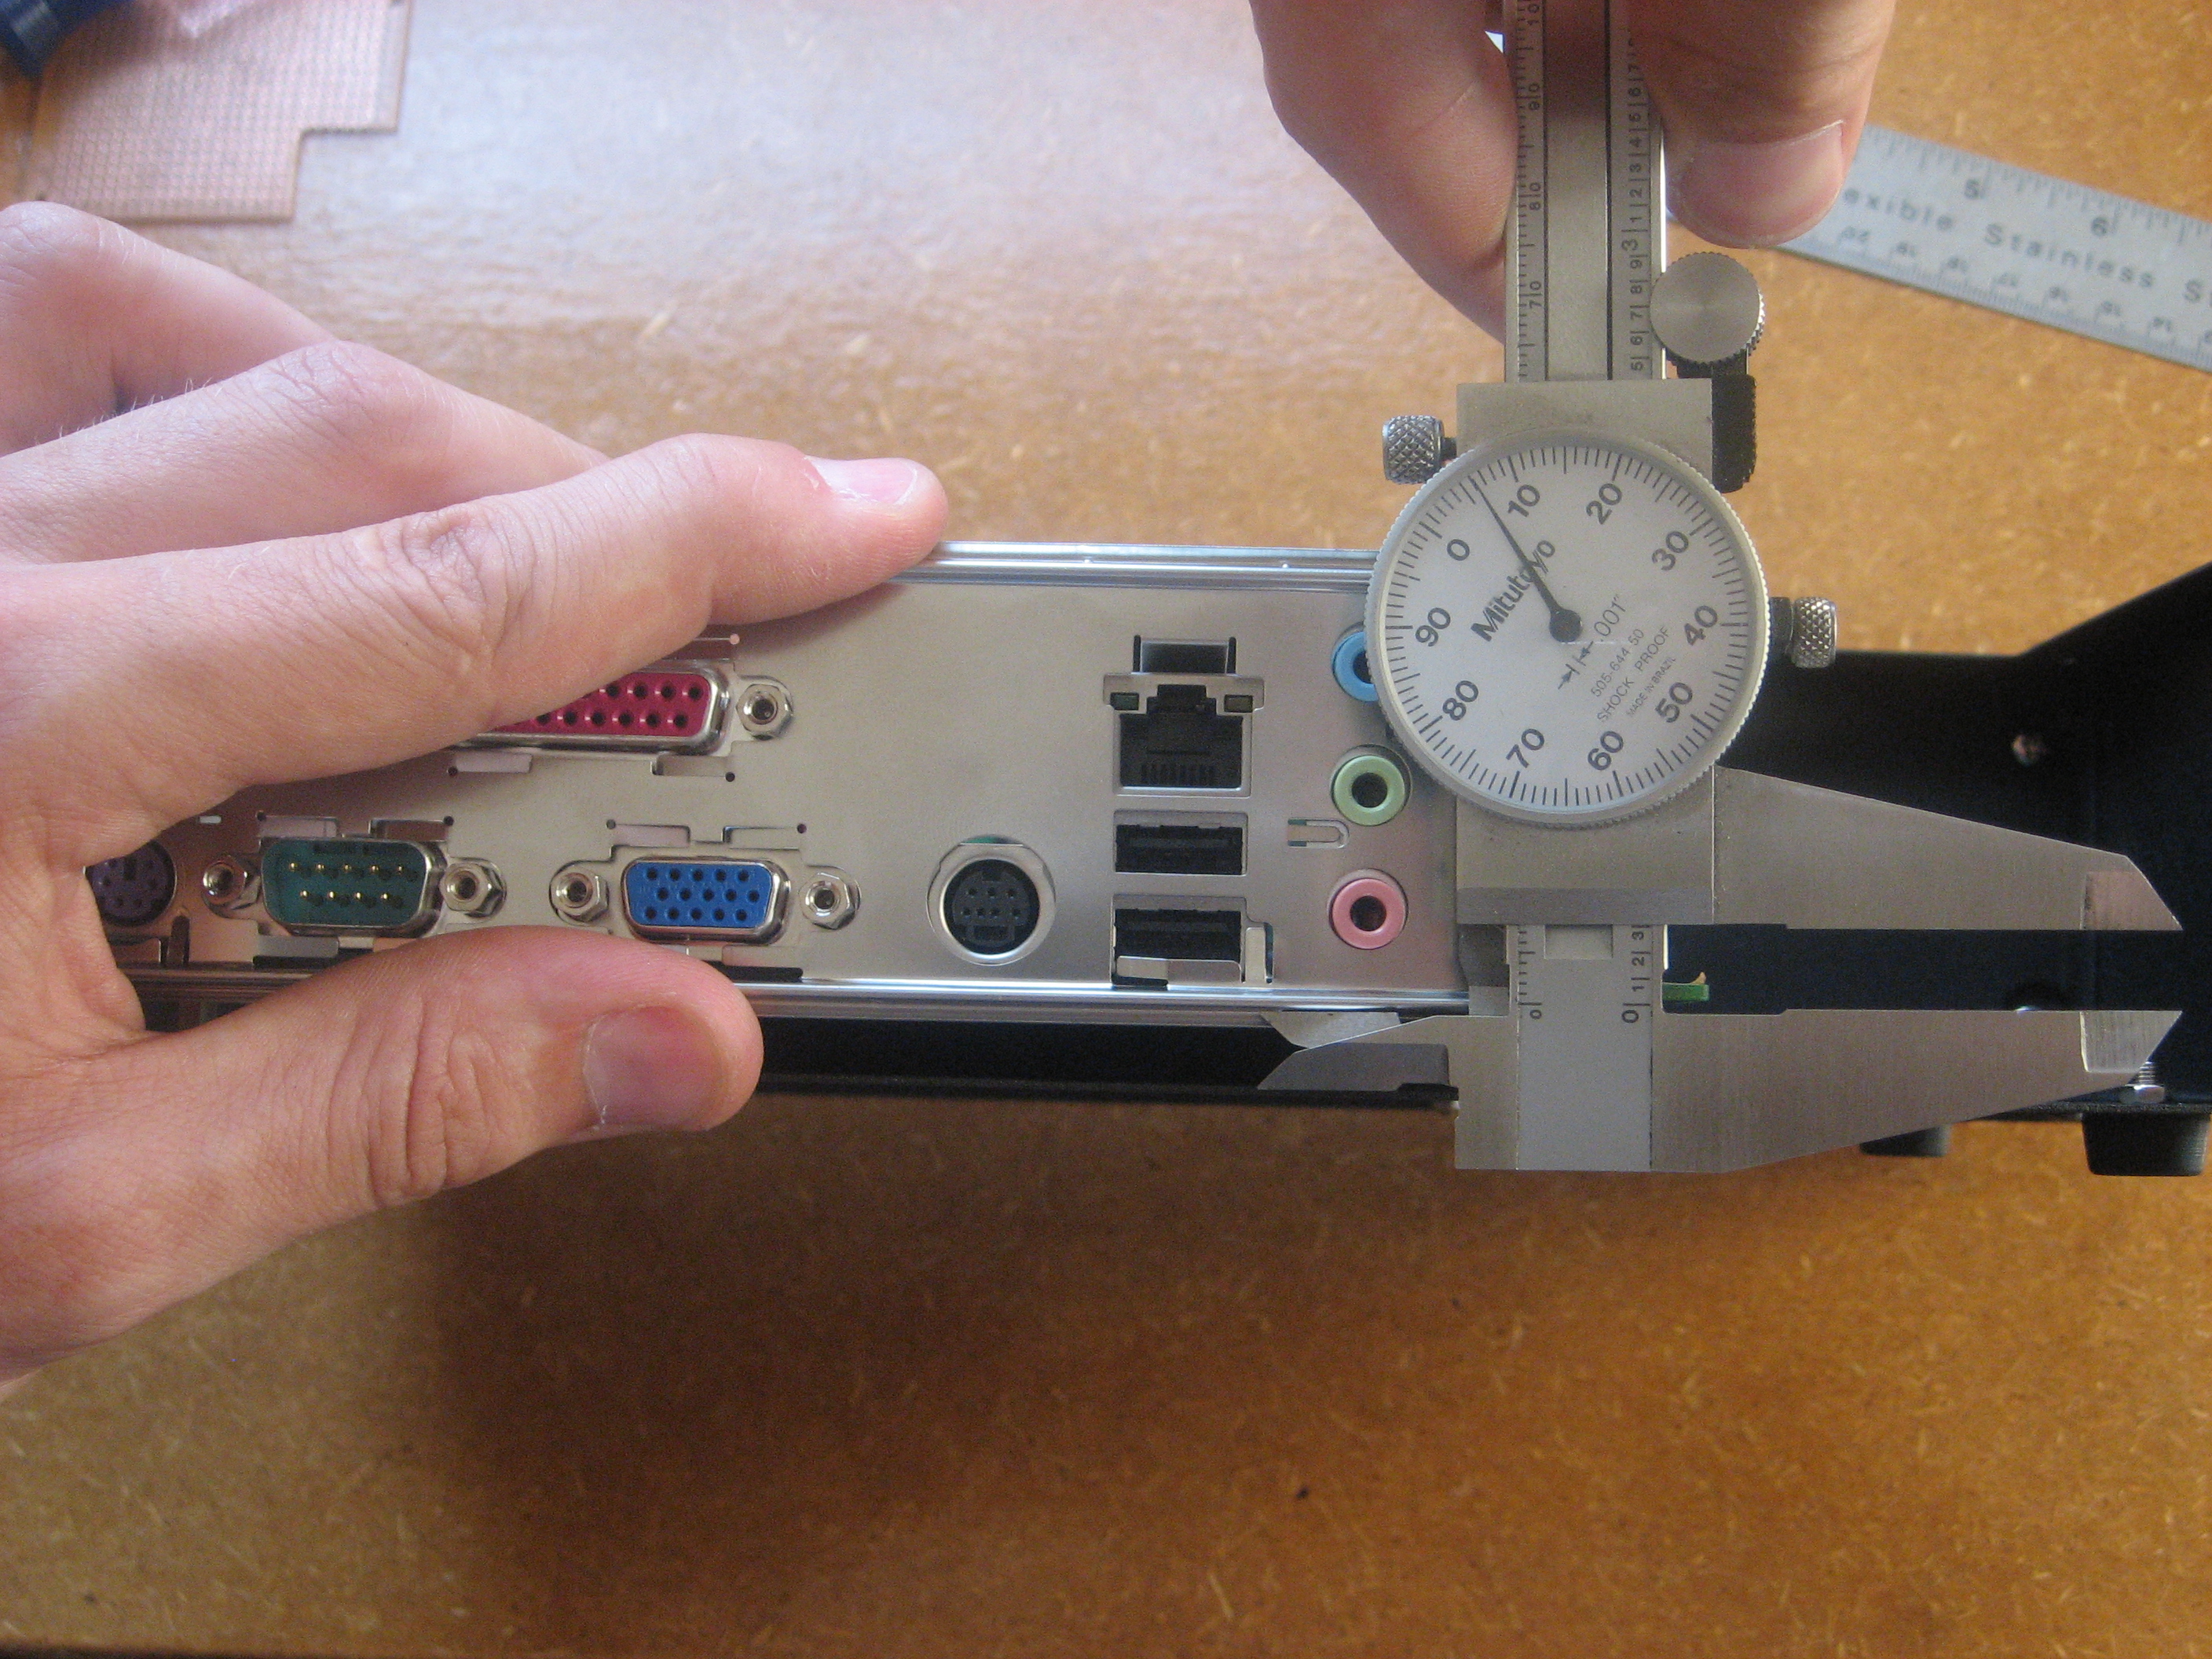
You know that old adage measure twice cut once? Well I can’t stress it enough. Some essential tools for precisely laying out lines on steel (and other materials too): vernier caliper, steel straight edge, and a scribe.
With the IO panel in place, you can see how the case was just a bit too small. Pretty easy fix though, just took a .150” file and elongated all screw holes by .150”.
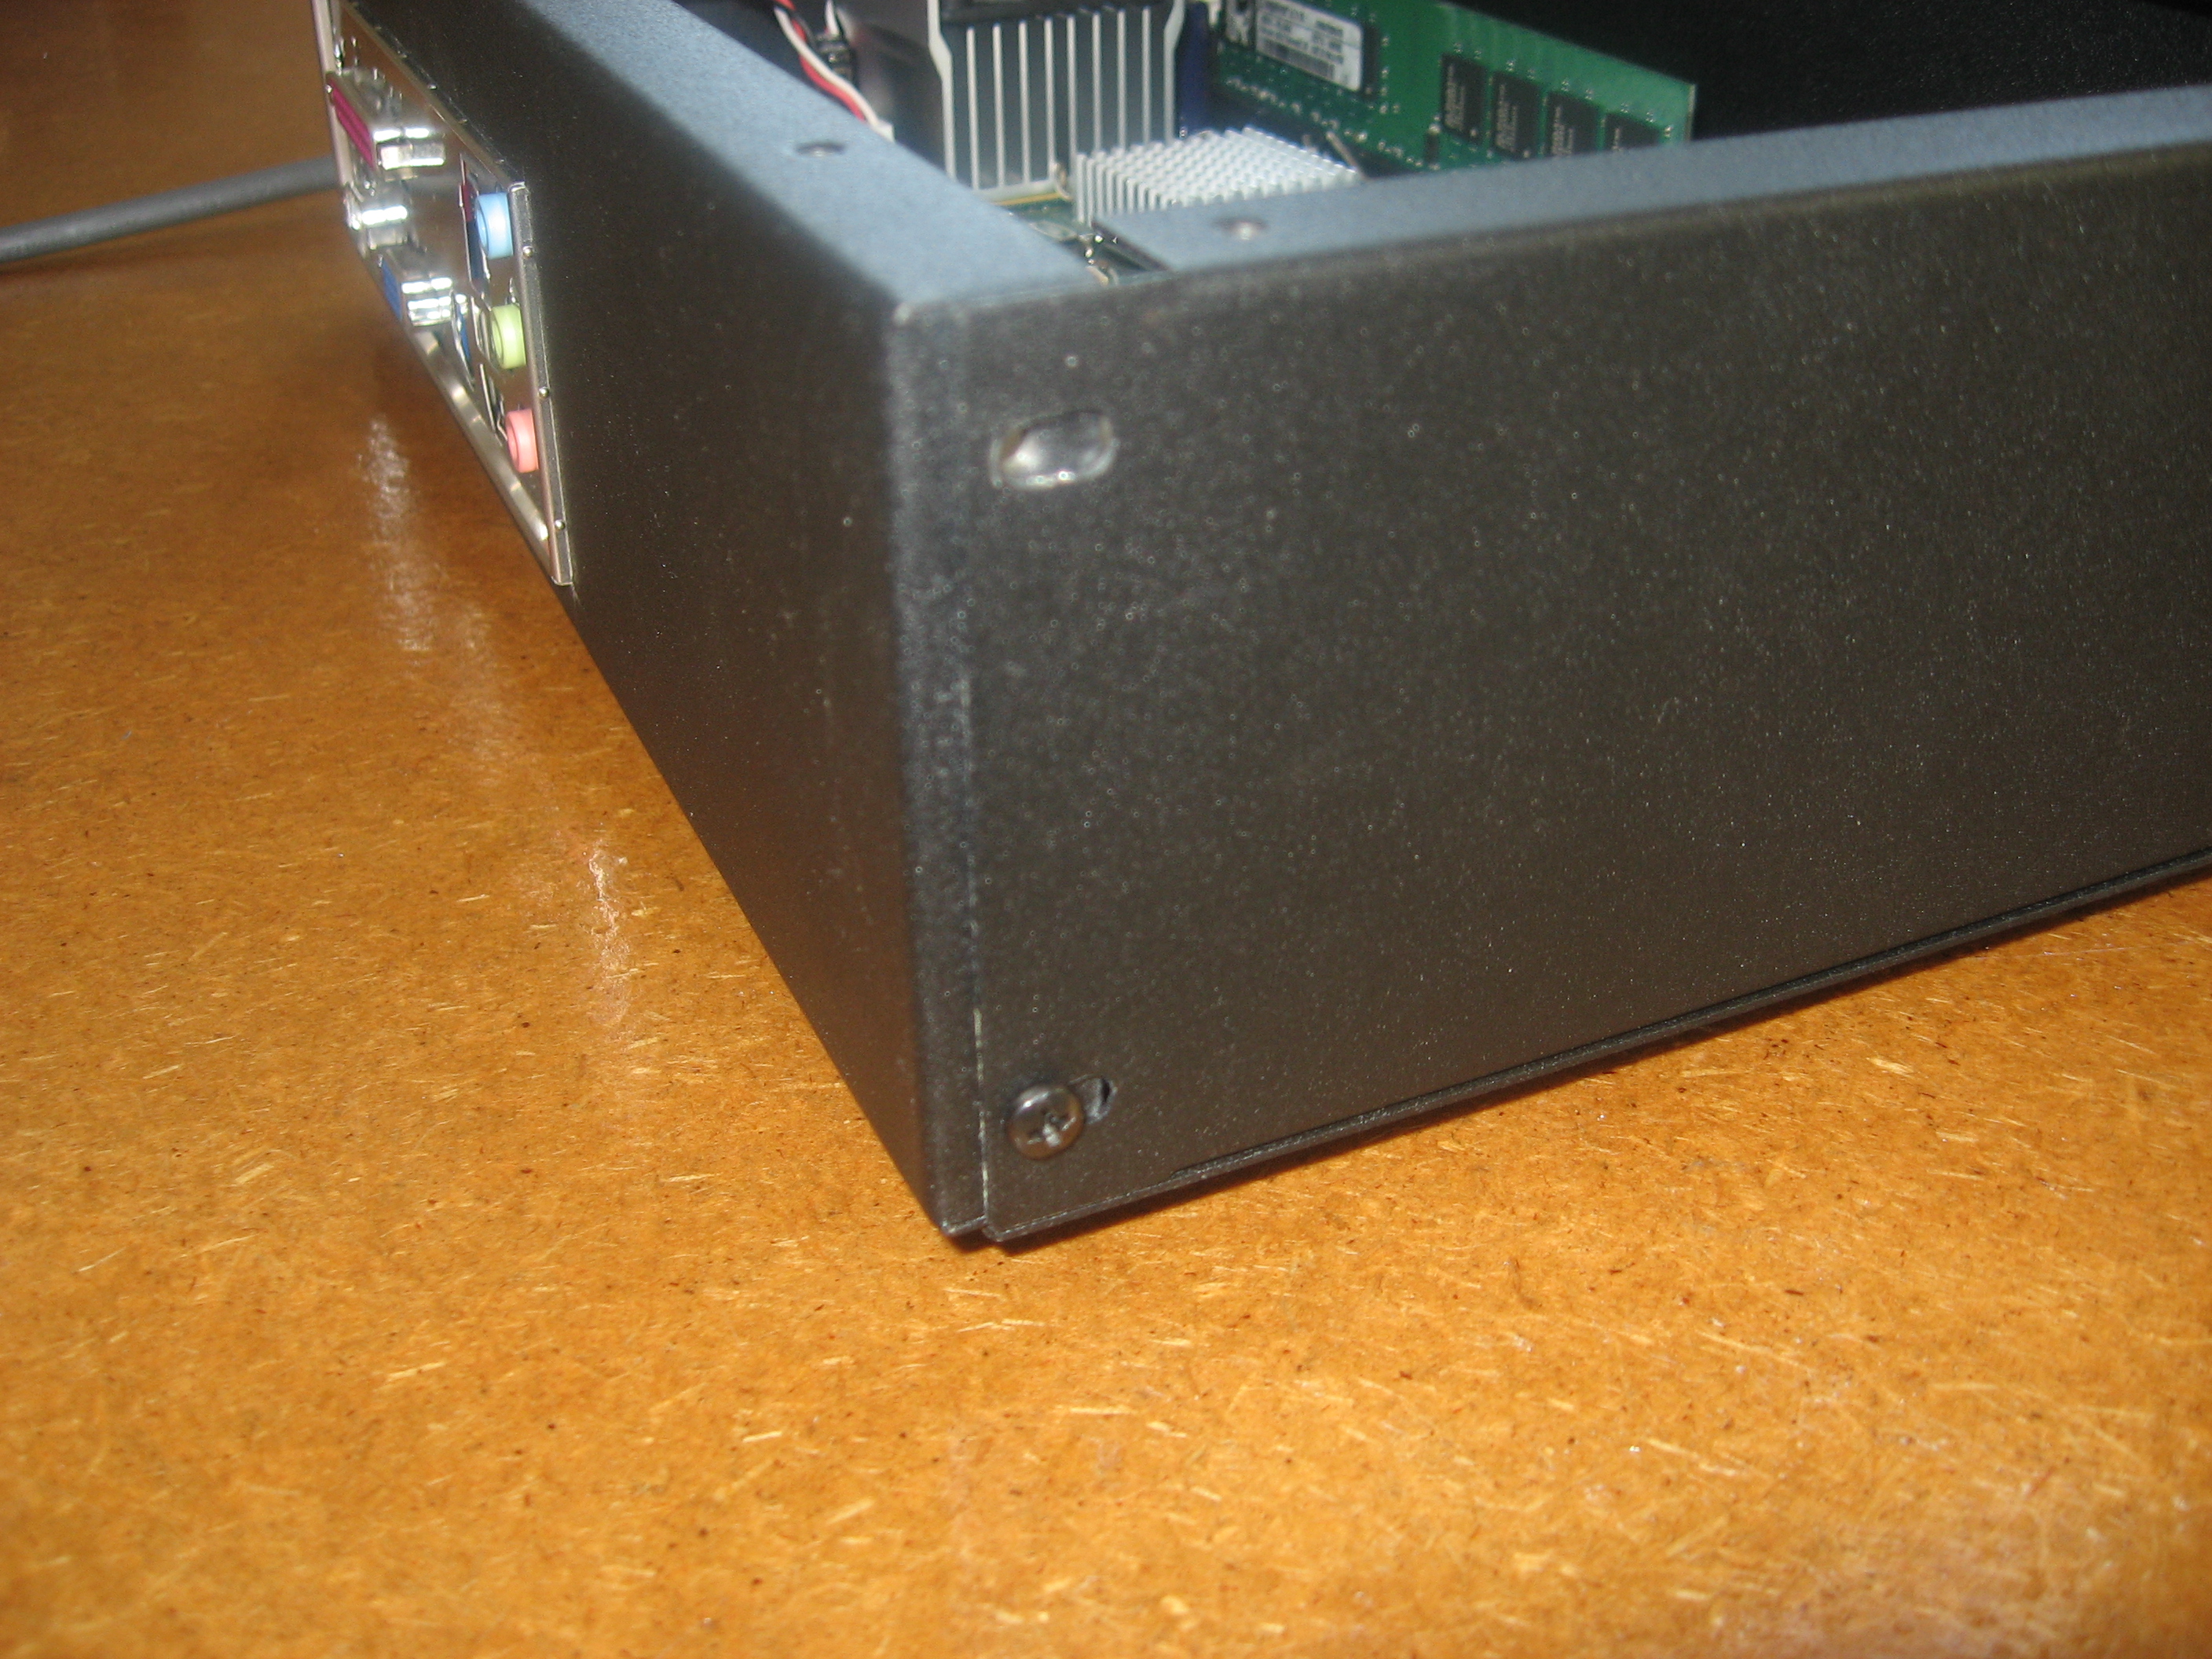
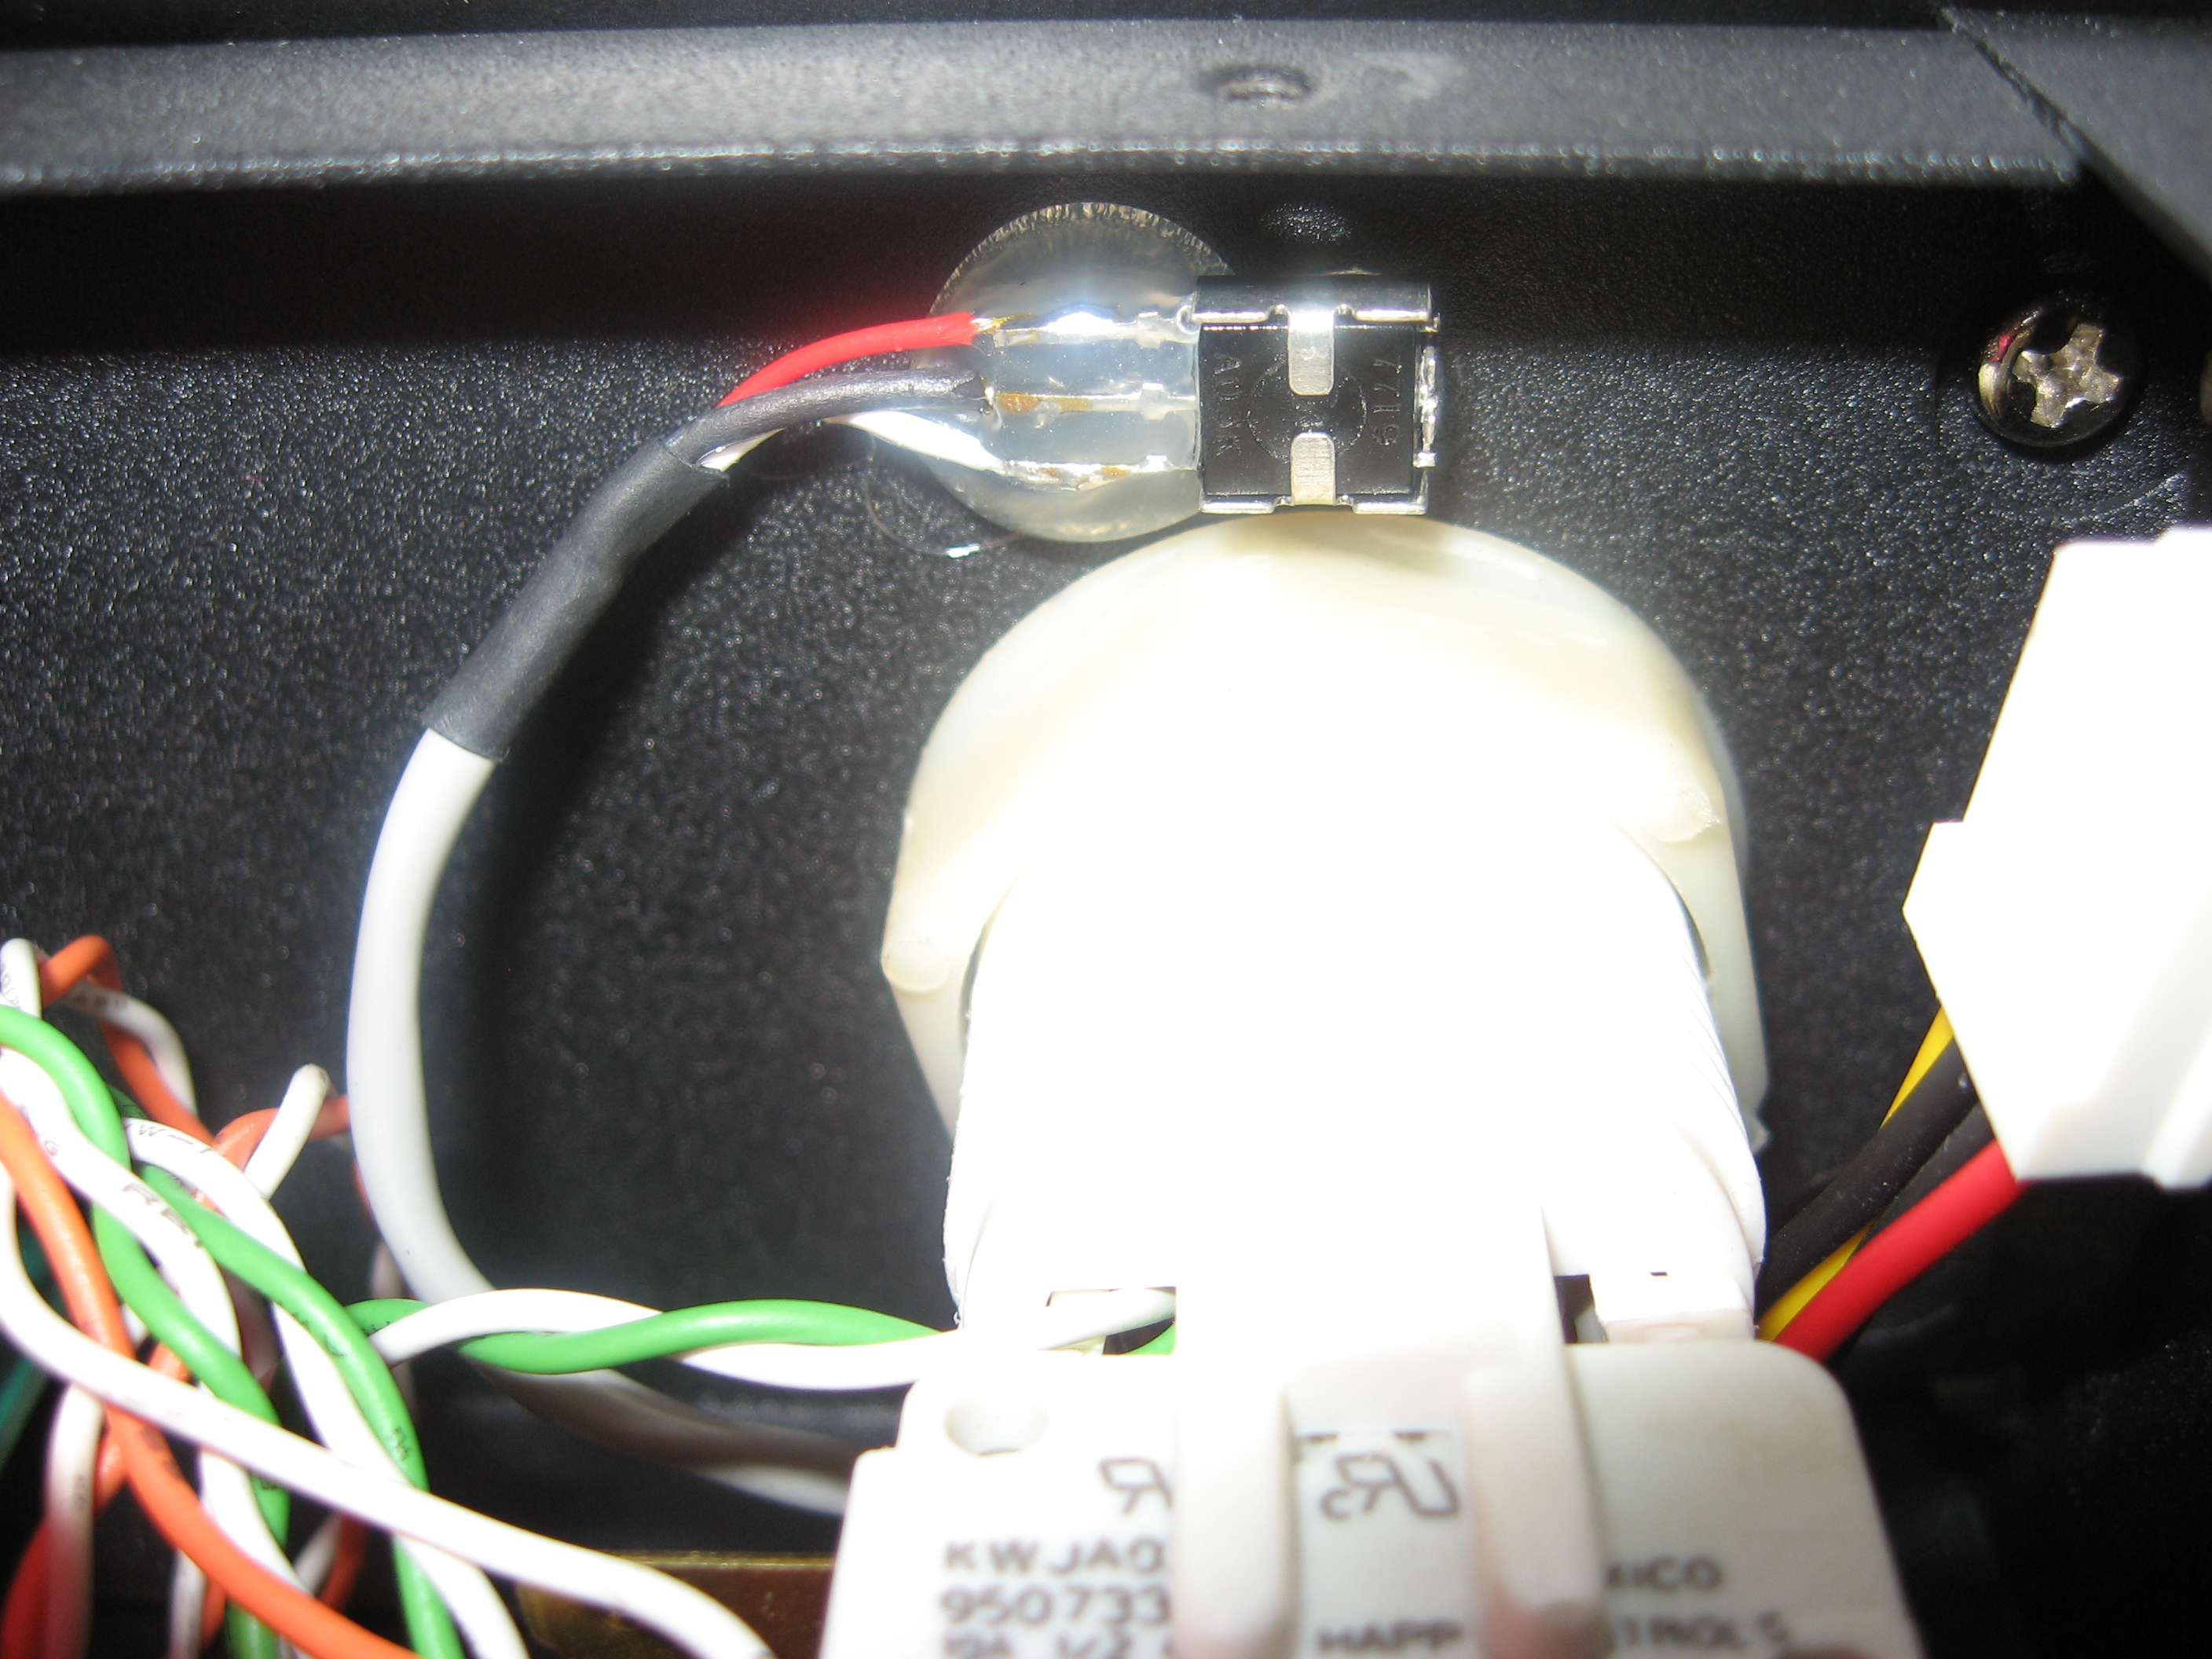
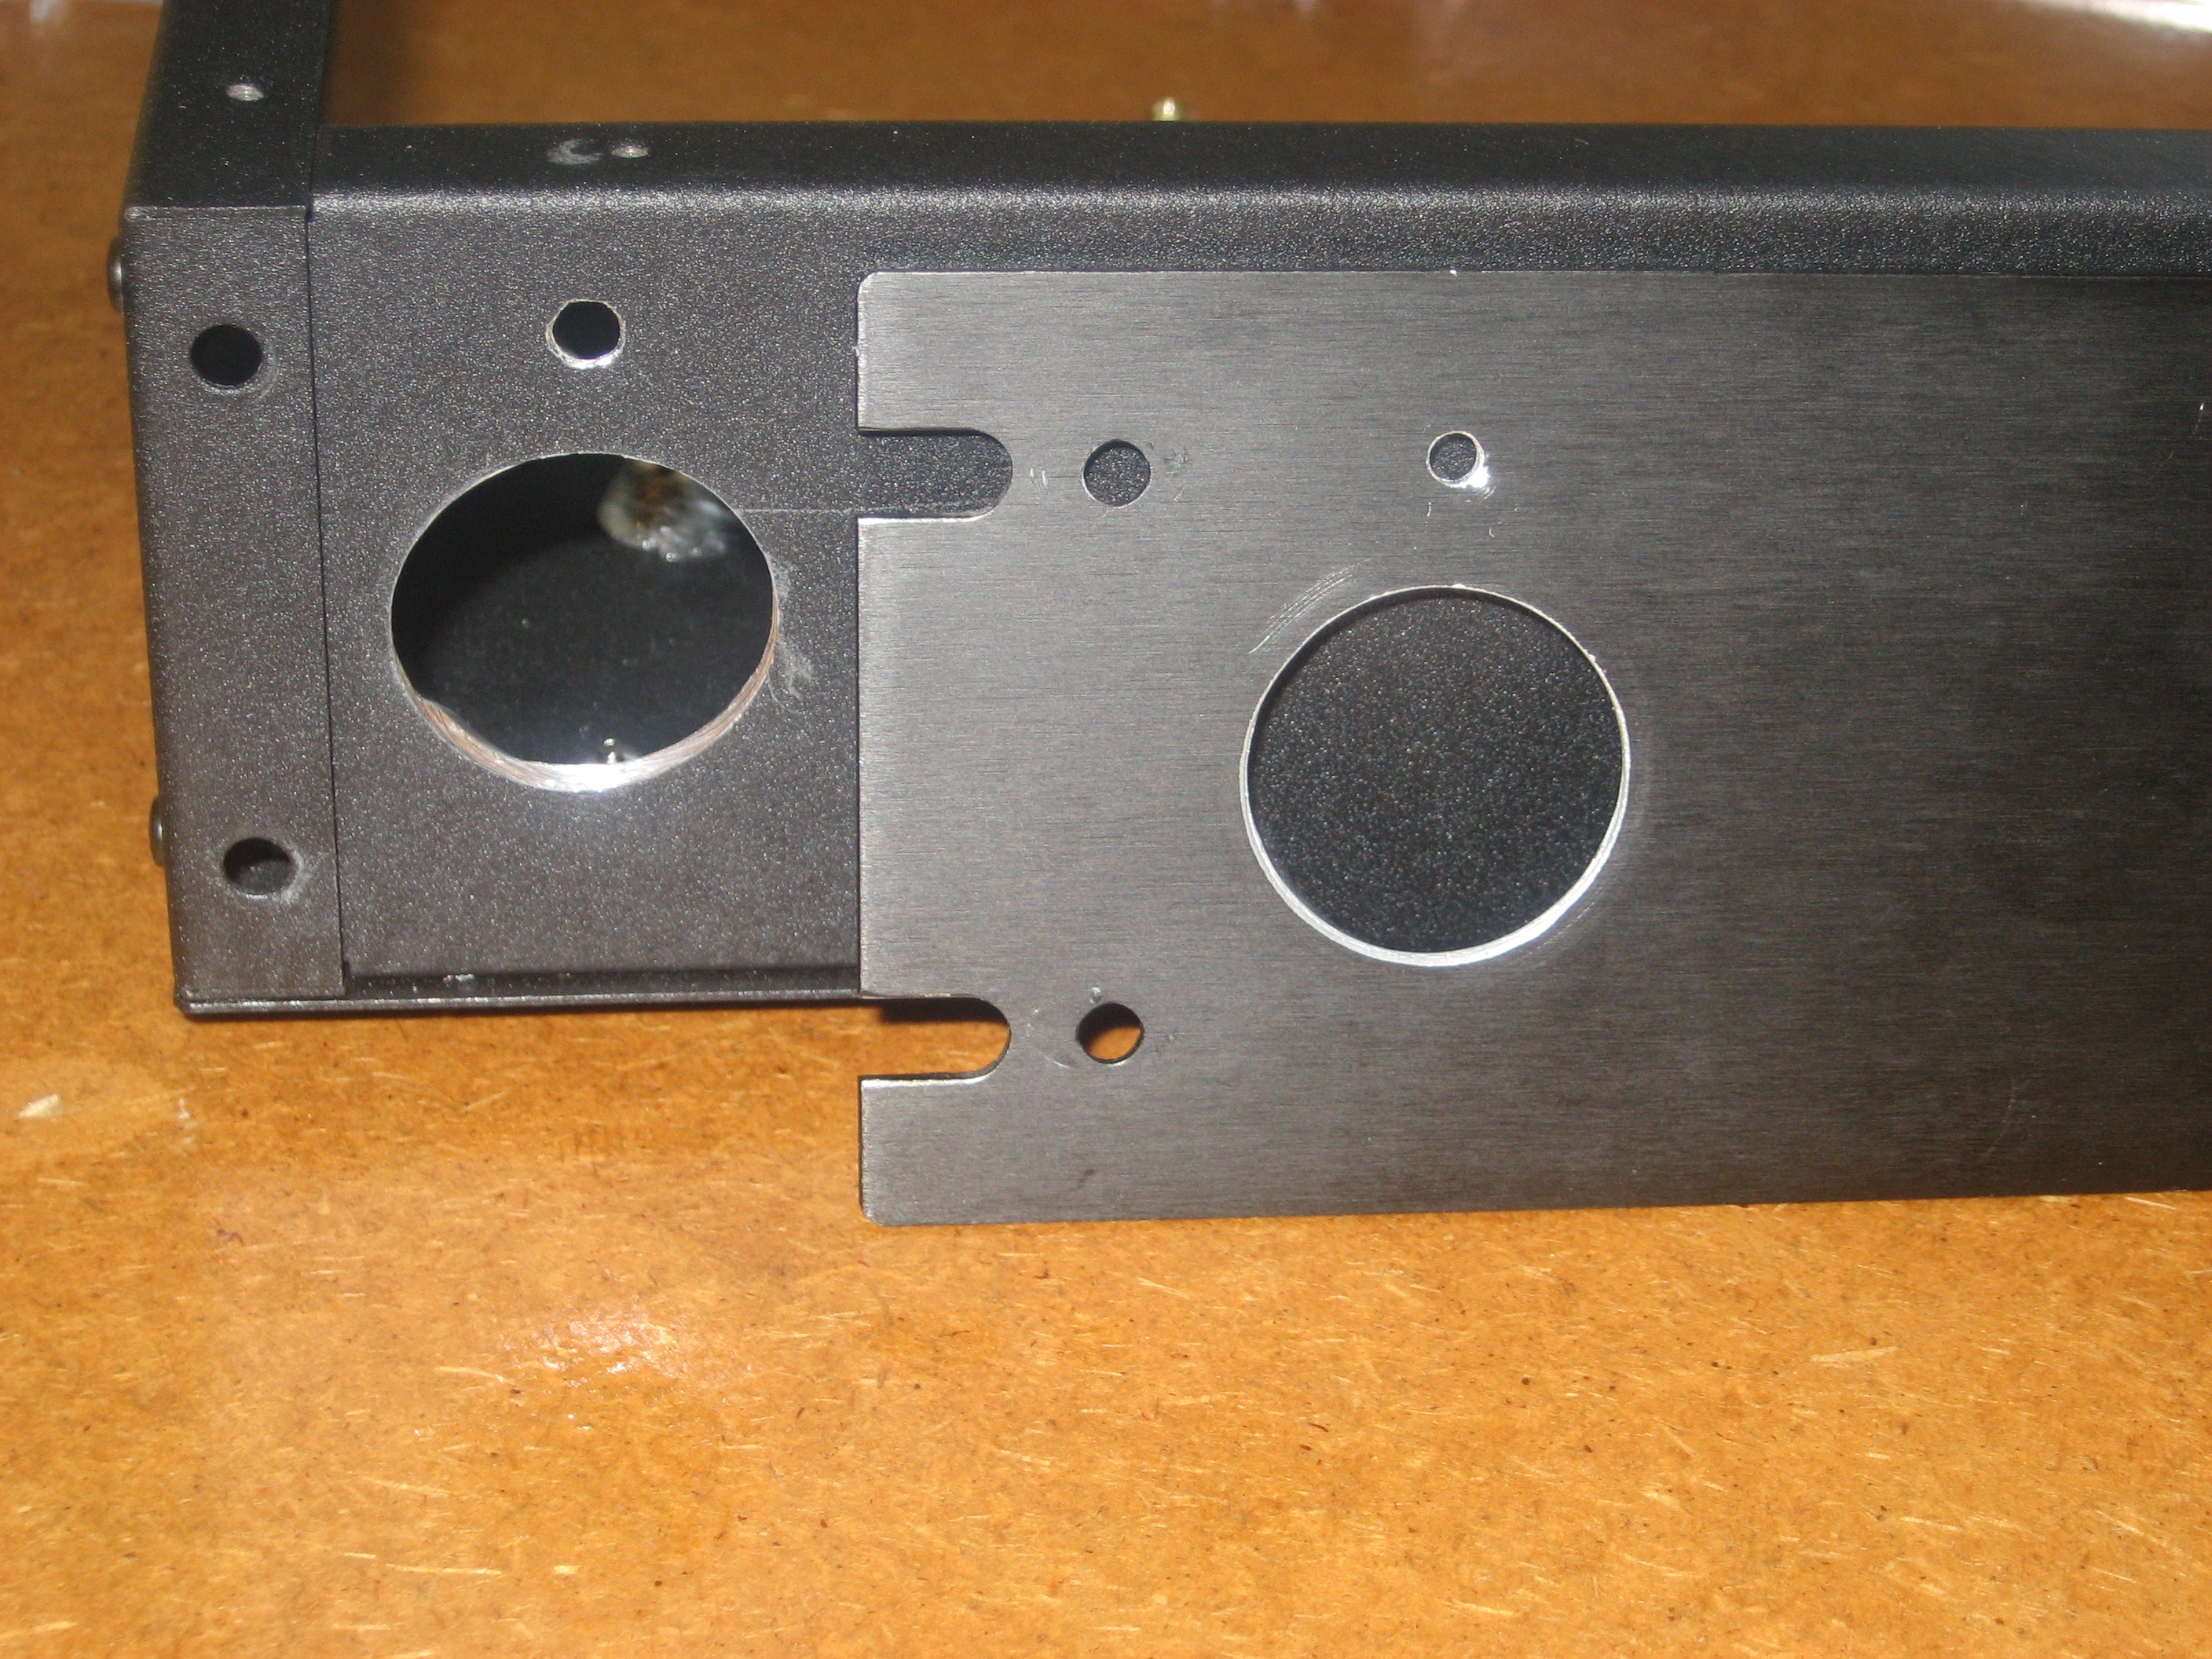
Front Plate

I found these little beauties in an old PC case. In their previous life they served as LED lenses but they also make a great window for an IR receiver.
I also got lucky with the case because there is a small gap behind the front plate just large enough for the flat face of these lenses.
And to hold the IR module in place… more hot glue!
Arcade buttons require a hole 1 - 1/8” in diameter. For this a hole saw is convenient but you really get what you pay for with tools. My hole saw came from crappy tire, and tends to wobble when drilling so it makes a bit of a mess. However, these buttons have a small bevel which will hide a messy cut.
With the front panel finished, it’s time to put it all together. Here are a few final pics.
Comment submitted